Contents: Removal ↳ Installation ↳
Note: This procedure assumes the engine is inside the vehicle. If the engine is removed, simply unbolt the oil pan and lift it off the engine block.
Removal
1. Disconnect the negative battery cable.
2. Raise the vehicle and support it on stands.
3. Drain the oil (see if necessary) chapter 1).
4. Drain the coolant (see chapter 1).
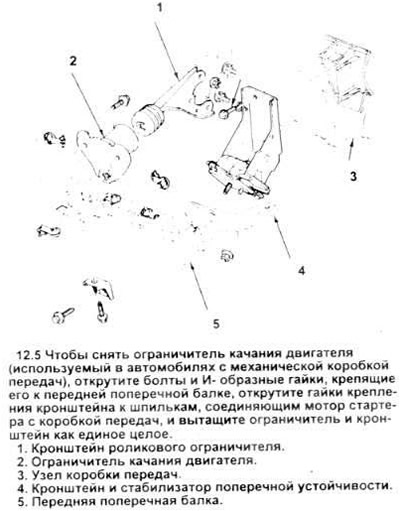
5. If the vehicle is equipped with a manual transmission, remove the engine oscillation limiter (see figure).
6. Remove the starter (see Chapter 5).
7. Remove the exhaust pipe elbow section between the intake and exhaust manifold and the catalytic converter (see chapter 4).
8. Disconnect the coolant pipe connected to the lower radiator hose, the water pump and the locking tabs on the oil pan (see Chapter 4).
Warning: To avoid possible coolant splashing and eye contact, do not stand or lie directly under the area between the coolant tube and the lower radiator hose. Residual coolant may splash out when these parts are separated.
9. If the vehicle is equipped with air conditioning and/or power steering, remove the compressor/power steering drive belt, remove the compressor from the bracket and disconnect the bracket from the unit (see chapter 3). Move the lower air conditioning pipes to the side. If necessary, remove them completely.
Warning: Do not disconnect the air conditioner hoses.
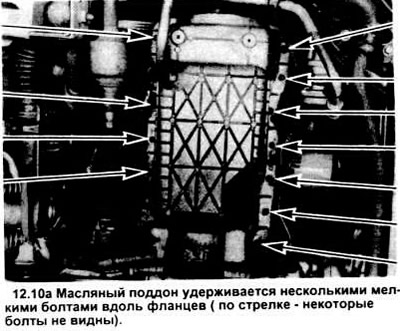
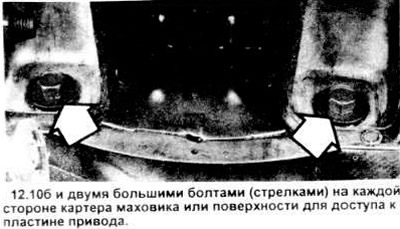
10. Remove the oil pan bolts (see picture). Remember that the two bolts located in the recess of the cover approach are larger than the others.
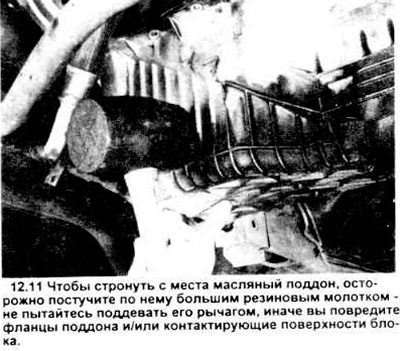
11. The oil pan can be difficult to remove because of the sealant used in it. Do not attempt to pry it off. Use a large rubber mallet to loosen it.
Installation
12. Use a special gasket scraper to clean all traces of old gasket and sealant from the pan and block. Wipe the surfaces under the gasket with a cloth soaked in acetone or varnish thinner.
14. The oil pump tube and the strainer assembly should also be cleaned. After cleaning both parts, install them (see next section).
15. Apply a thin coat of GE Pressure Sensitive Adhesive to the gasket contact surfaces of the engine and to the new block side oil pan gasket.
Warning: Use adhesion only in a well ventilated area.
16. After adhesion has set, apply a 1/8" thick bead of RTV sealant to the joints between the front cover and block, and between the block and rear seal retainer (4 locations) (see illustration).
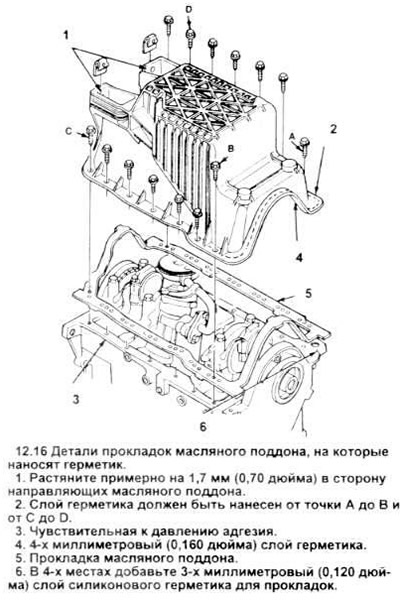
17. Immediately lower the gasket onto the block and press it down to level the "cushion" (layer) of RTV sealant applied earlier according to step 16.
18. Apply a 5/32" thick bead of RTV sealant to the mating curved surfaces along the edges of the pan. The bead should extend from one corner bolt to the other.
19. A couple of minutes after making the layers ("pillows"), install the oil pan.
20. Install the bolts onto the oil pan flanges and tighten them until the sealant is compressed until the holes in the oil pan are aligned with the holes in the transmission housing; however, the pallet must be able to move slightly relative to the block.
21. Install and tighten to specification the two oil pan to transmission bolts until the oil pan is aligned with the transmission, then loosen the bolts 1/2 turn.
22. Tighten all oil pan flange bolts to the specified torque.
23. Tighten the two bolts securing the oil pan to the transmission to the specified torque.
24. Subsequent installation is carried out in the reverse order of disassembly.