


Contents: Removal ↳ Installation ↳
Removal
1. Relieve the pressure in the fuel system as recommended in Chapter 4.
2. Disconnect the negative battery cable.
3. Drain the cooling system (see chapter 1) and disconnect the cooling hoses from the manifold.
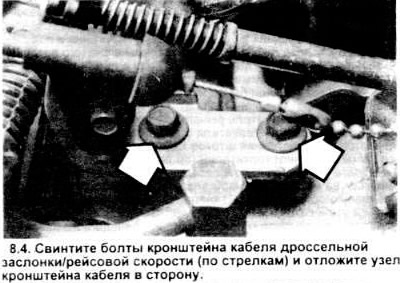
4. Remove the CFI fuel fill unit or upper intake manifold (chapter 4) then remove the throttle cable bracket, (see figure).
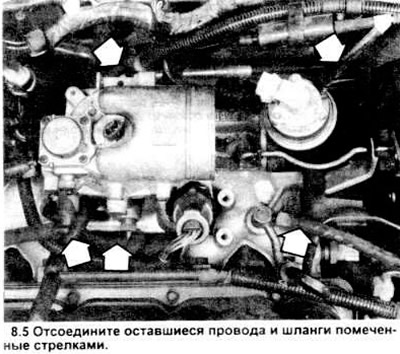
5. Label and disconnect the remaining wires, brake booster vacuum hose, cruise control vacuum hose, EGR valve vacuum hose; pCV hose and all other vacuum hoses (see diagram), connect to the throttle body or intake manifold.
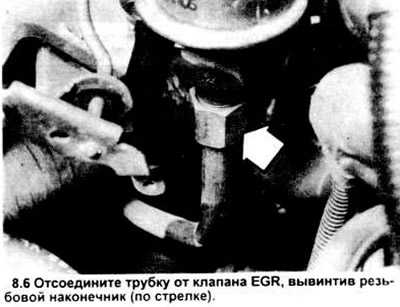
6. Disconnect the pipe from the EGR valve (see figure).
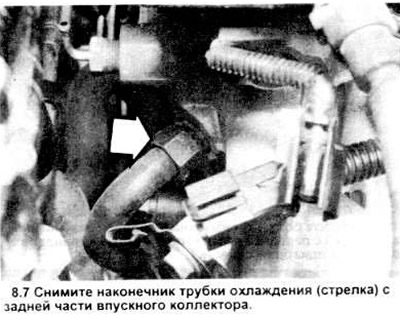
7. Disconnect the oxygen sensor wire and remove the coolant pipe tip from the intake manifold (see figure).
8. Unscrew the bolts and disconnect the manifold from the head.
Caution: Do not allow the lever to slide between the mating surfaces of the gaskets.
Installation
Note: The mating surfaces of the cylinder heads and manifolds must be very well cleaned before installing the manifold.
9. Use a special scraper to remove all traces of the gasket sealing material, then clean the contact surfaces with solvent or acetone.
10. Using a tap of the required size, go through the threaded holes for the bolts, then blow out the chips with a stream of compressed air (if possible).
Warning: When using compressed air, protect your eyes with goggles or a shield.
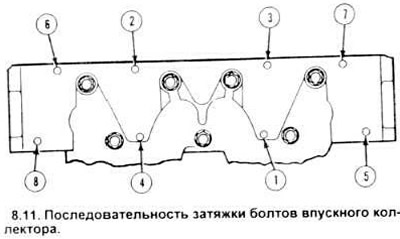
11. Apply a thin layer of RTV sealant to the mating surfaces of the manifold and the gasket on the cylinder head side. Install one bolt on each side of the manifold, thread a new gasket through them, then install the manifold on the head and tighten the bolts. Install the remaining bolts, tighten them to the required torque value. in the recommended sequence (see figure). Reach the required torque in three steps.
12. Further installation is carried out in the reverse order of disassembly.
[Content was created using data from this website: www.fordbook.ru]