Contents: Fuel injector ↳ Main gasket ↳ Idle Speed Control (ISC) Engine ↳ Fuel charging device housing gasket ↳
Fuel injector
Note: It is not necessary to remove the throttle body from the intake manifold when replacing the fuel injector. If it is necessary to replace the main gasket or the intermediate gasket between the throttle body and the main body, or the ISC throttle actuator, then it is necessary to remove the throttle body from the intake manifold. We do not recommend disassembling the fuel injection unit other than removing the components mentioned above.
1. Disconnect the negative battery cable.
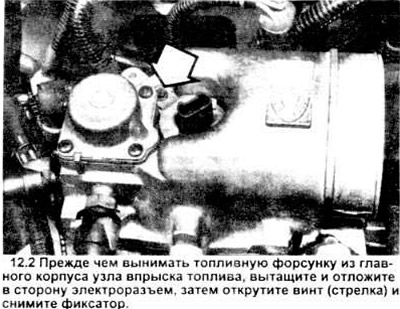
2. Pull out the fuel injector electrical connector, unscrew the screw and remove the retainer (see figure).
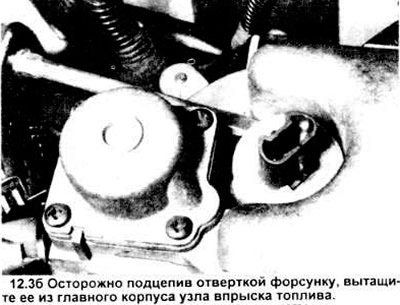
3. Using a screwdriver, carefully lift and remove the injectors from the fuel refill unit (see figure).
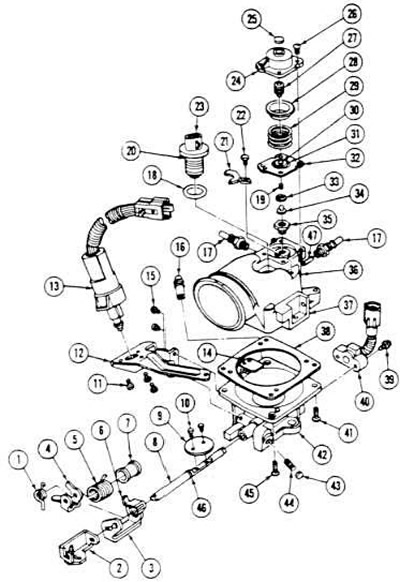
12.3, a. Three-dimensional image of the CFI (central fuel injection system) unit.
1 Engine idle speed spring.
2. Transmission linkage lever.
3. Throttle lever ball.
4. Idle speed control lever.
5. Throttle return spring.
6. Throttle lever.
7. Throttle control link bearing.
8. Throttle shaft.
9. Throttle valve.
10. Screw.
11. Self-tapping screw.
12. Engine throttle positioning bracket.
13. Idle speed control (ISC) unit.
14. Distribution plate of air entering the engine.
15. Screw
16. Emission inlet pipe.
17 Quick release fuel line connector.
18. Sealing ring.
19. Fuel pressure regulator valve spring.
20. Sealing ring.
21. Fuel injector retainer.
22. Screw.
23. Fuel injector.
24. Fuel pressure regulator cover.
25. Expander mileage.
26. Screw.
27. Adjustable screw of fuel pressure regulator.
28. Fuel pressure regulator cup.
29. Fuel pressure regulator diaphragm spring.
30. Fuel pressure regulator valve body.
31. Fuel pressure regulator diaphragm retainer.
32. Fuel pressure regulator diaphragm.
33. Fuel pressure regulator valve retainer.
34. Fuel pressure regulator valve assembly.
35. Fuel pressure regulator outlet pipe.
36. Main body of the fuel injection unit.
37. Main body of the fuel injection unit.
38. Fuel injection housing gasket.
39. Screw.
40. Throttle position sensor.
41. Screw.
42. Throttle body.
43. Plug
44. Screw.
45. Screw.
46. Throttle shaft seal.
47 Fuel filter.
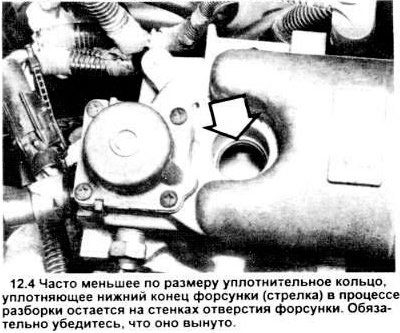
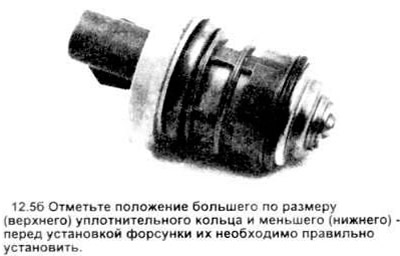
4. There are 2 sealing rings in the nozzle - the larger one is located at the top, the smaller one is at the bottom. The lower ring can stick to the wall of the nozzle hole (see picture). Be sure to remove and discard it.
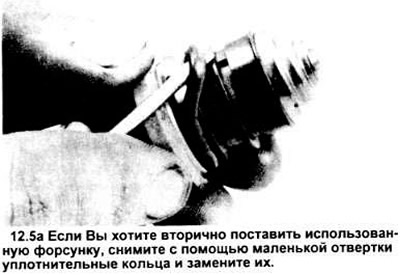
5. When replacing or installing an old injector, do not reuse the sealing rings. Carefully pull the sealing rings off the old injector (see figure). Install new rings as shown (see figure) and lubricate them with clean engine oil.
6. The nozzle is installed in the reverse order.
Main gasket
7. Relieve the pressure in the fuel system (see section 2).
8. Disconnect the negative battery cable.
9. Remove the connecting pipe from the air cleaning filter (see section 8).
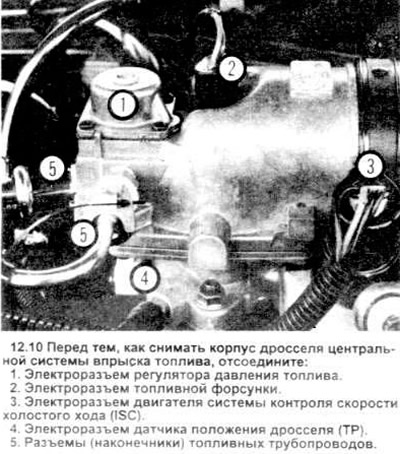
10. Carefully mark the wires and terminals on the throttle body, then disconnect and set aside all wires (see figure).
11. Disconnect the PCV hose from the throttle body.
12. Disconnect the fuel pressure and return lines from the fuel injection unit (in section 3 (A detailed description of the process of removing pipeline connectors is provided).
13. Disconnect the throttle cable and (if equipped) the cruise control unit cable from the throttle linkage (see section 9).
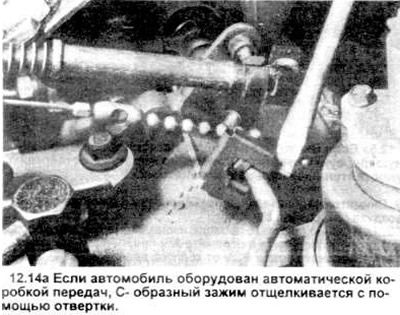
14. If the vehicle has an automatic transmission, remove the C-clamp (see illustration) and disconnect the transmission downshift rod from the throttle shaft. Push the rod down until it disconnects from the shaft (see illustration).
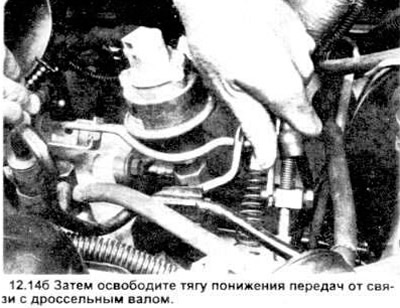
15. Unscrew the throttle body mounting nuts and disconnect the unit and gasket from the intake manifold.
16. If the gasket was leaking, install a new one, install the throttle body and tighten the mounting nuts to the required tightening torque.
17. The rest of the assembly is carried out in the reverse order of disassembly.
Idle Speed Control (ISC) Engine
Note: To avoid damaging the throttle valves when working with the throttle body, carefully support it by placing it on a workbench.
18. Remove the throttle body (see paragraph 7 in paragraph 9).
19. Remove the three ISC bracket mounting screws (see pictures) and remove the ISC and bracket from the throttle body.
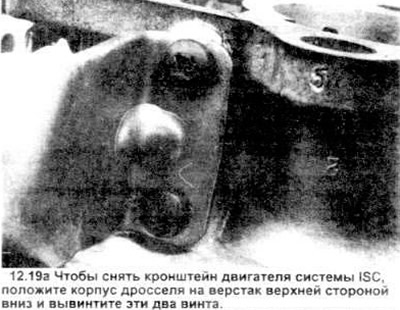
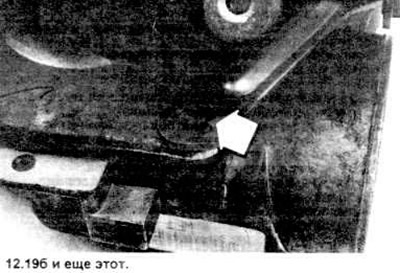
20. Loosen the three ISC bracket mounting screws (see figure), separate the ISC from the support bracket.
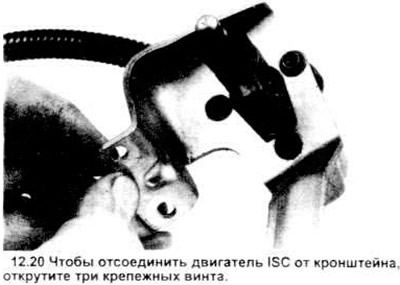
21. Installation is carried out in reverse order.
Fuel charging device housing gasket
22. Remove the throttle body and idle speed control (ISC) system (paragraphs 7 through 15 and paragraph 19).
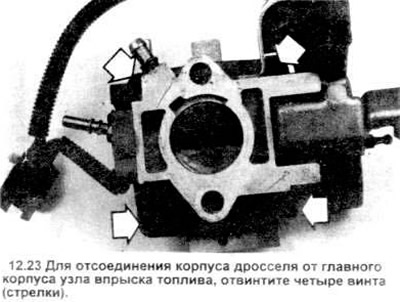
23. Unscrew the fuel priming device and unscrew the four screws securing the throttle body to the main body of the fuel injection device, then separate the two parts (see figure).
24. Remove the old gasket. If you have to use a scraper, be careful not to damage the work surface.
25. Place the main body upside down on the workbench, replace the new gasket, attach the throttle body, install the four screws and tighten them.
26. Install the idle speed control system and throttle assembly.