Warning 1: Before starting work, discharge the system (contact a specialist). You will need a special tool to disconnect the pipes.
Warning 2: Some 1992 models are equipped with R134 air conditioning systems. These systems have yellow tags on their parts that say "NON - CFC". Also, the compressor clutch on R134 systems is gold in color. They are very similar to R12 compressors, but are not interchangeable. Do not use R134 compressors in R12 systems, which are found on all pre-1991 models.
1. Disconnect the negative battery cable.
2. Remove the power steering pump (see chapter 10).
3. Pull out the air conditioning compressor clutch electrical connector.
5. Raise the front of the machine and support it securely on stands.
6. Looking from below, follow the pipes to their connection point. Using a special tool for spring clamps, disconnect both tips (see chapter 4).
Note: Do not attempt to remove the manifold assembly with tubes from the compressor without removing the compressor itself. You will not be able to remove the compressor once you remove the manifold bolts.
7. Remove the 4 bolts (see figure), then attach the compressor to its support bracket.
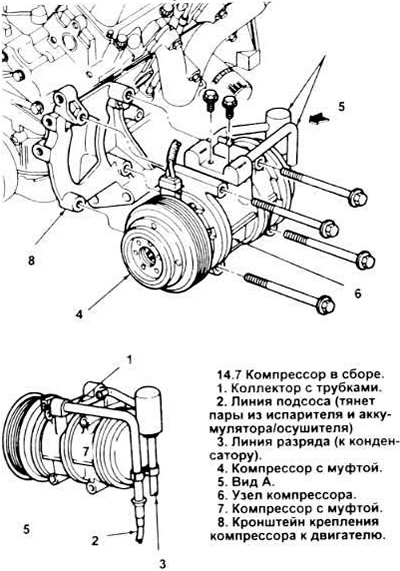
8. Pull the compressor out together with the manifold through the top.
9. Unscrew the manifold bolts and disconnect the manifold with the tubes from the compressor.
10. If the compressor needs to be replaced, remove the coupling and winding from the old one and install them on the new compressor.
11. Assembly and installation are carried out in reverse order.
[For more information, please visit the specified website: www.fordbook.ru]