Contents: Pressure switch ↳ Battery ↳
Warning: R12 type accumulator and pressure switches are similar but cannot be used in R134 systems and vice versa.
Pressure switch
1. Disconnect the negative battery cable.
2. Remove the electrical connector from the coupling type pressure switch.
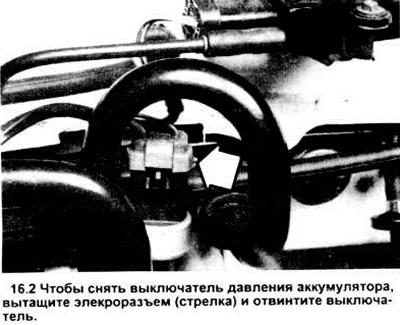
3. Unscrew the pressure switch from the battery.
4 Lubricate the O-ring of the pressure switch tip with clean oil.
5. Screw the pressure switch onto the battery panel. If the threaded end is made of plastic, tighten the switch by hand; if it is metal, use a wrench.
6. Connect the electrical connector to the switch.
7. To charge the system and check the operation of the pressure switch, contact a specialist.
Battery
8. Disconnect the negative battery cable.
9. Remove the electrical connector from the pressure switch located on top of the accumulator (see Figure 16.2).
10. Using the special tool, disconnect the suction lines at the spring lock closest to the compressor (see figure). Close the hoses and compressor to prevent oil and dirt from getting into them.
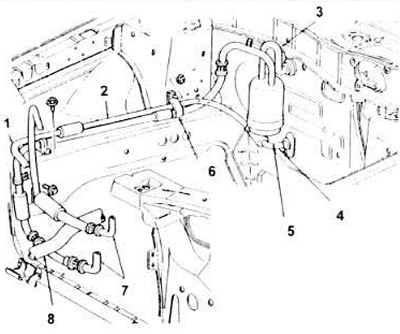
16.10. When removing and installing the accumulator, make sure that the pipelines on the suction line are connected correctly.
1. To the evaporator.
2. Air conditioner condenser piping.
3. To the capacitor.
4. To the evaporator
5. Accumulator/dryer unit with piping system.
6. Screw with lock.
7. To the compressor.
8. Lower radiator hose.
11. Using the special tool, disconnect the battery inlet pipe leading to the evaporator.
12. Loosen the holders screws and remove the battery.
13. Installation is carried out in reverse order. To charge the system, contact a specialist.
For more information, please visit the specified website: FordBook.ru