Contents: Removal ↳ Installation ↳
Removal
1. Remove the wheel and tire assembly. Refer to Section 204-04 for additional information.
2. Set the suspension to the design height. Refer to Section 204-00 for additional information.
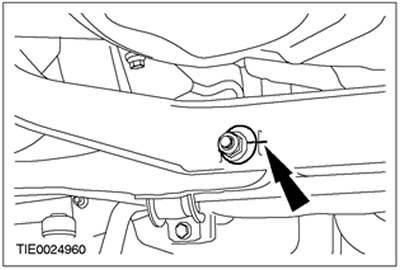
3. Mark the position of the rear lower arm adjusting cam relative to the crossmember.
4. Remove the rear lower arm.

Installation
All cars
NOTE: Final tightening of rear suspension components should be performed at the design suspension height.
1.
NOTE: Do not fully tighten the rear lower arm-to-wheel knuckle bolt at this stage.
NOTE: Align the mark on the rear lower arm adjusting cam with the mark on the crossmember.
Install the rear lower control arm.

2. Lower the suspension out of the calculated height position.
3-, 4-, 5-door version
3. Connect the stabilizer bar to the rear lower arm.

All cars
4. Install the spring. For more information, refer to the Spring chapter in this section.
5. Install the wheel and tire assembly. Refer to Section 204-04 for additional information.
6. Check the toe-in and adjust if necessary. Refer to Section 204-00 for additional information.
7.
NOTE: Final tightening of the rear lower arm adjusting cam retaining nut should be performed with the vehicle resting on its own wheels.
Tighten the rear lower arm adjusting cam retaining nut.

For more information, please visit the website (FORDBOOK)