Contents: Removal ↳ Installation ↳
Warning: Before removing the spring, prepare a device for compressing coil springs. Do not use improvised means, as this may cause the spring to jump out, which may cause injury. After removing the spring with the device, leave it in it in a secure, closed place.
Removal
1. Support the front wheels with chocks. Then lift the rear of the car and place it on supports. Remove the corresponding rear wheel.
2. Place a jack stand under the rear suspension lower arm (where the spring is located) to hold the spring compressed.
3. Place the compressor on the coil spring and compress it to release the upper support.
4. Loosen the nut and remove the washer and bushing from the junction of the anti-roll bar and the rear lower arm.
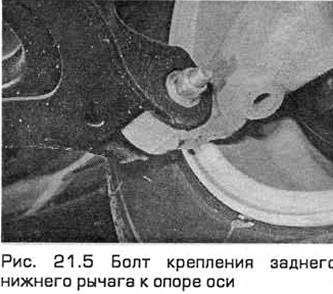
5. Unscrew the bolt securing the rear lower arm to the axle support (see Fig. 21.5).
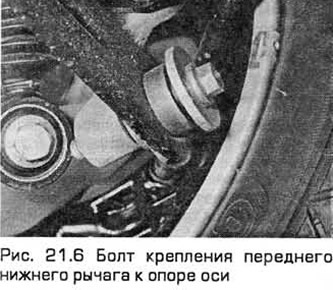
6. Unscrew the bolt securing the front lower arm to the axle support (see Fig. 21.6).
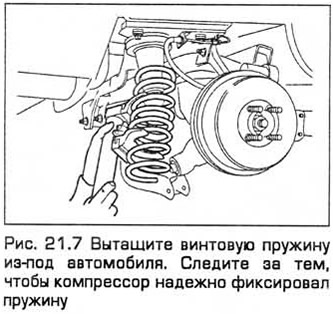
7. Lower the rear lower arm and pull the coil spring out from under the vehicle. Make sure the compressor securely holds the spring (see Fig. 21.7).
8. If you are installing a new spring, then the old one can be released from the compressor. If you are installing it again, leave the spring compressed.
Installation
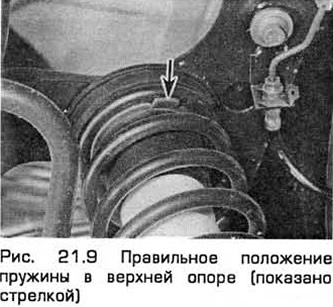
9. Installation - in the reverse order of removal. The spring must be correctly installed in the upper and lower supports (see Fig. 21.9). The lower arm mounting bolts must be fully tightened only after providing a load on the suspension. Finally, check and adjust the toe-in of the rear wheels (paragraph 36).