Dismantling
Engage handbrake, loosen wheel nuts.
Raise the vehicle and place it on tripods. Secure the rear axle with an additional wedge.
Remove the front wheel.
Unscrew the bolts on the crankcase and wheel housing (two on each side).
Remove the crankcase protection.
Cover the sealing lip on the ball joint with a soft cloth.
Unscrew bolt 1; Disconnect the ball joint 2, use a puller for this.
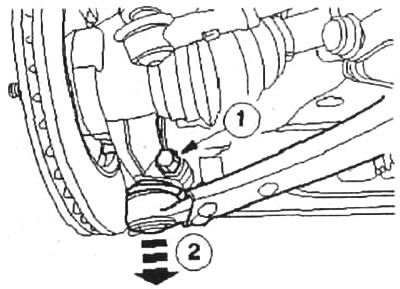
ball joint
Remove bolts 1 and 2 on the lower transverse arm.
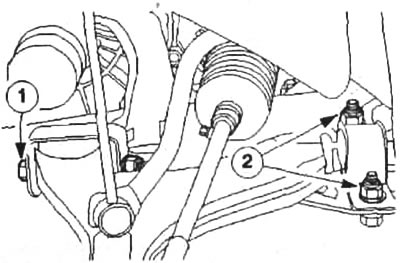
Disconnect the cross arm
Remove the transverse arm.
Installation
Always use new nuts, bolts and washers.
Tighten the transverse arm mounting bolts in five steps. 1. pre-tighten nut 1 to 100 Nm; 2. then tighten nut 2 by another 60°; 3. tighten nut 2 to 120 Nm; 4. pre-tighten bolt 3 to 120 Nm; 5. tighten bolt 3 by 90°; then check bolt 3 with a torque wrench, whether the tightening value is 170-230 Nm.
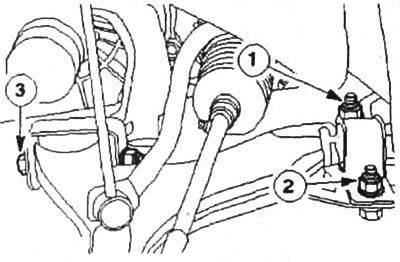
Tighten the transverse arm in five steps
Don't forget the heat shield on the control arm.
Push in the ball joint.
tighten bolt (50 Nm).
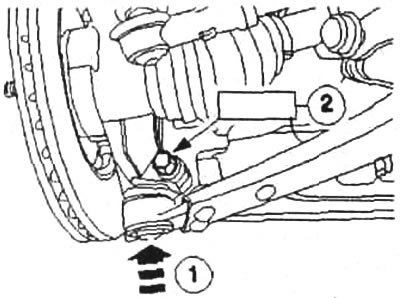
Mount ball joint
Install the front wheel.
Complete the work in reverse order.
Measure the front axle in the workshop.
Visitor comments