In new vehicles, the exhaust system consists of two parts. During repairs, it is replaced by a system consisting of three parts (in vehicles with a V6 engine up to 8/94 and a diesel engine - a four-part system). In the serial exhaust system, the middle muffler cannot be replaced separately; in the event of repairs, the pre- and post-mufflers must also be replaced. If only the post-muffler needs to be replaced, the exhaust system is sawed apart.
Caution: When installing exhaust system components, ensure that their connections are tight. Otherwise, incorrect results may be obtained when measuring the level of harmful emissions.
All parts of the exhaust system are connected with bolts and can be replaced separately. Self-locking nuts and sealing gaskets must be replaced with new ones after removal. When installing a new exhaust system, it is recommended to also update all rubber holders.
Removal
Raise the car onto the trestles.
Spray all bolts and nuts of the exhaust system with rust remover. Leave the product on the surfaces of the parts for a while to show its effect.
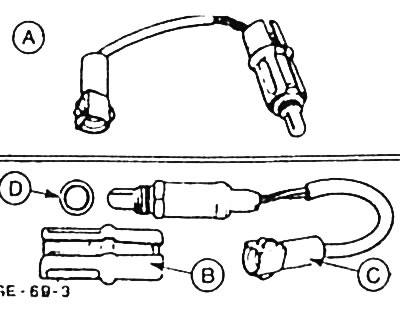
Vehicle with catalytic converter: disconnect the oxygen sensor plug connector "C" at the front wall. Remove the heat shield "B", unscrew the sensor from the exhaust pipe and carefully remove it together with the sealing gasket "D".
Caution: Do not hold the oxygen sensor by the sensitive element.
Loosen the ground jumper fastening between the catalytic converter and the body.
If present, loosen the ground jumper fastenings of the radio interference suppression system.
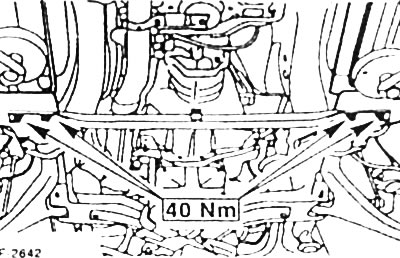
Model from 9/94: Unscrew the crossmember fastening located under the gearbox/exhaust system.
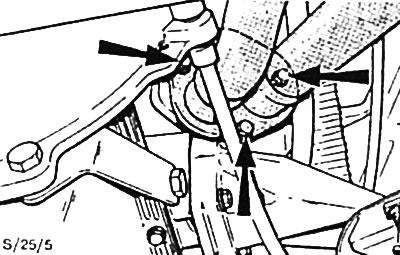
Remove the bolts "arrows" securing the front exhaust pipe to the exhaust manifold.
Remove the exhaust system from the retaining rubber loops.
Note: Before removing, check the rubber loops for cracks. To do this, lightly press the exhaust system down and inspect the loops, illuminating them with a flashlight. If necessary, replace the retaining rubber loops.
Caution: The catalytic converter (built into the front exhaust pipe) is very sensitive to impacts, do not allow it to fall.
Installation
Before installation, clean the connecting flanges of the exhaust manifold and front exhaust pipe with a steel brush. Be sure to use new seals and bolts, and if necessary, replace the retaining rubber loops. To make it easier to loosen the exhaust bolts later, it is recommended to lubricate them with a high-temperature paste, such as Liqui Moly LM-508-ASC.
Vehicles with V6 engine up to 8/94: Disconnect both front exhaust pipes of the old exhaust system and move the mounting bracket to the new exhaust pipes.
Place the front exhaust pipe with a new sealing gasket on the exhaust manifold flange (for a turbocharged diesel engine - on the turbocharger flange) and tighten the mounting bolts to 50 Nm. If a leak was detected in this area before removal, place the sealing gasket very carefully and monitor its position when tightening the bolts.
Caution: Do not use any sealants under any circumstances, as this may damage the oxygen sensor and catalytic converter.
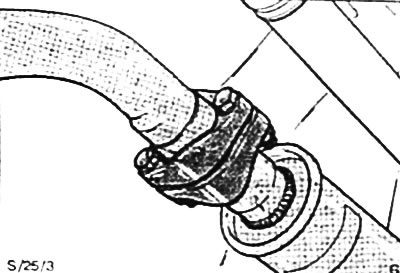
Place the front muffler holder into the retaining loops and align the muffler. Insert new mounting bolts into the flanges at the front exhaust pipe and tighten slightly.
Car with V6 engine up to 8/94
Apply a sealant such as Gun Gum to both connections between the front and rear mufflers.
Connect the pre-silencer to both front exhaust pipes and, without tightening, install the mounting bracket.
Place the retaining loops on the left pre-silencer holders. Insert the right pre-silencer holders into the retaining loops and screw the left pre-silencer loop holders to the body.
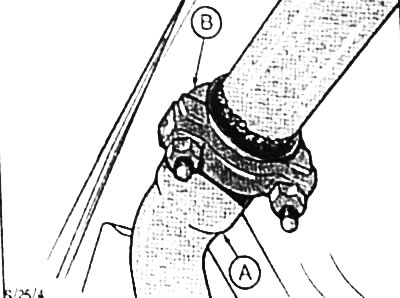
Place the U-shaped mounting bracket on the connecting pipe of the subsequent muffler and apply high-temperature paste to the connection point of the intermediate pipe.
Slide the subsequent muffler onto the intermediate pipe and insert the holder into the rubber loop.
The exhaust system must be aligned. The distance from the exhaust system to the body and adjacent parts must be at least 25 mm. The retaining loops must be loaded evenly, without overtightening or skewing.
Tighten the U-shaped bracket nuts and the front exhaust pipe connection tightening bolts to a torque of 40 Nm.
If present, tighten the ground jumper fastenings of the radio interference suppression system.
Vehicle with catalytic converter: Screw the oxygen sensor with a new sealing gasket into the exhaust pipe and tighten to 50 Nm. Clean the threads beforehand and apply high-temperature paste to them. Install the heat shield, connect the oxygen sensor plug connector. Tighten the ground jumper fastening between the catalytic converter and the body.
Model from 9/94: Tighten the 4 bolts of the crossmember located under the gearbox/exhaust system to 40 Nm.
Check the exhaust system for leaks.
Lower the car.
The full article is on the online resource: fordbook