Contents: Removal ↳ Installation ↳
In cars up to 8/94, the instrument panel can be disassembled to replace individual instruments. In cars of later production, only the instrument panel protective screen can be replaced separately.
Removal
Disconnect the negative (-) battery cable.
Caution: When the battery is disconnected, the contents of electronic memory devices, such as engine fault codes or radio codes, are erased. Before disconnecting, also read the instructions in the chapter "Removal and installation the battery".
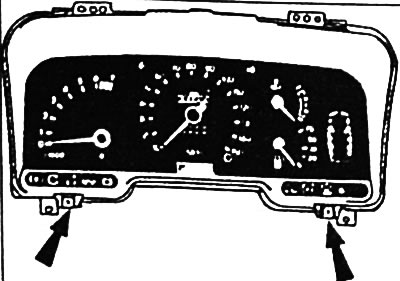
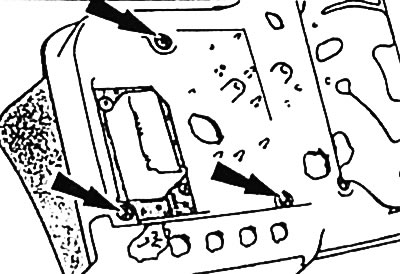
Remove the instrument cluster assembly and place it on clean paper or a soft, lint-free cloth.
Press with a screwdriver and remove the two terminal holders.
Turn all indicator lamps and sockets to the left and remove.
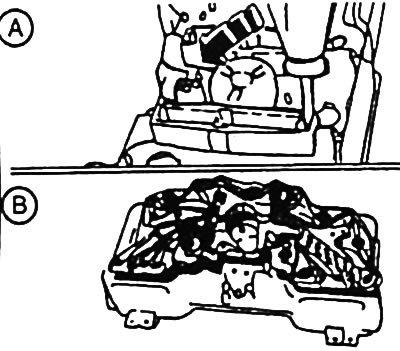
Cars up to 5/89: Unscrew all nuts from the contact plate clamps. Carefully separate the contact plate from the holders and remove.
For vehicles with 6/89, carefully separate the contact plate from the instrument terminals.
Remove the tuning knob.
Remove both clamps of the protective screen "arrows". Tilt the protective screen upwards and remove.
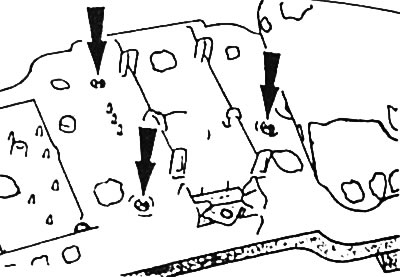
Speedometer up to 1/92: unscrew the 3 screws securing the speedometer "arrow" from the rear side of the instrument panel assembly and remove the speedometer from the assembly.
Speedometer from 2/92: unscrew the 2 screws securing the speedometer "arrows" from the back of the instrument panel assembly and remove the speedometer from the assembly.
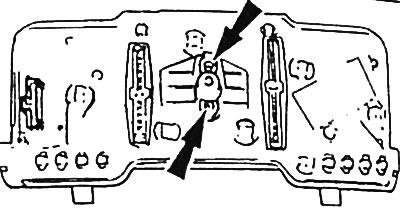
Clock/tachometer: Unscrew the 3 screws securing the clock/tachometer "hands" from the rear of the instrument cluster assembly and remove the clock/tachometer from the assembly.
Caution: Do not place the tachometer face down for a long time, as this may cause silicone fluid to leak out.
Fuel gauge and coolant temperature gauge: unscrew the 3 screws securing the combined instrument "arrows" from the rear of the instrument panel assembly and remove the combined instrument from the assembly.
Installation
Insert the appropriate device into the panel and screw it on.
Place the protective screen against the top edge of the instrument panel assembly and tilt the screen downwards.
Install both clamps and insert the adjustment knob.
Secure the contact plate to the rear of the instrument cluster assembly using all tongue clamps and instrument clamps.
Cars up to 5/89: Tighten all nuts on the contact plate terminals.
Turn all indicator lamps and sockets to the right and secure.
Attach and secure the terminal holders.
Install the instrument panel assembly.
Connect the ground (-) cable to the battery.
If available, set the clock and enter the radio theft protection code.
Check the operation of all indicating instruments and signaling devices on the instrument panel.
[For more information, please visit the website: FordBook]