


Contents: Removal ↳ Installation ↳
General equipment
- Fixing clamp (Hazet 1847-1)
- Technological plugs
| Name | Specification |
| Transmission fluid | WSD-M2C200-C |
| Internal joint grease | XS4C-M1C230-A |
Removal
1.
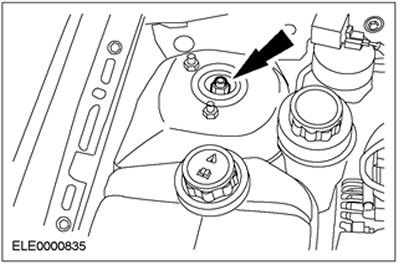
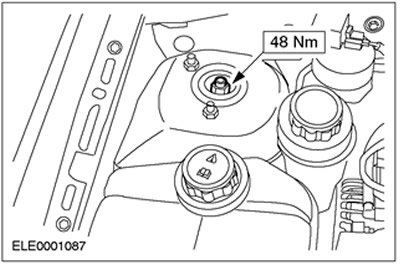
NOTE: To prevent the piston rod from turning, use a socket wrench.
Loosen the upper nut of the right suspension strut five turns.
2. Raise the vehicle. Refer to Section 100-02 for additional information.
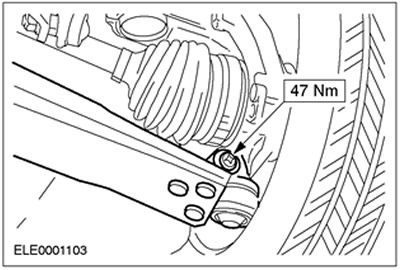
3. Disconnect the right suspension arm.
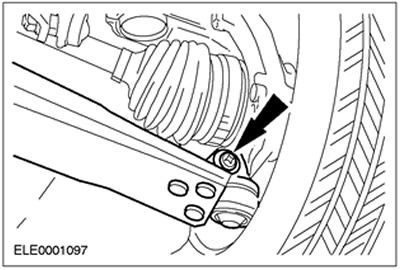
CAUTION: The inner hinge must not be deflected beyond 18 degrees.
4.
NOTE: Do not damage the protective cover.
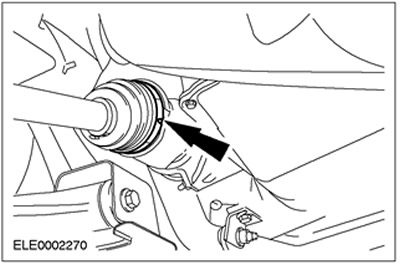
Disconnect the right front drive axle shaft from the intermediate shaft.
- Remove the clamping band and pull the cover back.
- Remove the front drive axle shaft from the tripod joint housing.
- Remove the grease.
- Secure the front drive axle shaft.
5.
NOTE: Oil leakage
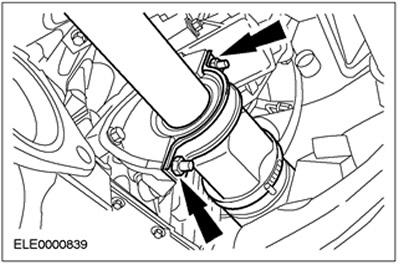
Remove the intermediate shaft.
- Remove the clamp.
- Remove the intermediate shaft from the gearbox.
- Plug the gearbox holes.
Installation
1.
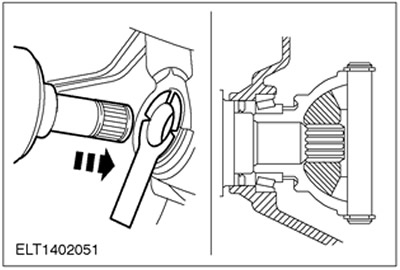
CAUTION: Do not damage the oil seal when installing the front drive axle shaft. If the iB5 transmission is installed, use the installation sleeve (included with each new oil seal).
Insert the intermediate shaft into the gearbox.
2.
NOTE: Replace the clamp and nuts on the intermediate bearing.
NOTE: Insert the intermediate shaft into the gearbox until the intermediate shaft bearing contacts the rib of the intermediate shaft bracket.
Insert the intermediate shaft into the gearbox (continued).
- Install the clamp.
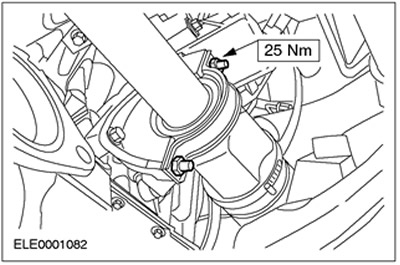
CAUTION: The inner hinge must not be deflected beyond 18 degrees.
3. Install the front drive axle shaft.
- Pack the inner tripod joint with grease. For this purpose, use grease for inner joint (filling volumes are given in the chapter "General specifications").
1. Insert a small screwdriver under the edge of the protective cover to release air.
2. Slide the tripod joint until it stops, then pull it out 20 mm.
- Remove the screwdriver.
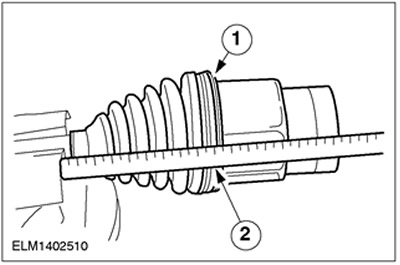
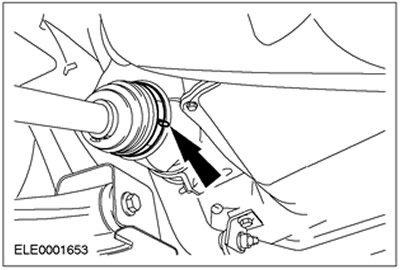
4. Insert the clamp band into the groove on the boot and tighten it using the locking clamp.
- Insert the clamping band into the groove on the boot.
5. Install the wheel without tightening.
6. Check the transmission fluid level.
- IB5 Manual Transmission: For additional information, refer to Section 308-03A/308-03B/308-03C.
- MTX75 Manual Transmission: Refer to Section 308-03A/308-03B/308-03C for additional information.
7. Lower the vehicle.
8. Tighten the right suspension strut nut.
- Lock it from turning with a socket wrench.
- Tighten by hand using a spanner.
- Using a torque wrench, tighten to the specified torque.
Information for this article was taken from the website: FORDBOOK.ru