Warning: If suspension or steering fasteners are lost or unscrewed, they must be replaced with new ones, do not reuse them. Fasteners are replaced with new ones of the same design, quality and marking.
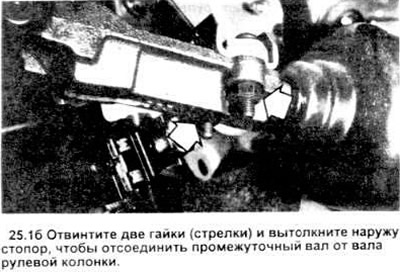
1. From under the dashboard, mark the relative location of the intermediate shaft and steering column shaft. Unscrew the two nuts and the stopper connecting the intermediate shaft to the steering column shaft (see picture).
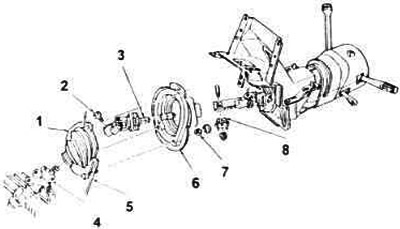
25.1, a. Installing parts of the intermediate shaft.
1. Assembly of the intermediate shaft.
2. Bolt.
3. Secondary housing assembly.
4. Steering gear cross member.
5. Dashboard.
6. Main casing.
7. Nut.
8. Stopper.
2. Remove the three nuts holding the main shroud to the inside of the dashboard, then slide the shroud back away from the panel.
3. Raise the car, place it securely on stands. From under the car, remove the secondary casing from the steering gear and mark the relative position of the intermediate hall and the input shaft of the steering gear. Remove the pinch bolt securing the intermediate shaft to the steering gear input shaft and remove the intermediate shaft from the steering gear.
4. Remove an intermediate shaft from within the car.
5. Installation is carried out in the reverse order. It is necessary to align the alignment marks on the shafts and tighten the coupling bolt and two nuts securing the intermediate shaft to the steering column shaft to the required tightening torque.
Visitor comments