Contents: Removal ↳ Installation ↳
Removal
Loosen the wheel nuts on the vehicle while it is parked on the platform.
Mark the position of the wheel on the hub with paint. This will allow the balanced wheel to be installed again in its original position.
Raise the front of the car onto jack stands.
Remove the wheel.
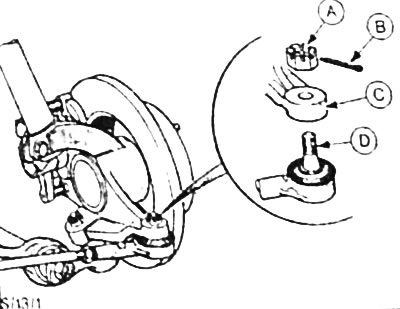
Unscrew the crown nut "A" securing the steering rod end pin "D" at the steering arm "C", for which remove the cotter pin "B".
Caution. Loosen the castle nut only enough to completely cover the thread on the pin. This prevents damage to the initial threads on the pin when pressing out the tie rod end.
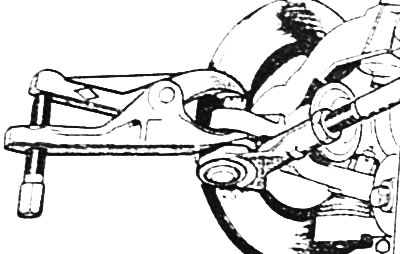
Press the tie rod end pin out of the steering arm using a standard puller and remove the castle nut.
Loosen the lock nut and unscrew the tip from the steering rod.
Note: When loosening, count and record the number of turns so that when installing, screw the tip onto the steering rod by the same number of turns.
Installation
Screw the tip onto the steering rod in accordance with the number of turns recorded during removal; do not tighten the lock nut yet.
Insert the tie rod end pin into the steering arm. Screw in the crown nut, tighten it to 30 Nm and secure with a new cotter pin. If the cotter pin does not fit into the hole, do not loosen the nut, but tighten it enough so that the cotter pin can fit.
Place the wheel so that the marks applied before removal match and tighten the wheel mounting nuts. Lower the car and tighten the wheel mounting nuts crosswise to a torque of 100 Nm.
Rock the car from side to side to allow the suspension to settle.
Check the parameters of the vehicle's chassis (at a service station) and tighten the lock nut securing the tip to the steering rod to a torque of 65 Nm.
[This publication was borrowed from the website fordbook.ru]