Contents: Installation ↳ Installation ↳
To remove and install the rear brake pads, you will need a special FORD 12-006 tool for installing the piston in the wheel brake cylinder.
Installation
Mark the position of the wheel on the hub with paint. This will allow the balanced wheel to be installed again in its original position.
When loosening the wheel nuts, the vehicle should stand on its wheels.
Raise the rear of the car onto jack stands.
Remove the wheel.
Caution: Do not swap brake pads from the right wheel to the left. Changing the location of the pads may result in uneven braking action. Brake pads of one axle must be replaced only as a set. If disc brake pads are to be reinstalled, their location must be marked before removal.
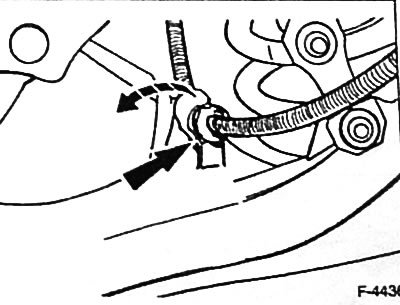
Release the handbrake cable from the retaining clip at the lower wishbone.
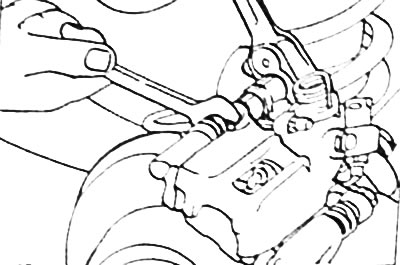
Remove the front guide pin.
Disconnect the brake pad wear indicator sensor connector.
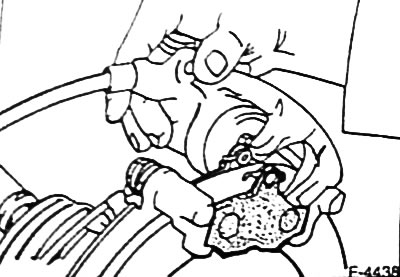
Fold the piston body upwards.
Remove the brake pads.
Installation
Caution: When the brake pads are removed, do not depress the brake pedal, otherwise the piston will be pushed out of the housing.
Clean the guide surfaces or the corresponding pad locations in the housing shaft with a suitable soft metal brush or wipe with a cloth soaked in alcohol. Do not use solutions containing mineral oils or tools with sharp edges.
Before installing the pads, check the brake discs with your fingers to make sure there are no dents. Discs with dents must be replaced.
Measure the thickness of the brake discs, see next chapter.
Check the dust seal and caps for cracks. Replace a damaged seal immediately, as penetrating dirt will quickly damage the caliper's seal. To do this, the brake caliper must be disassembled (at a service station).
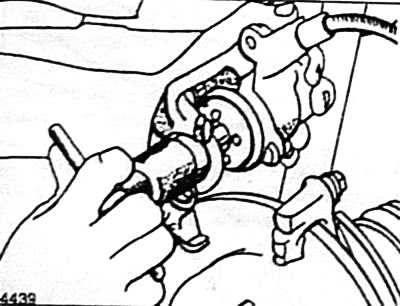
Place the brake cylinder piston back into the housing by screwing it in using a special FORD return tool.
Caution: Do not use a normal return tool or a hardwood rod to install the piston, as this will damage the piston and adjusting bolt.
Note: When installing the piston into the cylinder, the brake fluid from the brake cylinder is squeezed into the expansion tank. Monitor the fluid level in the tank and, if necessary, suck out excess fluid with a siphon.
To suck out the fluid, use a plastic bottle that has only been in contact with brake fluid before. Do not use bottles intended for drinking liquids! Brake fluid is poisonous and should never be sucked out by mouth through a hose. Suck out the fluid with a siphon. After replacing the brake pads, the brake fluid level in the expansion tank should also not exceed the MAX mark, since the fluid expands when heated. Brake fluid leaking from the tank gets under the master brake cylinder, destroys the varnish coating and leads to corrosion.
Make sure that there are no traces of oil or grease on the brake pads and brake discs; if necessary, clean them using alcohol.
Remove the protective paper from the brake pads and insert the pads into the housing.
Fold the piston housing down.
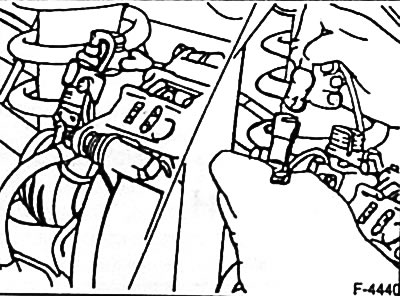
Route the connecting wire of the brake pad wear indicator sensor so as to prevent it from being rubbed by the brake disc.
Connect the plug connector of the brake pad wear indicator sensor.
Place the guide pin and tighten to 35 Nm.
Secure the handbrake cable with the retaining clip at the lower wishbone.
Tighten the rear wheel with nuts in accordance with the marks made before removal. Lower the car and tighten the wheel nuts crosswise to a torque of 100 Nm.
Caution: Press the brake pedal hard repeatedly with the vehicle stationary until you feel strong resistance.
Check the brake fluid level in the expansion tank and, if necessary, top up the tank to the MAX mark.
Carefully work in new brake pads by repeatedly braking the car from 80 km/h to 40 km/h by lightly pressing the brake pedal. Allow the brakes to cool down a little between braking operations.
Attention: On a section of the road up to 200 km long, there should be no sudden braking before coming to a complete stop.