Contents: All engines except DOHC ↳ DOHC Engine ↳
All engines except DOHC
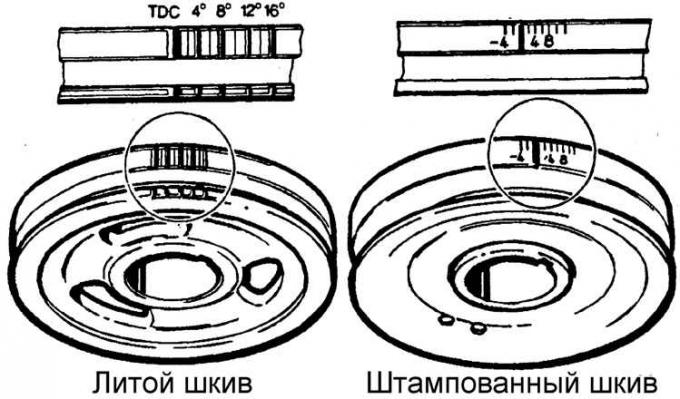
OHC Engine Timing Scales
V6 Engine Timing Scale and Marker
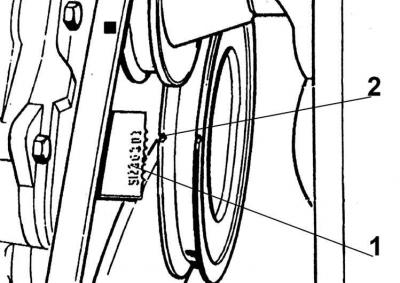
1 – ignition timing scale,
2 – pulley with mark
The ignition timing is set very precisely when the car is manufactured. Adjustment is necessary after removing the ignition distributor or timing belt.
Before checking, the following conditions must be met:
- the engine must be warmed up;
- on engines with a carburetor, the vacuum pipe must be disconnected from the manifold and the manifold opening plugged;
- idle speed should be below 900 rpm;
- disconnect and insulate the octane corrector wire.
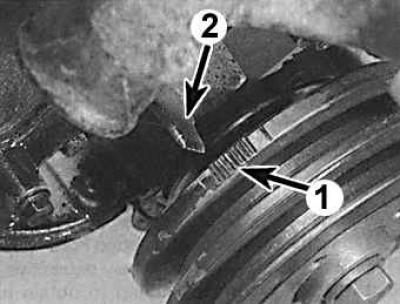
1. Clean the timing marks. On OHC engines, the timing scale (1) is located on the crankshaft pulley and the pointer (2) on the cover must align with the corresponding mark on the pulley.
Note: There are two alternative pulley types with different marks. On V6 engines there is one notch on the pulley and the timing scale is on the cover.
3. Connect the stroboscope to the high-voltage wire of cylinder 1 and then proceed in accordance with the operating instructions.
4. Start the engine in idle mode and direct the light from the strobe light to the marks. The marks should be in place and aligned with the pointer at the required ignition setting angle.
5. To adjust the ignition timing, stop the engine, loosen the distributor mounting bolt, turn the distributor and tighten the mounting bolt. To advance the ignition, turn the distributor counterclockwise and vice versa. Start the engine and recheck the ignition timing adjustment.
DOHC Engine
The ignition timing is set by the ESC II or EEC IV unit and no additional adjustment is possible.