OHC engines
Coolant pump and thermostat OHC engine
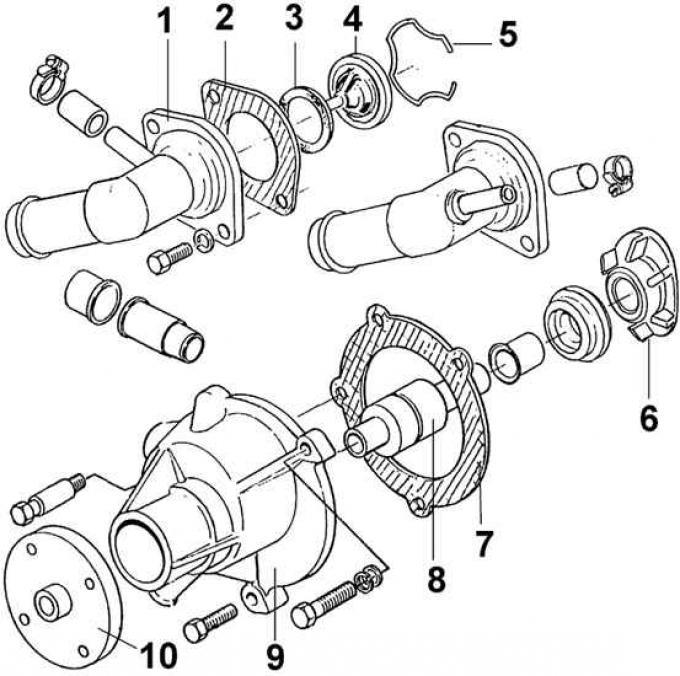
1 – thermostat housing, 2 – gasket, 3 – sealing ring, 4 – thermostat, 5 – spring clamp, 6 – pump impeller, 7 – gasket, 8 – bearing, 9 – housing, 10 – pulley hub
1. Disconnect the ground wire from the battery.
2. Drain the cooling system.

3. Disconnect the upper hose from the thermostat housing on the front of the cylinder head.
4. Unscrew the bolts and remove the thermostat housing and gasket.
 |
 |
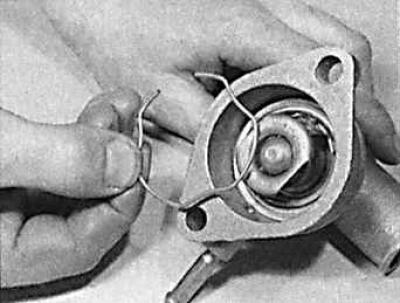
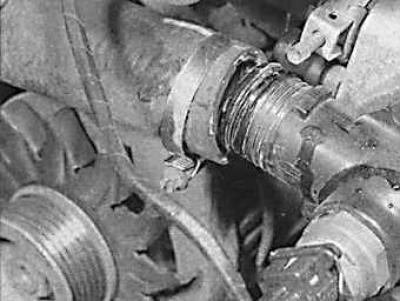
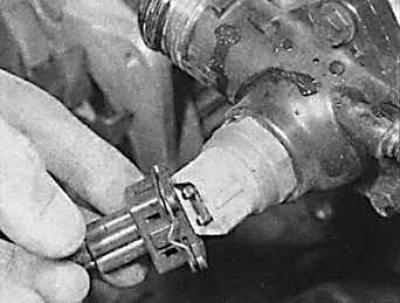
5. Use a screwdriver to pry up the spring clip (picture on the left) of the thermostat and remove the thermostat together with the sealing ring (picture on the right).
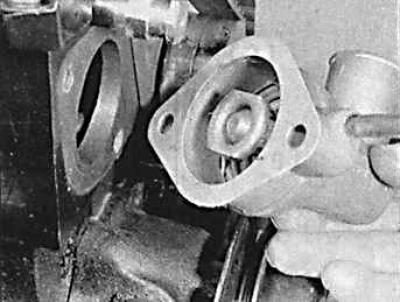
6. Clean the mating surfaces of the thermostat housing and cylinder head.
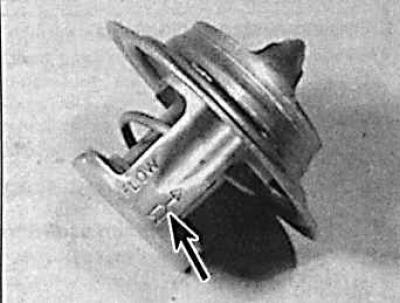
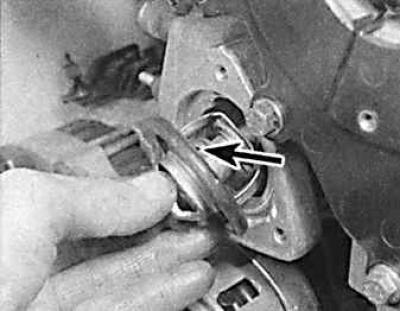
7. Installation is carried out in the reverse order of removal, with the thermostat flow arrow (shown by the arrow) pointing towards the engine.
8. Start and warm up the engine, and also check the tightness of the cooling system connections.
9. After the engine has cooled down, check and, if necessary, top up the coolant level in the expansion tank.
DOHC engines
1. Disconnect the ground wire from the battery.
2. Drain the cooling system.
3. To improve access to the thermostat on engines with a fuel injection system, loosen the clamps and remove the tube connecting the high-pressure chamber and the intake manifold.
2. Drain the cooling system.
4. Disconnect the coolant hoses from the thermostat housing.
5. Disconnect the connector from the cooling fan switch located in the thermostat housing.
6. Unscrew the three bolts and remove the thermostat housing.
7. Installation is carried out in the reverse order of removal, and the thermostat safety valve must be installed upwards (shown by the arrow).
V6 engines
The thermostat is removed during the process of removing the water pump.