Contents: Removal ↳ 4-cylinder engines ↳ V-shaped 6-cylinder engines ↳ General check ↳ Checking the Thermostat ↳ Installation ↳
Note: See warning in paragraph 1 this chapter.
Removal
1. Disconnect the negative battery cable (Chapter 5, paragraph 1).
2. Drain the cooling system (chapter 1). If the fluid does not need to be replaced, drain it into a clean container.
4-cylinder engines
3. Remove the resonator support bracket bolts from the front engine compartment crossmember. Loosen the screws holding the two clamps securing the resonator to the air flow meter and intake air duct chamber hoses. Then move the resonator away from the thermostat housing (Chapter 4).
4. Disconnect the coolant expansion tank hose and the upper radiator hose from the thermostat housing outlet pipe.
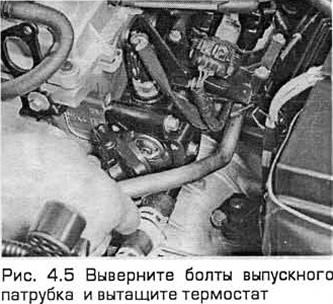
5. Unscrew the thermostat cover bolts and pull out the thermostat (see Fig. 4.5). Pay attention to the position of the air release valve, as well as the position of the thermostat (which of its ends is facing outward).
V-shaped 6-cylinder engines
6. Remove the screws and remove the coolant pump belt cover.
7. Remove the battery (Chapter 5A). Disconnect the air supply hose to the air cleaner (Chapter 4A).
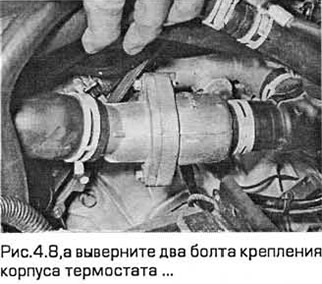
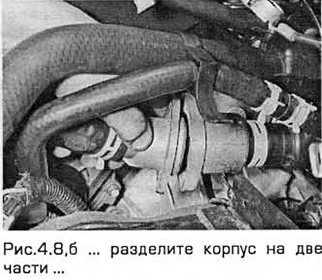
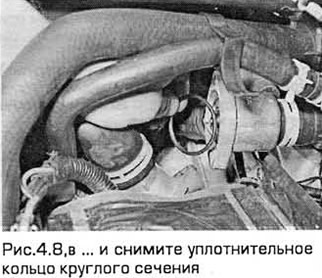
8. Divide the housing into two parts by unscrewing two bolts. Remove the circular section sealing ring (see Fig. 4.8, a-c). When installing, the ring must be replaced with a new one.
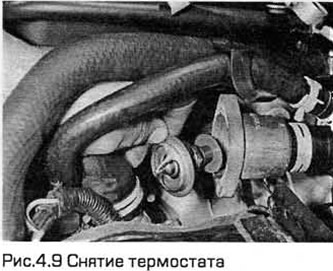
9. Remove the thermostat, taking into account which side it is installed on (see Fig. 4.9).
General check
10. Before assuming that the thermostat is the cause of a cooling system malfunction, check the coolant level, tension and condition of the accessory drive belt (chapter 1) and the operation of the temperature indicator.
11. If you feel like the engine is taking too long to warm up (as judged by the temperature of the air coming out of the heater or the operation of the temperature gauge), then it is likely that the thermostat is stuck open. In this case, replace it.
12. If the engine heats up too quickly, touch the upper radiator hose with your hand. If it is not hot and the engine is hot, the thermostat is stuck closed, preventing coolant from flowing from the radiator to the engine. Replace the thermostat.
13. If the upper radiator hose is hot, coolant is flowing through it and the thermostat is open. See "Troubleshooting" to determine if there is a possible problem with the cooling system.
Checking the Thermostat
14. If the thermostat remains open at room temperature, it is faulty and needs to be replaced.
15. For a complete check, lower (on a rope) the closed thermostat together with the thermometer into cold water. The container with water should not touch other objects.
16. Heat the water and monitor the temperature at which the thermostat begins to open. Compare this value with the technical requirements.
17. Continue heating the water until the thermostat is fully open. This temperature is stamped on its end. Remove the thermostat and let it cool. Make sure it is fully closed.
18. If the thermostat does not open and close as specified above, or if it gets stuck in any position, or does not open at the specified temperature, it must be replaced.
Installation
19. Installation - in the reverse order of removal.
- a) Clean the mating surfaces. Replace the thermostat sealing ring if it is worn or damaged.
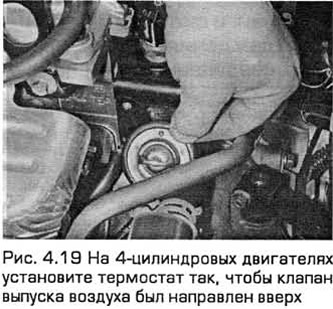
- b) Then install the thermostat. On 4-cylinder engines, the air release valve is directed upwards (see Fig. 4.19).
- c) Tighten the cover-to-housing mounting bolts to the specified torque.
- d) Reconnect all disconnected hoses (chapter 1).
- d) Fill the cooling system with liquid (chapter 1).
- e) Start the engine and after it has warmed up to normal operating temperature, check for leaks and the operation of the thermostat.
(The original post is on the web portal www.FordBook.ru)