Contents: Heater control unit ↳ Supercharger/Air Conditioner Control… ↳ Air distribution control unit ↳
Heater control unit
1. Disconnect the negative battery cable (Chapter 5, paragraph 1).
2. Remove the ashtray (see Chapter 11) and pull out the cigarette lighter trim. Remove all screws securing the central console and slide it back.
3. Then remove the radio/cassette player (Chapter 12).
Models produced up to and including 1996
4. Remove the cassette storage box located underneath the radio/cassette player.
5. Pull out the heater/radio control unit trim by releasing it from the three clips that secure the top edge of the trim, then pull it forward.
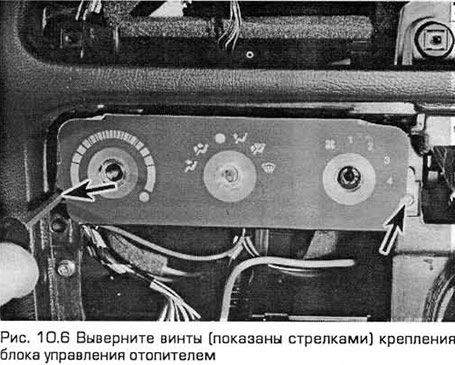
6. Remove the heater control unit handles. Unscrew the heater control unit mounting screw at each end (see Fig. 10.6). Pull the control unit out of the front panel.
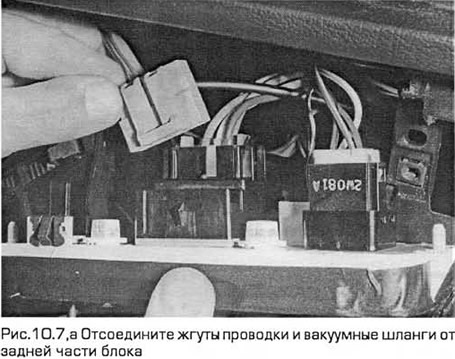
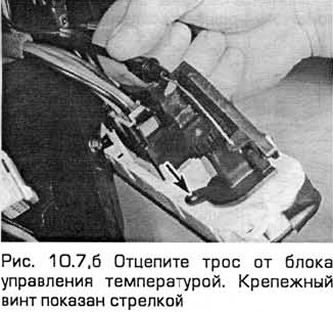
7. Disconnect the wiring harnesses and vacuum hoses, noting their positions, from the rear of the unit. On models without air conditioning, unhook the control cable from the temperature control unit (see Fig. 10.7,a,b).
8. Remove the unit, making sure everything that needs to be removed is disconnected from it.
Models produced since 1997
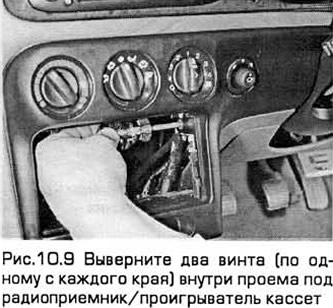
9. Remove the two screws (one on each edge) inside the radio/cassette player opening (see Fig. 10.9).
10. Pull out the heater/radio control unit trim by releasing it from the three clips that secure the top edge of the trim, then pull it forward.
11. Disconnect the wiring harnesses and vacuum hoses, noting their positions, from the rear of the unit. On models without an air conditioning system, unhook the control cable from the temperature control unit (see Fig. 10.11, a, b).
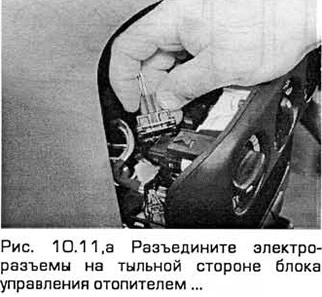
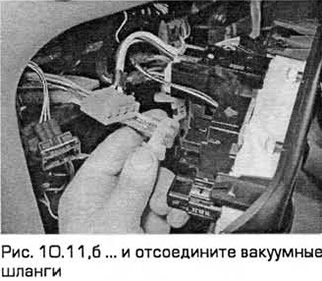
12. Remove the unit, making sure that everything that needs to be removed is disconnected from it.
Supercharger/Air Conditioner Control Unit and Temperature Control Unit
Removal
13. Remove the heater control unit (see above).
14. Remove the handle if you have not removed it yet. Unscrew the screw and pull out the block by turning it (see Fig. 10.14,a,b).
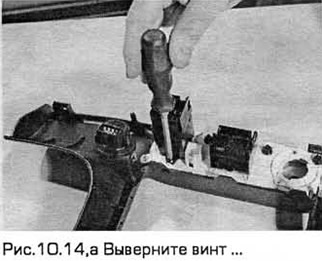
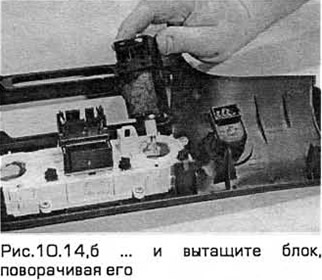
15. Installation - in the reverse order of removal. Finally, check the operation of the control unit.
Air distribution control unit
16. Remove the heater control unit (see above).
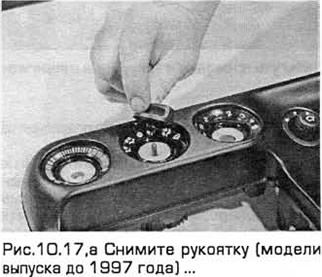
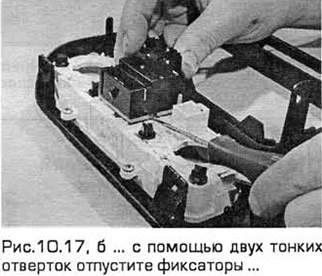
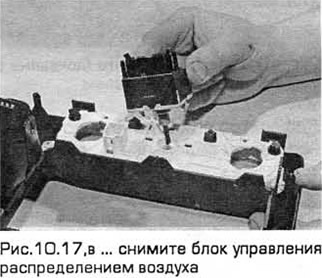
17. Remove the handle if you have not already removed it. Using two thin screwdrivers, release the clips on each side of the air distribution control unit, and then pull it out (see Fig. 10, 17, a-c).
18. Installation - in the reverse order of removal. Finally, check the operation of the control unit.
(Content was created using data from this website: FordBook.ru)