Note: See warning in paragraph 1 this chapter.
Examination
1. The radiator fan of the cooling system operates under the control of the electronic control unit of the engine management system depending on the signal received from the coolant temperature sensor. Where two fan sections are installed or one two-speed fan, control is carried out through a resistor fixed to the fan casing at the bottom left. In case of failure, it can be replaced separately.
2. Pre-check the relevant fuses and relays (Chapter 12). To check the fan motor, disconnect the wiring harness connector and connect the fan to the battery using auxiliary wires and a fuse included in the circuit. If it does not rotate after this, replace the motor.
4. If the electric motor is normal, then the malfunction is caused by the coolant temperature sensor (for details on checking it, see paragraph 6), the wiring loop (Chapter 12, for details on checking) or the engine management system (Chapter 4A).
Removal
4-cylinder engines
5. Disconnect the negative battery cable (Chapter 5, paragraph 1).
6. Remove the resonator support bracket bolts from the front crossmember of the engine compartment. Loosen the screws of the two clamps securing the resonator to the air flow meter and prechamber hoses. Then move the resonator away from the thermostat housing (Chapter 4A).
7. Drain the cooling system (chapter 1).
8. Remove the upper radiator hose. Disconnect the metal coolant pipe/hose from the thermostat and remove the coolant pipe bolts from the exhaust manifold insulating boot.
9. Disconnect the electrical connector(s) from the electric fan. Then remove all hoses and wires from the fan housing.
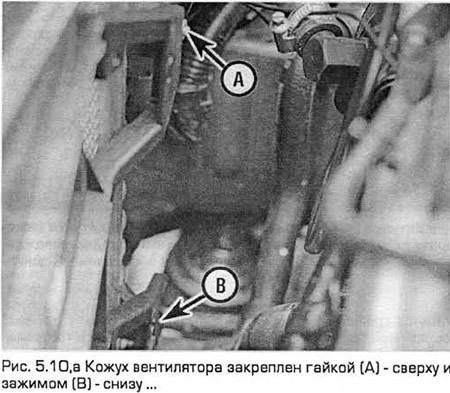
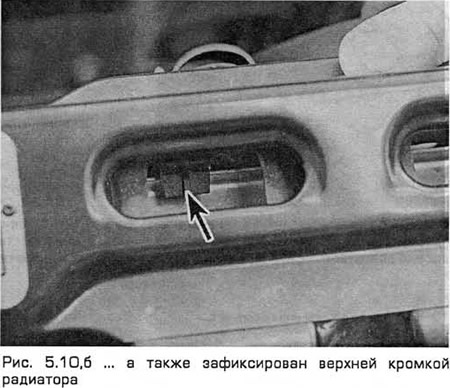
10. Unscrew the two fan casing fastening nuts. Then lift the unit to remove it from the lower supports and the upper edge of the radiator (see Fig. 5.10,a,b).
11. Remove the fan and casing as a single unit (see Fig. 5.11).

V-shaped 6-cylinder engines
12. Disconnect the negative battery cable (Chapter 5, paragraph 1).
13. Drain the cooling system (chapter 1).
14. Disconnect the electrical connector(s) from the electric fan. Then, release all hoses and wires from the fan shroud. On models with air conditioning, slide the air conditioning hoses to gain access without disconnecting them.
15. Remove the two fan shroud mounting nuts. Then lift the unit to remove it from the lower supports and the upper edge of the radiator.
16. Move the knot back as far as possible and tie it to the engine.
17. To ensure removal of the fan, the radiator must be removed (paragraph 7).
18. After removing the radiator, the fan can be lowered down from the engine compartment and removed.
All models
19. The fan, its electric motor and casing are replaced as a single unit.
Installation
20. Installation - in the reverse order of removal.
- a) On V6 models, install the fan assembly before installing the radiator (Chapter 7).
- b) Make sure the casing is seated on all four supports, then install and tighten the nuts.
- c) Fill the cooling system (chapter 1).
This article is a copy from the website FordBook.ru