Heater motor
Withdrawal
1. Disconnect the negative battery cable (chapter 5 paragraph 1).
2. Release the four latches (pulling them out) fixing the upper trim panel of the passenger footwell. Then remove this panel.
3. Disconnect the engine wiring connector.
4. Slightly lift the motor locking lug, rotate the motor counterclockwise (looking down) - approximately 30°, and then pull the knot out.
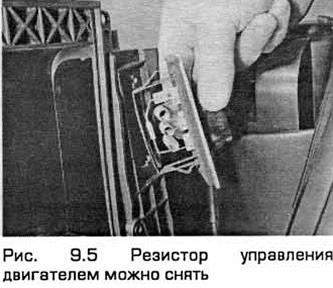
5. The motor control resistor can be removed by inserting a thin screwdriver into the slot on one of the ends. Press the screwdriver about 5 mm against the spring force and remove the resistor (see fig. 9.5).
Installation
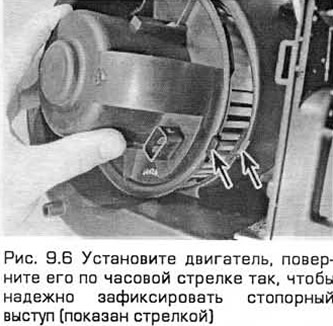
6. Installation - in the reverse order of removal. Install the motor, turn it clockwise so that the locking lug is securely fixed (see fig. 9.6).
Heat exchanger
Withdrawal
7. Disconnect the negative battery cable (chapter 5 paragraph 1).
8. Apply the parking brake. Raise the front end and place it on stands. Empty the cooling system (Chapter 1).
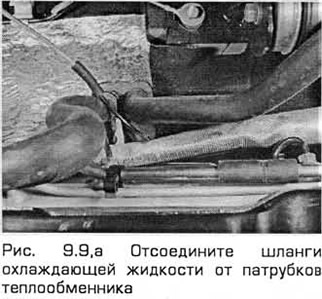
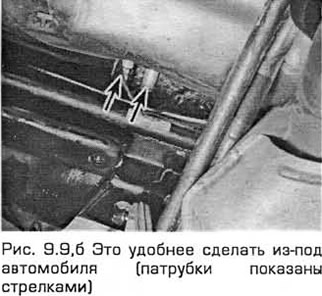
9. Disconnect the coolant hoses from the heat exchanger pipes protruding from the bulkhead of the engine compartment (see fig. 9.9, a, b).
10. Working inside the passenger compartment, remove the cladding panels from each footwell only in the area in front of the center console. Each of these panels is secured with two screws. The center console can be removed to provide additional space (chapter 11).
11. Remove the screw located at the base of the heater block to free the air duct (see fig. 9.11).

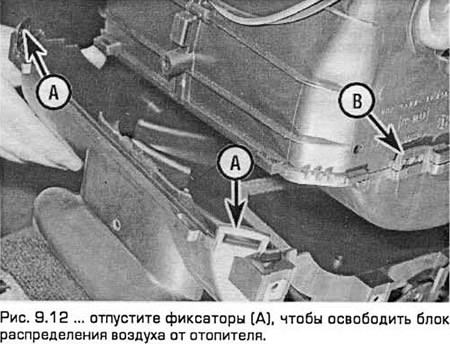
12. Remove the three slotted head screws (T20) attaching the air distributor to the bottom cover of the heater. Then release the latches. There is one plastic clip on each side, but metal clips can be installed in addition to them. Press the air duct to retract it and pull out the air distributor (see fig. 9.12).
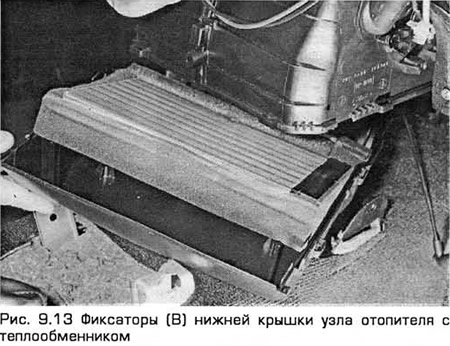
13. Release the clips - one plastic on each side. (In addition to them, you can find metal clips.) Then pull out the bottom cover of the heater assembly together with the heat exchanger (see fig. 9.13).
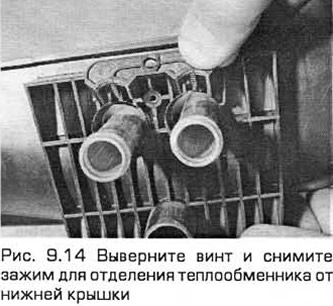
14. Loosen the screw and remove the clip to separate the heat exchanger from the bottom cover (see fig. 9.14).
Installation
15. Installation - in the reverse order of removal. You may need additional metal clips to secure the bottom cover of the heater and air distributor. Make sure. that the air duct exits downwards from the air distributor and is fixed with a screw.
16. Fill the cooling system with a mixture of antifreeze and water (Chapter 1). Start the engine and after it has warmed up to normal operating temperature (when the upper radiator hose becomes hot) recheck the coolant level and top up the system if necessary. Then check for leaks. Control the operation of the heater.
Driver side deflector and center deflector
18. These deflectors are removed together with the bezel trim (chapter 12).
Deflector on the passenger side of the front seat
19. Remove the glove box (chapter 11).
20. Remove the deflector from the end of the panel with a screwdriver, laying a gasket between its sting and the panel.
21. Disconnect the air duct from the deflector through the opening of the glove box and remove the deflector.
22. Installation - in the reverse order of removal.
Visitor comments