Note: See warning in paragraph 1 this chapter.
Radiator
Withdrawal
Note: If you are removing a radiator due to leaks, be aware that small leaks can often be repaired with radiator sealant without removing it.
1. On models with 4-cylinder engines, remove the radiator fan and its casing (paragraph 5). On models with 6-pin V-twin motors, disconnect the fan assembly from the radiator (paragraph 5) and move it back as far as possible.
2. In order to make it convenient for you to lower the radiator and take it out. apply the parking brake, raise the front end and place it on stands. Remove the lower radiator cap.
3. Disconnect the lower hose from the radiator, as well as the upper one, if you have not disconnected it yet.
4. On models with automatic transmission, disconnect the transmission radiator pipes and plug the holes formed.
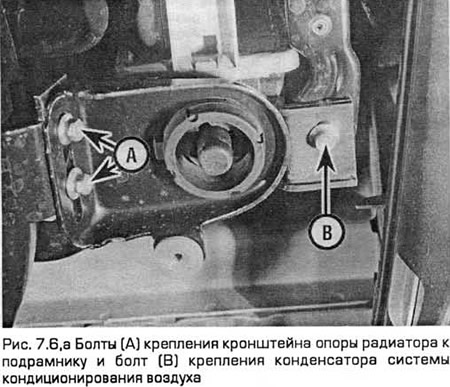
5. On models with an air conditioning system, remove the condenser support nuts or bolts. Then disconnect the condenser from the radiator and tie it to the front cross member of the engine compartment. Disconnect the wiring from the compressor and the minimum pressure sensor of this system.
Warning: Do not disconnect refrigerant hoses.
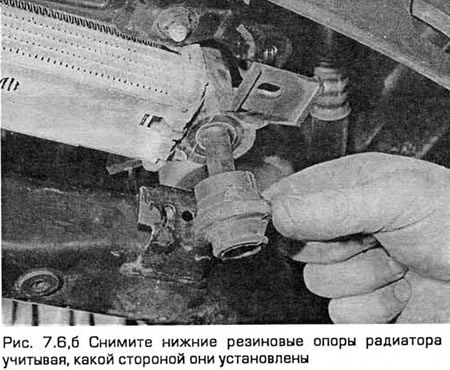
6. Turn out bolts of arms of a support of a radiator from a stretcher. Please note that the brackets differ like mirror images and are therefore marked for correct installation (see fig. 7.6, a, b). Assemble the bottom rubber mounts, considering which side they are on, and fold them for storage.
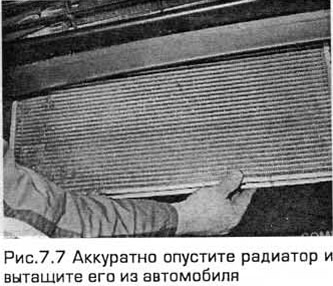
7. Gently lower the radiator and pull it out of the car (see fig.7.7).
Inspection
8. Once the heatsink has been removed, it can be checked for leaks and damage. If it needs repair, take it to dealers or specialists.
9. Dirt, as well as insects, can be removed from the radiator with a soft brush or water jet from a hose. In this case, the ribs cannot be bent.
Installation
10. Installation - in the reverse order of removal.
- A) On models with V-6 engines, first lift the fan assembly, blending it back toward the engine, as close as possible. After that, you need to install the radiator in place, and then fix the fan (paragraph 5).
- b) Make sure the rubber mounts have settled into place in the radiator base.
- V) After installation, fill the cooling system with the specified coolant (Chapter 1).
- G) Start the engine and check for leaks. After reaching normal operating temperature, when the upper radiator hose becomes hot, recheck the coolant level and top up the system if necessary.
- d) On models with automatic transmission, check the level and add fluid to the transmission (Chapter 1).
Expansion tank
11. When the engine is completely cool, remove the expansion tank filler cap to relieve pressure in the system, and then install the cap.
12. Disconnect the hoses from the tank, first disconnecting the top one. After disconnecting the hoses, drain the contents of the tank into a clean container. If you use the liquid again, keep it in a closed container,
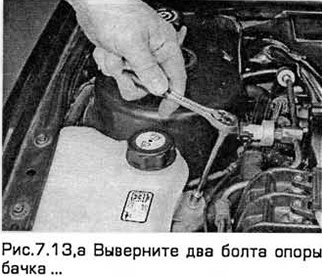
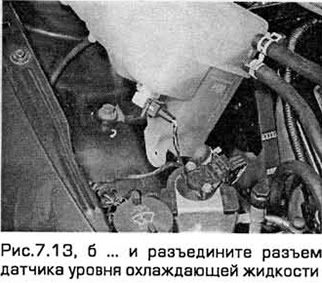
13. Turn out two bolts of a support of a tank and disconnect a socket of the gauge of level of a cooling liquid (in the presence of) (see Fig. 7.13, a, b).
14. Wash the tank and inspect it for cracks or abrasions. Replace if necessary.
15. Installation - in the reverse order of removal. Fill the cooling system with a mixture of antifreeze and water in the appropriate ratio (Chapter 1). Then start the engine and when it warms up to normal operating temperature (when the upper radiator hose becomes hot), repeat the level check and top up the system.
Visitor comments