Handbrake
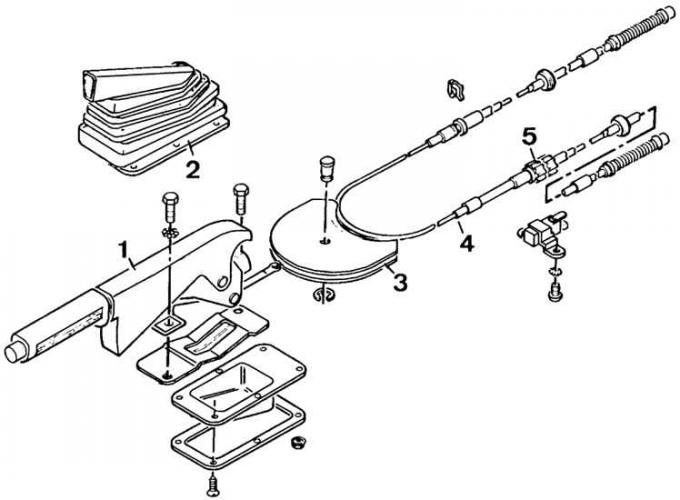
1 – handbrake lever, 2 – protective cover, 3 – crossbar, 4 – cable, 5 – adjusting nut with lock nut
Handbrake actuator parts
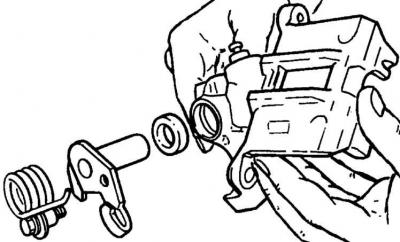
Attention! Adjustment of the handbrake is performed after replacement of the rear brake pads, handbrake cables or handbrake lever inside the body. In other cases, all adjustment actions are prohibited.
1. Check if the handbrake lever is released.
2. Place the vehicle on a lift so that the rear wheels hang freely.
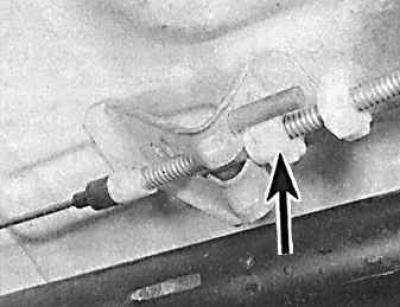
3. Unlock the lock nut (indicated by the arrow) for adjusting the handbrake cable.
4. Completely unscrew the adjusting nut and loosen the handbrake cables as much as possible.
5. Check that the cables and levers move freely on the calipers without excessive resistance.
6. Gradually tighten the cable by tightening the adjusting nut until the cable ends contact the handbrake levers on the rear calipers. The levers should not move.
7. Check whether the levers on the calipers move when the handbrake lever is switched from the first to the second tooth of the latch, and lock the adjusting nut with a lock nut.
8. Lower the car.
[The original article is available on the website: FORDBOOK.ru]