Withdrawal
Note 1: This procedure is difficult when the engine is installed in the vehicle, as it requires prior disassembly and access to the components is limited. Therefore, it is recommended to perform it on the engine removed from the car. Please note that the oil pump safety valve can be removed from the engine installed in the car (item 8).
Note 2: You will also need a new pump gasket and replacement parts (see paragraph 15), as well as tools and fixtures.
1. Remove the toothed belt (paragraph 10).
2. Remove the crankshaft toothed pulley, as well as the thrust washer located behind it, considering which side it is installed (paragraph 1).
3. Remove the pallet (paragraph 15).
4. Remove the suction pipe/strainer screws from the pump. Then loosen the nut and remove the intake pipe/strainer. Discard the gasket.
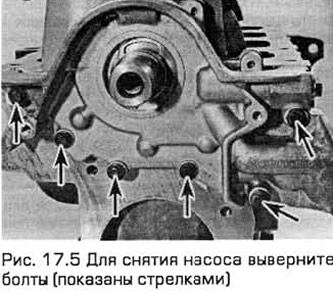
5. Remove the pump bolts from the cylinder block/crankcase (see fig. 17.5). Pull out and discard the gasket. Remove the right crankshaft seal. Thoroughly flush and remove grease from all components, especially the mating surfaces of the pump, sump, and cylinder block/crankcase.
Inspection
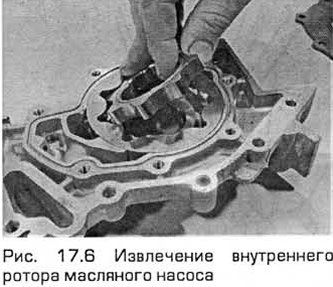
6. Remove the slotted screws and remove the pump cover. Paying attention to the location marks on the rotors, pull them out (see fig. 17.6).
7. If any of the rotors, pump housing, or cover are scored or damaged, the entire pump assembly must be replaced.
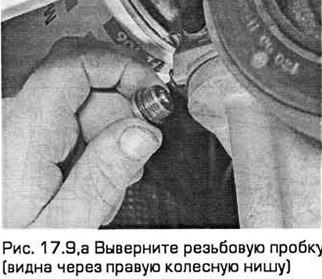
8. If required, the relief valve can be removed without removing the pump. To do this, park the vehicle on a firm level surface, apply the parking brake, raise the front end and place it on supports. To access the valve, remove the right front wheel and accessory belt cover (Chapter 1).
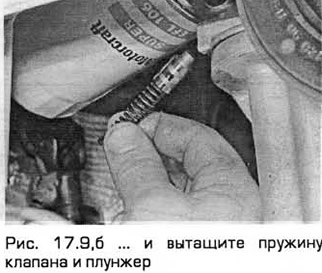
9. Unscrew the screw plug and pull out the valve spring and plug (see fig. 17.9, a, b). If the O-ring is worn or damaged, it must be replaced during installation.
10. Installation - in the reverse order of removal. Install the spring and valve in the correct direction and securely tighten the screw plug.
Installation
11. When installing, the oil pump must be filled with clean engine oil by turning its inner rotor a few turns.
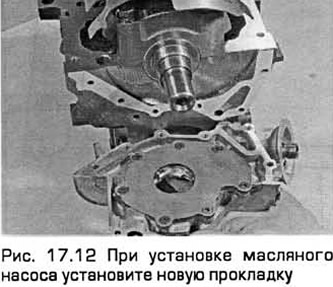
12. Use grease to stick a new gasket to the cylinder block/crankcase. Rotate the pump inner rotor to align with the crankshaft flats, install the pump. Insert the bolts and tighten them slightly (see fig. 17.12).
13. Using a ruler and feelers, center the pump relative to the crankshaft, and also install it without distortions so that its mating surface is 0.3... 0.8 mm below the mating surface of the cylinder block / crankcase and this distance is the same on both sides of the crankshaft (see fig. 17.13). Without displacing the gasket, bring the pump to the regulated position and tighten its bolts to the required torque.
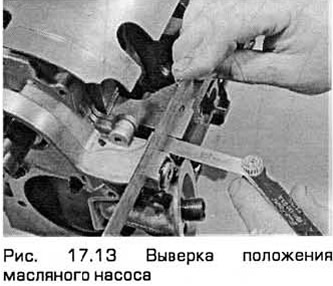
14. Make sure the pump is installed and positioned correctly. If necessary, unscrew the bolts again and repeat the entire procedure to ensure its required position.
15. Install a new right crankshaft seal (paragraph 20).
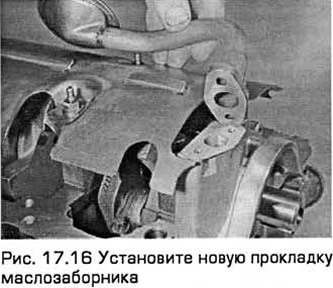
16. Apply grease to the gasket on the pump. Install intake pipe/strainer. Tighten the screws and nut to the correct torque (see fig. 17.16).
17. Perform other operations in the reverse order of removal.
Visitor comments