Removal
1. Remove the transmission (Chapter 7A or 7B). It is also a good idea to check the seals and replace them if necessary.
2. Remove the clutch (depending on the version) see Chapter 8. It makes sense to check or replace the clutch components and the pilot bearing (which centers the clutch on the crankshaft end).
3. Use a punch or a drop of paint to mark the flywheel/faceplate and crankshaft to ensure they are aligned during installation.
4. Lock the flywheel/faceplate from turning by locking the flywheel teeth or by securing the faceplate/flywheel relative to the cylinder block/crankcase using a steel strip and bolts.
5. Unscrew the flywheel mounting bolts one by one. After unscrewing, they should always be replaced regardless of their condition, as they operate under a complex load.
6. Taking into account the position of the booster plate (automatic transmissions only), remove the flywheel/faceplate. Do not drop this unit, it is very heavy.
Inspection
7. Clean the flywheel/faceplate from oil. Inspect the surface for cracks, burrs, burn marks and other defects. Minor burrs can be removed with sandpaper. Check for cracks or broken teeth on the ring gear. Place the flywheel/faceplate on a flat surface and check for warpage with the end of a straightedge.
8. Clean and inspect the mating surfaces of the flywheel/faceplate and crankshaft. If the left crankshaft oil seal is leaking, (paragraph 20) Before installing the flywheel/faceplate, replace it.
9. Thoroughly clean the inside (right) side of the flywheel/faceplate, especially the recesses used as reference elements for the crankshaft position/speed sensor. Clean the sensor tip and make sure that the sensor is securely fastened. Also clean the threaded holes in the end of the flywheel and the threads of the bolts - this is important, since the remains of the old seal will weaken the connection after some time and it will no longer transmit the engine torque properly.
Installation
10. When installing, make sure that the power unit adapter plate (if any) is installed in its place. Then install the flywheel/faceplate on the crankshaft so that all the bolt holes are aligned (there is only one way to do this). Make sure that the marks made before removal are aligned. Do not forget about the stiffener (if any).
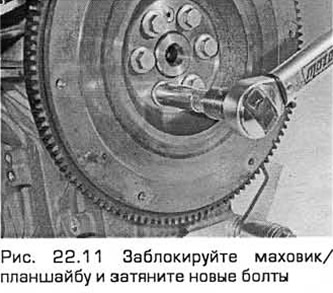
11. Lock the flywheel/faceplate in the same way as for removal. Tighten the new bolts evenly in a crisscross pattern (in two or three stages, see Technical Data) (see Fig. 22.11).
12. Perform the remaining installation operations in the reverse order of removal.