If possible, use a source of compressed air at a pressure of 0.7–1.0 MPa (7–10 kgf/cm2), then the valve stem seals can be replaced without removing the cylinder head from the engine. If there is no source of compressed air, you will have to remove the cylinder head, since on this engine it is impossible to fix the valves with mechanical devices inserted into the spark plug hole.
Pic. 5.8. Devices for removing valve springs: 1 - a device for compressing springs; 2 - a device for supplying air to the candle hole
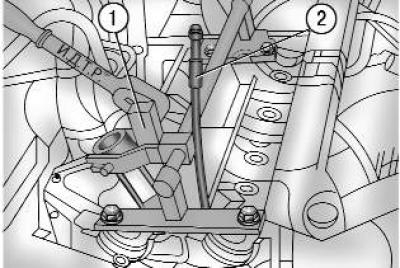
You will need: all the tools needed to remove the cylinder head cover (cm. «Replacing the cylinder head cover gasket»), timing belt drive (cm. «Replacing the timing belt»), camshafts (cm. «Replacing camshafts»), and also tweezers (or magnetized screwdriver) for extracting crackers from the plates of valve springs, tool 1 (pic. 5.8) for compressing valve springs, tool 2 for supplying air to the spark plug hole (can be made from a faulty spark plug) …
...tick..
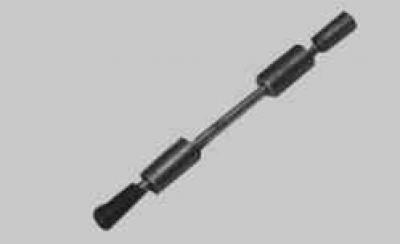
... or an inertial oil seal remover. The puller shown has a mandrel on the other end for pressing on the caps. In the absence of such a puller, you will need pliers to remove the caps and a mandrel of a suitable diameter to press them onto the valve guides.
1. Disconnect the wire from the terminal «minus» battery.
2. Remove all spark plugs (cm. «Replacement and maintenance of spark plugs»).
3. Set the piston of the 1st cylinder to TDC (cm. «Setting the piston of the first cylinder to the TDC position of the compression stroke»). This position corresponds to the BDC of the pistons of the 2nd and 3rd cylinders.
NOTE: If the piston is not set to BDC, when compressed air is supplied to the cylinder, the engine crankshaft will rotate and the vehicle may move (with gear engaged).
4. Remove the cylinder head cover (cm. «Replacing the cylinder head cover gasket»).
5. Remove the timing belt (cm. «Replacing the timing belt»).
6. Remove camshafts (cm. «Replacing camshafts»).
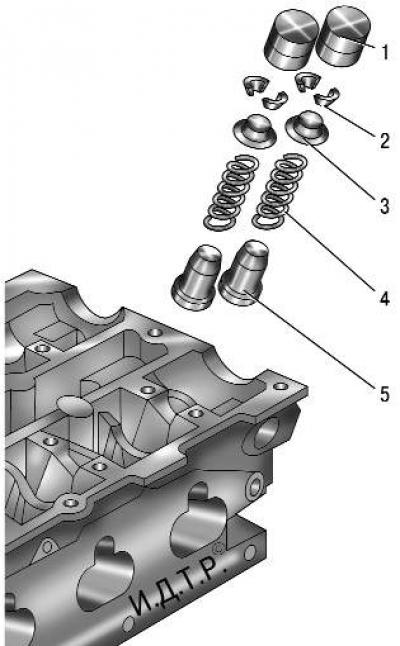
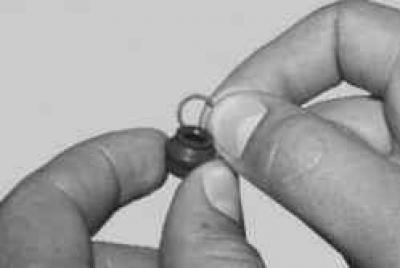
Pic. 5.9. Valve drive parts: 1 - pusher; 2 - cracker; 3 - spring plate; 4 - spring; 5 - oil scraper cap
7. Remove pushers 1 (pic. 5.9) valves of the 2nd cylinder.
8. Install the valve spring removers on the 2nd engine cylinder as shown in fig. 5.8.
9. Apply compressed air at a pressure of 7–10 kgf / cm2 to the spark plug hole of the 2nd cylinder.
10. Compress the spring 4 with the tool (see fig. 5.9) one of the valves and remove the springs from the plate 3 using tweezers or a magnetized screwdriver, two crackers 2. Then remove the tool.
WARNING: After removing the cotters, the valve is held in the up position only by air pressure. Do not turn off the pressure until the oil seal is replaced and all parts are installed, otherwise the valve will fall into the cylinder and you will need to remove the cylinder head to remove it.
11. Remove plate 3 springs and spring 4.
NOTE: If you are removing poppets and springs from multiple valves at the same time, then the removed parts must be installed on the valves from which they were removed.
12. Press the valve stem seal 5
from the valve guide. To do this, install the collet of the inertial extractor of oil seals on the cap and sharply hit the collet bushing with the striker. Then just as sharply hit the handle of the device with the striker, thereby compressing the cap from the sleeve.
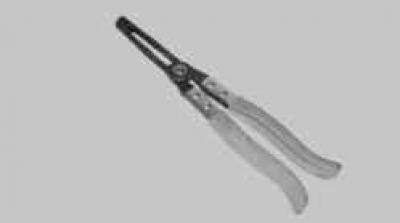
13. In the absence of an inertial cap remover, remove the cap with a special tong-type remover or pliers, applying force straight up and without turning the cap so as not to damage the valve guide.
WARNING: Do not remove the cap by prying it on both sides with screwdrivers. The guide sleeve, on which the cap is put on, is made of cermet, and its edge easily breaks off.
14. Before installing new valve stem seals, we recommend that you remove the springs from them, otherwise the caps can be damaged when they pass through the grooves for crackers on the valves. If the set of new caps includes a plastic mounting sleeve, the springs can not be removed. In this case, put the sleeve on the valve stem.
NOTE: Original valve stem seals are green for inlet valves, brown for exhaust valves.
15. Lubricate the inner surface of the valve stem seal with engine oil and slide the cap along the valve stem to the guide sleeve.
16. Install the mandrel for pressing the cap. With light blows of the striker on the mandrel, press the cap in until it stops. In the absence of a special device, you can choose a cylindrical mandrel of a suitable diameter and press the cap through it with light hammer blows on the mandrel.
GOOD ADVICE: You can use the long head from the tool kit as a mandrel. You need to choose a head with 12 faces and a chamfer inside the hole so that the head contacts the cap in a solid circle.
17. Remove the guide sleeve from the valve stem or put a spring on the cap if it was removed.
18. Install the spring and valve disc in the reverse order of removal. Install the crackers with the tool so that they fit into the grooves of the valve stem. After installing the crackers, hit the end of the valve with a hammer through the metal rod so that the crackers sit in place.
WARNING: If the skewed cotters remain loose when starting the engine «cracked» the valve will fall into the cylinder, resulting in a serious engine failure.
19. Similarly, replace the valve stem seals of the remaining three valves of the 2nd cylinder and four valves of the 3rd cylinder.
20. Turn the crankshaft half a turn so that the pistons of the 1st and 4th cylinders are installed in the BDC, and replace the valve stem seals of the remaining valves.
21. Install the removed parts in the reverse order of removal. After installing the camshafts and the timing belt, check and, if necessary, adjust the clearances in the valve drive (cm. «Valve clearance adjustment»).
Visitor comments