Withdrawal
WARNING: Do not smoke or allow lit cigarettes or any open flame to be present when working on or near any fuel-containing elements. In such situations, there are always highly flammable mixtures that can ignite. Failure to follow these instructions may result in personal injury.
WARNING: This procedure is related to fuel handling. Always be aware of the possibility of fuel splashing and observe fuel safety precautions. Failure to follow these instructions may result in personal injury.
WARNING: The fuel supply system remains under pressure for a long time after the ignition is switched off. Relieve fuel pressure before starting any repair. Failure to follow these instructions may result in personal injury.
1. Relieve pressure in the fuel supply system. See Section 310-00 for more information.
2. Drain the fuel from the fuel tank. See Section 310-00 for more information.
3. Raise and support the vehicle. See Section 100-02 for more information.
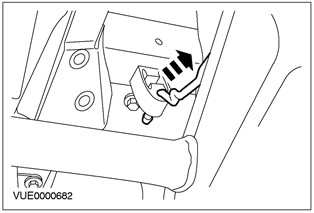
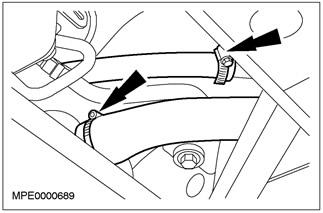
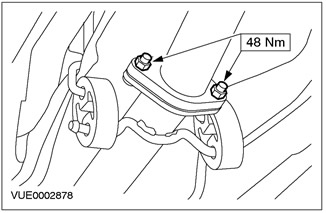
4. Disconnect the exhaust pipe from the rear suspension support.
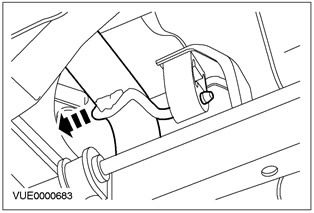
5. Disconnect the exhaust pipe from the hanger.
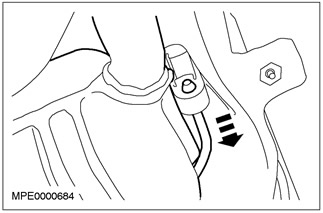
6. Disconnect the center muffler from the outboard support.
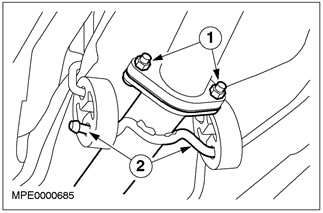
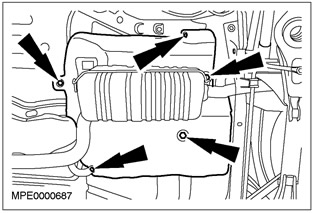
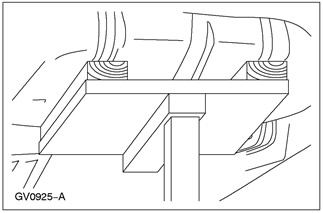
7. Disconnect the exhaust pipe.
- 1. Remove nuts.
- 2. Detach the exhaust pipe from the two supports.
8. Remove the heat shield.
9. Fix the exhaust pipe in a suitable position.
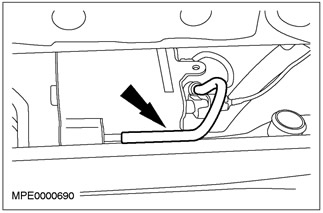
10.
CAUTION: When removing the fuel tank vent and fill lines, do not use sharp-edged tools to remove the lines. Failure to follow this instruction may result in damage to the pipelines.
NOTE: To install the fixing straps in the desired position, mark the position of their installation before removing.
Disconnect the fuel tank vent and filler pipes.
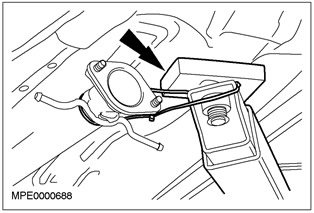
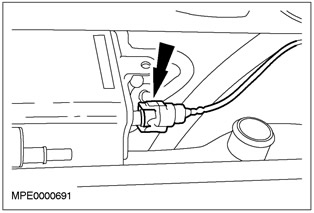
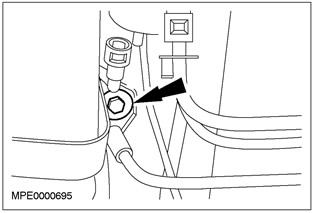
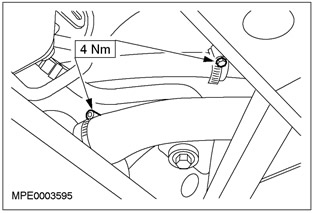
11. Disconnect the fuel vapor line from the carbon filter of the fuel vapor control system.
12. Disconnect the fuel vapor line from the carbon filter.
13.
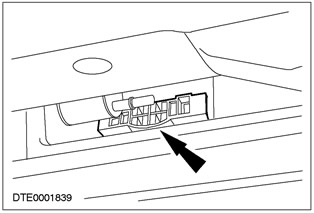
NOTE: Use a blunt object to press the clamp.
Press the charcoal filter locking clip.
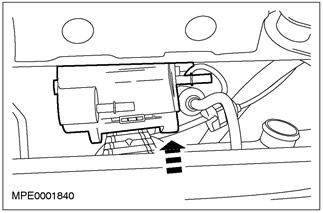
14. Remove the carbon filter of the fuel vapor control system.
15. Disconnect the fuel line connections. See Section 310-00 for more information.
16.
CAUTION: To prevent damage to the lower outer surface of the fuel tank, place suitable packing material under the tank when supporting it.
Install a suitable jack under the fuel tank.
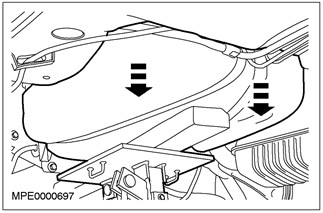
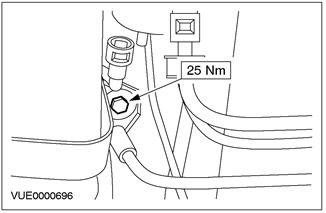
17. Turn out a bolt of a fixing collar of a fuel tank.
18.
CAUTION: When lowering the fuel tank, make sure that there is no excessive stress in the fuel lines and fuel line connections.
Partially lower the fuel tank.
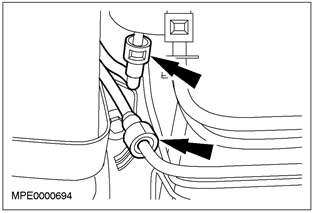
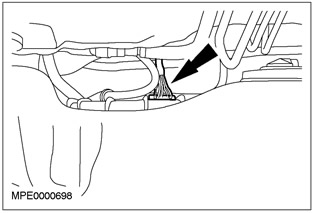
19. Disconnect the fuel pump electrical connector.
20. Remove the fuel tank.
21. If installing a new fuel tank, remove the shut-off valve from the old tank (when capsizing), filler and vent pipes and install these items on the new tank.
Installation
WARNING: Do not smoke or allow lit cigarettes or any open flame to be present when working on or near any fuel-containing elements. In such situations, highly flammable vapors are always present that can ignite. Failure to follow these instructions may result in personal injury.
NOTE: When installing the fuel tank, make sure the fuel lines are not kinked or pinched.
1.
NOTE: The fill and vent line retaining clamps must be reinstalled in the same position from which they were removed.
Reinstall the elements in reverse order.
Visitor comments