Contents: Removal ↳ Installation ↳
Removal
1. Raise and support the vehicle. Refer to Section 100-02 for additional information.
2.
CAUTION: Excessive bending of the flexible exhaust pipe may cause damage. Support the flexible exhaust pipe with a support clamp or suitable cotter pin.
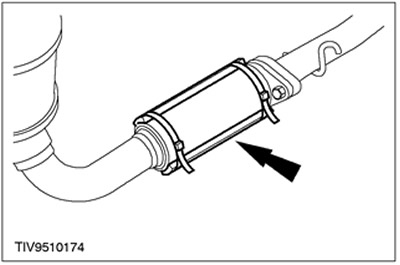
Support the flexible exhaust pipe with a suitable clamp.

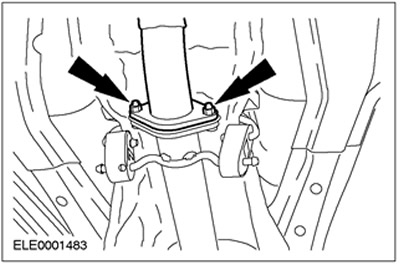
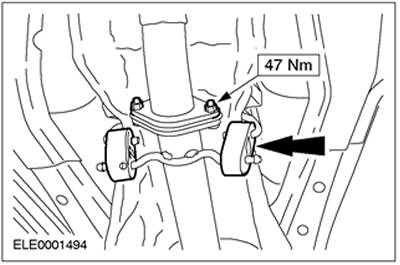
3. Disconnect the exhaust pipe and support cushions.
- Discard the gasket as it is no longer needed.
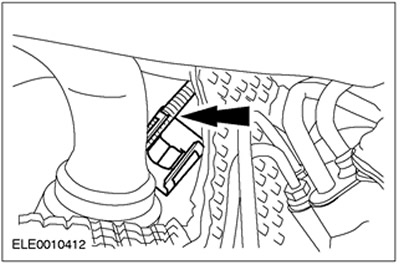
4. Release the gear selector lever cable from the clip on the right side of the bracket.

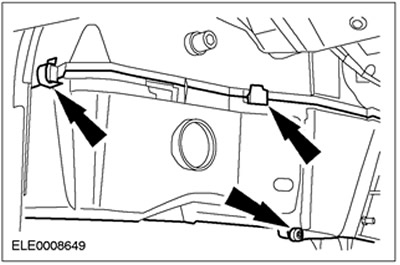
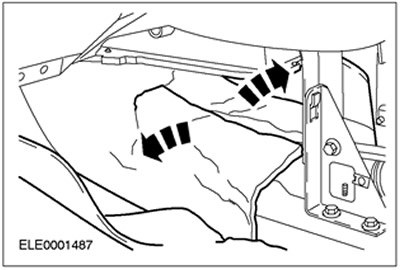
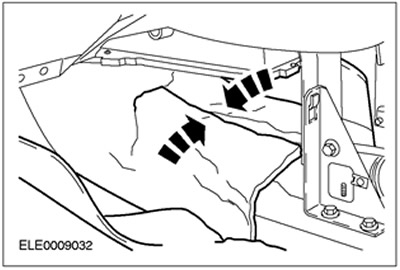
5. Remove the wiring harness cover.

6. Remove the exhaust system heat shield.
- Release the gear selector lever cable.

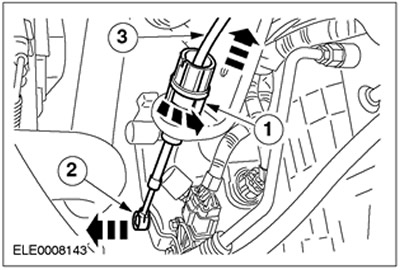
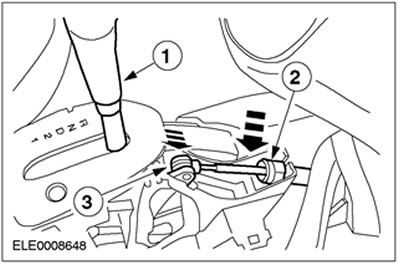
7. Disconnect the cable from the gear selector lever.
- 1. Unlock the regulator by turning the outer sleeve of the gear selector lever cable.
- 2. Disconnect the gear selector lever cable from the transmission range (TR) sensor bracket.
- 3. Remove the gear selector lever cable from the bracket.
8. Lower the vehicle.
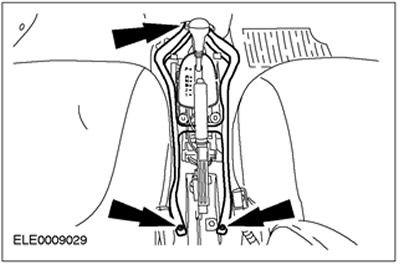
9. Remove the floor console. For additional information, refer to Section 501-12.
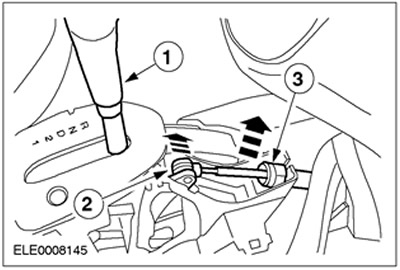
10. Remove the gear selector lever cable from the gear selector lever.
- 1. Shift the gear selector lever to position "P".
- 2. Release the gear selector lever cable.
- 3. Release the outer sleeve of the gear selector lever cable.
11. Remove the heater duct in the footwell.

12. Remove the lower center console trim panels (left side shown).
- Remove the screws.
- Release the clamp.

13. Remove the heater housing cover (right side shown).
- Release the four clamps.
- Remove two screws.
14. Remove the floor covering and insulation material and place them aside (heat exchanger shown removed).
15. Connect a suitable piece of cord to the transaxle end of the gear selector lever cable and secure it to the transaxle.
16. Remove the gear selector lever cable sealing bushing.
17. Remove the gear selector lever cable.
- Pull the cable and cord through the floor panel.
Installation
1. Connect the cord to the gear selector lever cable on the transaxle side of the block.
2. Pull the gear selector lever cable through the floor panel.
3. Install the gear selector lever cable sealing bushing.
4. Secure the insulation material and floor covering using adhesive tape (heat exchanger shown removed).
5. Install the heater housing cover (right side shown).
- Install four clamps.
- Install two screws.

6. Install the center console lower trim panels (left side shown).
- Install the clamp.
- Screw in the screws.

7. Install the heater duct into the footwell.
8. Connect the gear selector cable to the gear selector lever.
- 1. Shift the gear selector lever to position "P".
- 2. Secure the outer sleeve of the gear selector lever cable.
- 3. Secure the gear selector lever cable.
9. Install the floor console. For additional information, refer to Section 501-12.
10. Raise and support the vehicle. Refer to Section 100-02 for additional information.
11. Remove the cord.
12. Connect the gear selector lever cable to the gear selector lever assembly.
- 1. Check the position of the gear selector lever cable.
- 2. Secure the gear selector lever cable to the transmission range (TR) sensor bracket.
- Move the gear selector lever to position "D".
- 3. Fix the regulator assembly by turning the outer sleeve of the gear selector lever cable.

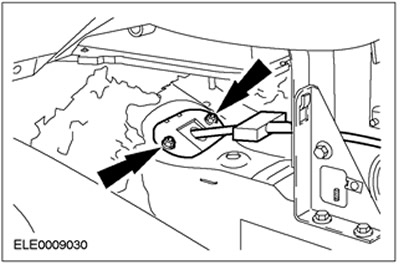
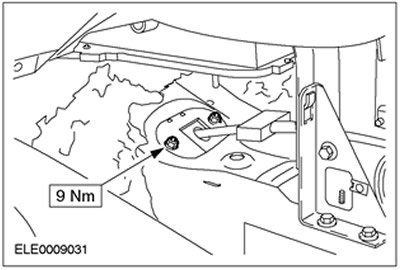
13. Secure the gear selector lever cable to the right side of the bracket.
14. Install the exhaust system heat shield.

15. Install the wiring harness cover.

16.
NOTE: Install a new exhaust flange gasket.
Install the exhaust pipe supports and connect the exhaust pipe.
17. Remove the support clamp.
18. Adjust the gear selector lever cable. For more information, refer to the Adjusting the Gear Selector Lever Cable chapter in this section.