Caution: These procedures are performed after removing the cylinder head.
1. Remove the coolant pump, exhaust manifold, combustion swirl chambers and engine overheat indicator light thermal switch.
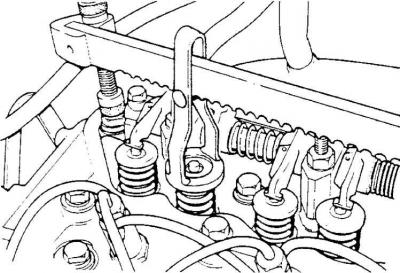
2. Using a valve spring compressor, remove the upper spring retaining clamps and remove the valve springs.
3. Remove the valves and mark which cylinder they were working in.
4. Wash the valve springs in petrol or diesel fuel, being careful not to damage their protective coating.
5. Using a soft wire brush, thoroughly clean the exhaust ports in the cylinder head, the outer surfaces of the valve guides and the valve.
Caution! Do not use tools that may scratch the parts being cleaned.
6. Clean and thoroughly blow out all parts with compressed air.
7. Using a ruler, check the flatness of the lower plane of the cylinder head: lengthwise, crosswise and diagonally. During the check, do not rest the ruler on the combustion chambers (they may protrude slightly from the cylinder head).
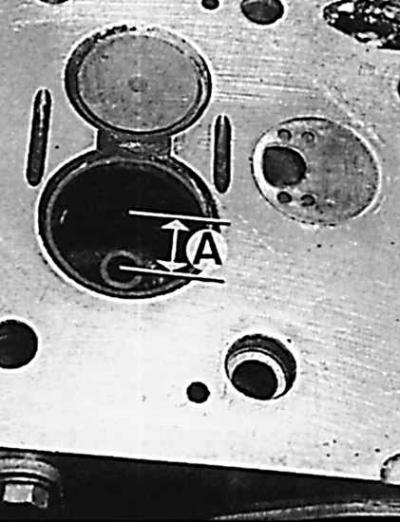
8. If necessary, replace the valve guides (A is the depth of the valve guide) and check the position of the guides after their installation.
9. After installation in the cylinder head, drill out the internal diameter of the valve guides to the appropriate dimensions. Grind the valves using fine-grained grinding paste.
10. Thoroughly wash the cylinder head and valves to remove any paste particles.
11. Check the condition of the working surfaces of the valve seats.
12. Check the fit of the valves to the seats by turning the valves 1/8 of a turn while lightly pressing them against the seat.
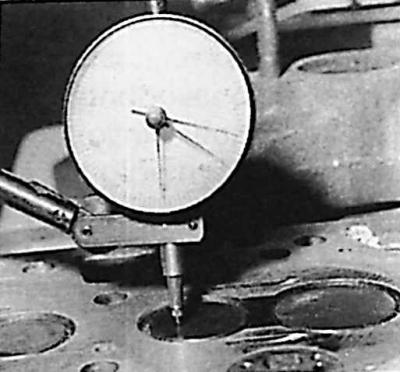
13. Measure the depth of the valves relative to the lower plane of the cylinder head.
14. Check the condition of the removed combustion chambers.
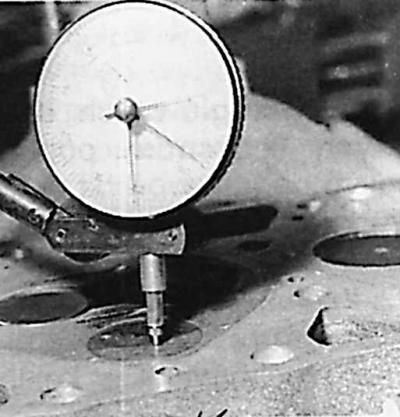
15. After installing the combustion chambers in the cylinder head, use a dial indicator to check their protrusion (0–0.03 mm) from the lower plane of the cylinder head.
16. Assemble the cylinder head by performing the steps in the reverse order to those described above.