Contents: Disassembly ↳ Assembly ↳
Disassembly
1. Secure the engine to a suitable stand, drain the oil and remove the oil filter. Remove the vacuum pump and V-belt; unscrew the vacuum line.
2. Remove the entire generator (together with the holder) and the drive V-belts, the tensioner roller of the coolant pump V-belt and the belt.
3. Unscrew the high idle speed regulator thermostat from the cylinder head, then unscrew the return fuel hoses and remove the fuel pump.
4. Unscrew and remove the fuel lines. Seal the openings of the lines and fuel system devices with appropriate plugs to prevent dust from getting in.
5. Remove the injectors, their gaskets and thermal insulation rings, disconnect the electrical wire and current bus from the glow plugs and unscrew them.
6. Disconnect the oil supply line to the valve lever shaft and unscrew the outer valve lever shaft holders.
7. Unscrew the cylinder head mounting bolts (in the reverse order to tightening them) and remove the head and its gasket.
8. Remove the oil filter holder and oil cooler, then unscrew the fuel pump with its holder. Remove the crankshaft and fan pulleys, remove the timing chain cover.
9. Lock the chain tensioner with a screwdriver, remove the tensioner and its eccentric, remove the timing chain and the fuel pump sprocket.
10. Remove the fuel pump drive mounting flange and the oil supply line.
11. Pull the sprocket off the crankshaft and remove the timing chain tensioner.
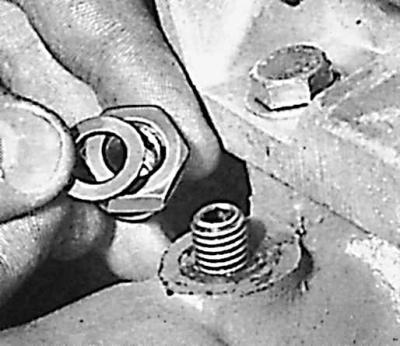
12. Remove the flywheel drive and clutch disc, oil pan, oil pump plug, oil pump mounting nut and bolt, and then remove the oil pump.
13. Turn the engine 180°, remove the intermediate plate from the cylinder block, remove the camshaft, and then use a puller to remove the sprocket from the camshaft.
14. Remove the tappets and install them in the sequence they occupy in the engine.
15. Mark the main bearing caps, as well as the connecting rods and their caps (from the fuel pump side).
16. Remove the main bearing caps and connecting rod caps.
17. Remove the crankshaft from the engine cylinder block.
18. Remove the pistons and connecting rods from the cylinders.
19. Install the liners together with the covers in the sequence they occupied in the engine.
Assembly
Attention! Before assembling the engine, check all parts and install only clean and in good technical condition parts.
Attention! Observe: required connections of interacting parts, correct mutual arrangement of these parts and their correct installation in accordance with their designations.
1. Replace all gaskets and spring washers that prevent the bolts from loosening.
2. Clean the mating surfaces of the gaskets and the parts being connected. Do not use abrasive materials or sharp tools for cleaning. These surfaces must not show any signs of impact, abrasion or scratches.
3. The oil passage holes in the engine block should be sealed with copper plugs coated with Loctite Frenetanch sealing paste.
[The original text is provided on an online resource FORDBOOK]