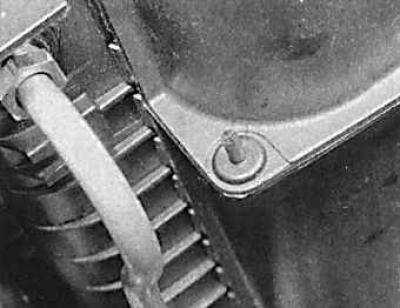
Upper radiator shroud, plastic bracket and pin
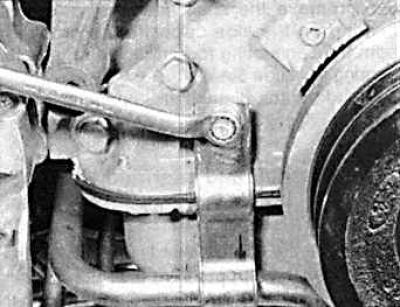
Cooling system pipe hanger mounting bolt
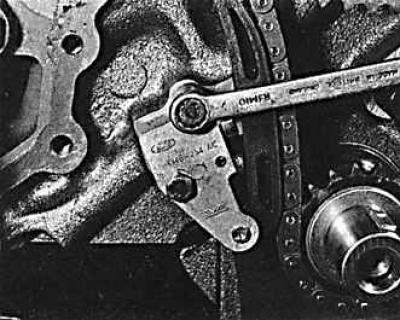
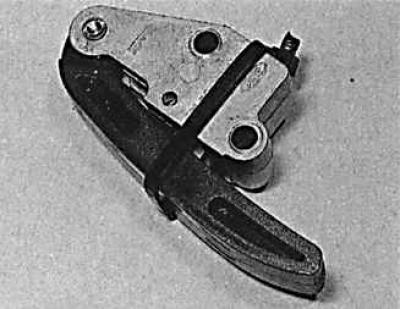
Installing the chain tensioner
Releasing the chain tensioner plunger
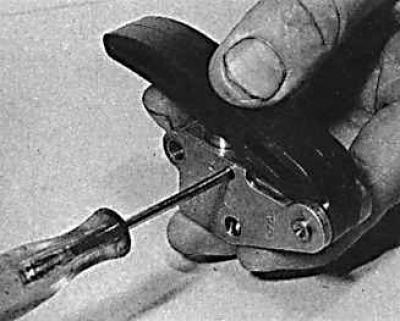
Fixing the chain tensioner plunger
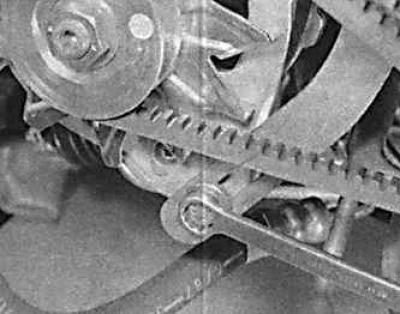
Alternator Drive Belt Tensioner Bolt
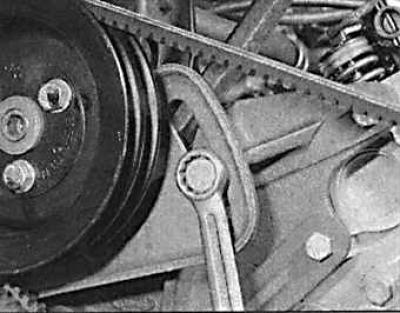
Power steering pump drive belt tensioner bolt
1. By turning the crankshaft by the central bolt of the torsional vibration damper, set the piston of cylinder 1 to the ignition point (12° before TDC). The correctness of the installation can be checked by removing the distributor cap, while the distributor rotor should be aligned with the contact of the high-voltage wire going to cylinder number 1.
2. Remove the ground wire from the battery.
3. Remove the air filter cover together with the air flow sensor and hoses.
4. Remove the oil filler cap.
5. Drain the coolant from the cooling system.
6. Disconnect the water pump and expansion tank connection hose.
 |
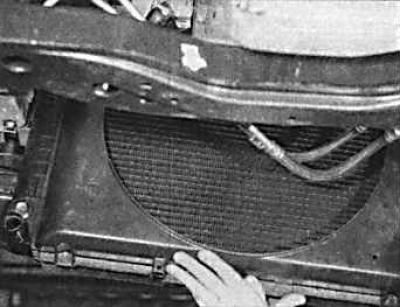 |
7. Remove the upper radiator shroud and radiator.
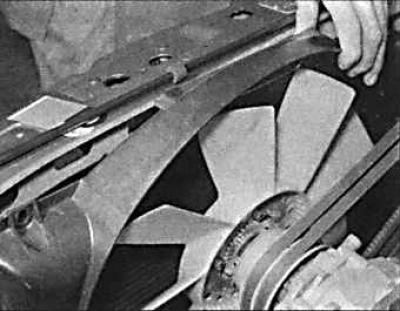
8. Remove the fan from the water pump hub.
Attention! The fan mounting nut has a left-hand thread.
9. Disconnect the cooling system hoses from the water pump fittings.
10. Unscrew the bolt securing the coolant hose hanger from the front cover.
11. Remove the auxiliary drive belt.
12. Unscrew 4 bolts and remove the crankshaft pulley.
 |
 |
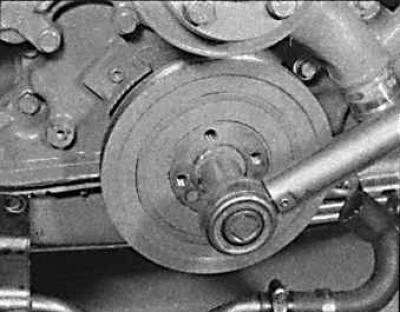
13. Lock the crankshaft by the flywheel ring gear, unscrew the central bolt securing the vibration damper and remove it using a special puller.
14. Drain the engine oil from the engine.
15. Disconnect the wires, unscrew and remove the starter.
16. Carefully lift the engine with a lifting mechanism and then unscrew the engine holders.
17. Check that the steering wheel is in the straight ahead position and mark the position of the intermediate shaft lower clamp and steering gear pinion with paint or a marker, then disconnect the intermediate shaft from the steering gear.
18. Disconnect the brake pipes from the front suspension beam.
19. Support the beam using a suitable lift and a wide board.
20. Unscrew the bolts securing the beam to the bottom of the car. Tilt the beam so that access to the oil pan is free.
21. Unscrew the bolts and nuts securing the oil pan and remove it from under the engine.
22. Unscrew the 9 bolts securing the timing cover and remove the cover together with the water pump.
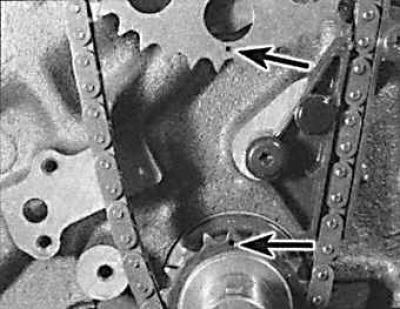
23. Check that the marks (indicated by arrows) on the sprockets are facing each other. Otherwise, turn the crankshaft until the marks align.
24. Unscrew and remove the timing chain tensioner.
25. Fix the camshaft sprocket and unscrew the sprocket mounting bolt.
26. Remove the camshaft sprocket together with the chain and remove the chain from the crankshaft sprocket.
27. If necessary, remove the sprocket with key and chain guide from the crankshaft.
28. Thoroughly clean the mating surfaces from traces of old gaskets.
29. Check the position of the keyways on the camshaft and crankshaft. They should be facing each other.
30. Install the chain guide and sprocket with key onto the crankshaft.
31. Install the chain onto the crankshaft sprocket.
32. Install the chain on the camshaft sprocket and install the sprocket together with the chain on the camshaft, while the camshaft key must enter the sprocket groove.
33. Tighten the camshaft sprocket mounting bolt.
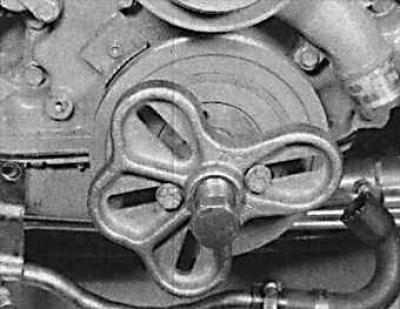
34. Compress the chain tensioner by pressing the tensioner plunger and holding it in this position, tying it with appropriate tape.
35. Install the chain tensioner in place, while removing the tape holding the plunger.
36. Install the front timing cover gasket.
37. Replace the front timing cover sealing ring.
38. Install the front timing cover.
39. Center the hole in the cover relative to the crankshaft and align it with the oil pan installation plane.

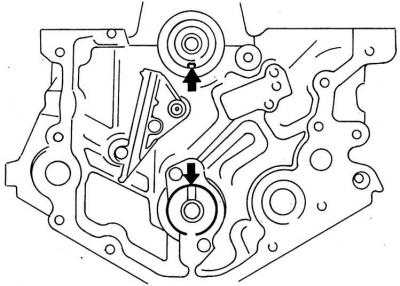
40. Screw in the bolts securing the front cover of the valve timing mechanism (indicated by arrows).
41. Thoroughly clean the mating surfaces of the cylinder block and oil pan.
42. Install a new gasket into the oil pan grooves.
43. Apply sealant to the front and rear areas of the oil pan.
44. Apply a compound that prevents loosening to the bolt threads, install the oil pan and tighten the bolts.
45. Lubricate the working edges of the sealing ring and the mating surface of the torsional vibration damper with engine oil and install the damper on the crankshaft.
46. Tighten the central bolt of the vibration damper to the appropriate torque.
47. Install the crankshaft pulley.
48. Install the beam and brake pipes.
49. Connect the intermediate shaft to the steering gear.
50. Install the starter and connect the wires.
51. Install the auxiliary drive belt.
52. Install the fan and radiator.
53. Install the air filter cover.
54. Fill the engine with engine oil and coolant into the engine cooling system.