1. Remove the decorative engine cover (see Removal and installation of a decorative casing of the engine).
2. Disconnect a wire from the minus plug of the storage battery.
3. Remove the cylinder head cover (refer to Cylinder Head Cover Gasket Replacement).
4. Hang the front of the car and place on a secure support. Remove the right front wheel.
5. Remove the crankcase protection (see Removal and installation of mudguard and crankcase protection).
6. Remove the right front fender liner (see Removal and installation of wheel mudguards and fender liner).
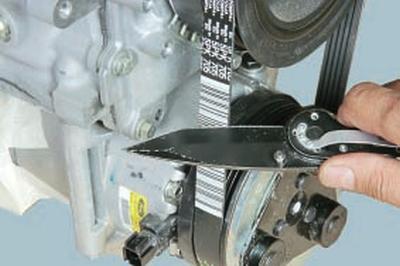
7. Remove the A/C compressor drive belt by cutting it with a knife.
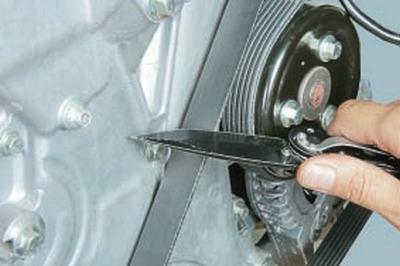
8. Remove the accessory drive belt by cutting it with a knife.
9. Set the piston of the 1st cylinder to the TDC position of the compression stroke (see Setting the No. 1 Cylinder Piston to TDC on the Compression Stroke).
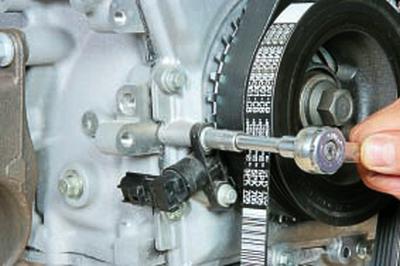
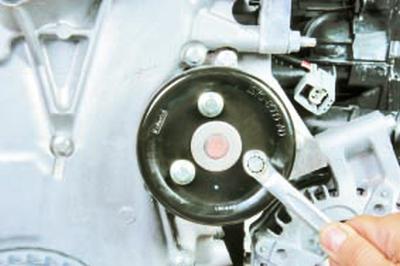
10. Turn out bolts of fastening and remove the gauge of position and frequency of rotation of a cranked shaft.
NOTE: The timing chain replacement steps are shown below on a removed 2.0L Duratec-HE engine for clarity. The timing chain for the 2.3L Duratec-HE engine is replaced in the same way.
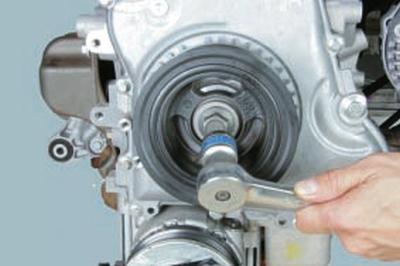
11. Turn out a bolt of fastening of a pulley of a cranked shaft..
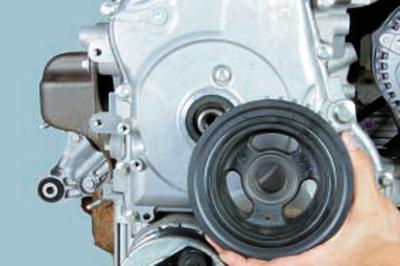
12….and remove the pulley.
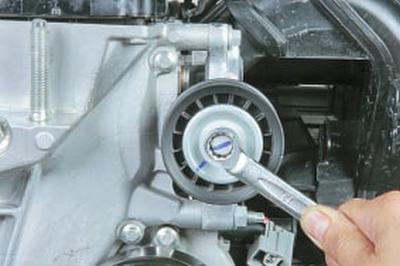
13. Turn out a bolt of fastening …
14.... and remove the intermediate roller.
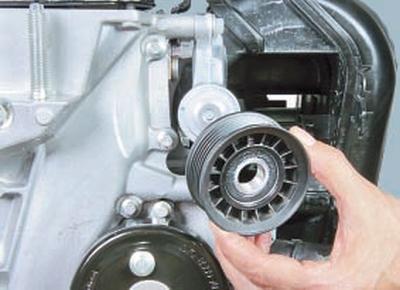
15. Turn out three bolts of fastening of a pulley of a drive of the water pump …
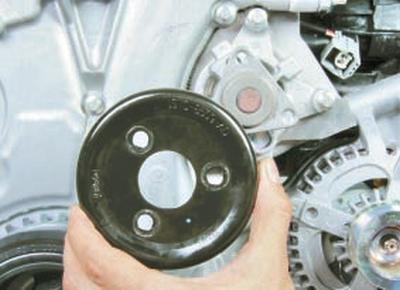
16….and remove the pulley.
17. Securely support the engine.
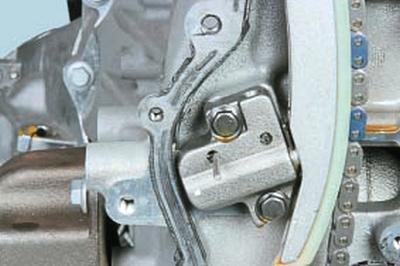
18. Remove the right suspension support of the power unit by unscrewing the two nuts of its fastening to the bracket on the engine and unscrewing the two bolts of fastening to the side member of the body.

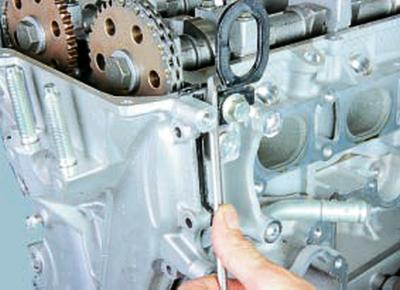
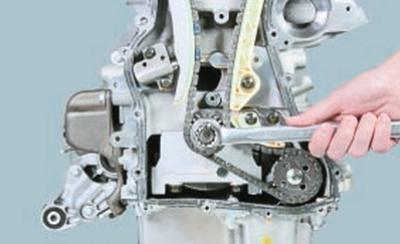
19. Turn out twenty three bolts of fastening of a cover of a drive of the gas-distributing mechanism..
20….carefully pry off the edge of the cover with a screwdriver…
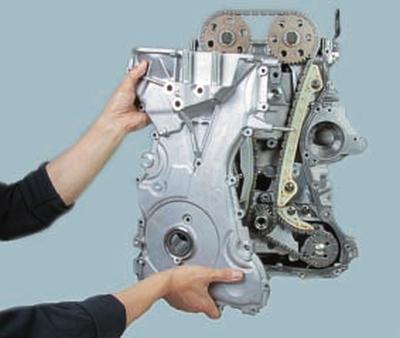
21.... and remove the timing cover.
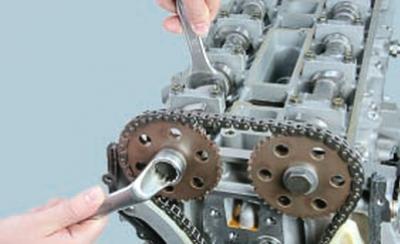
22. Loosen the camshaft sprocket bolts.
23. Check the installation of the piston of the 1st cylinder in the TDC position of the compression stroke (see Setting the No. 1 Cylinder Piston to TDC on the Compression Stroke).
24. Pressing with a thin screwdriver on the ratchet of the chain tensioner through the hole in it, unlock the tensioner, then drown the tensioner rod by pressing on its shoe..
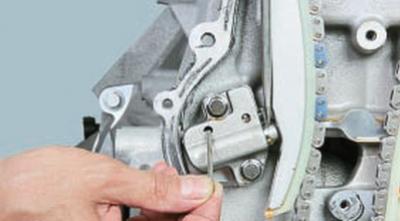
25….and fix the tensioner rod in the recessed position by inserting a suitable rod into the hole.
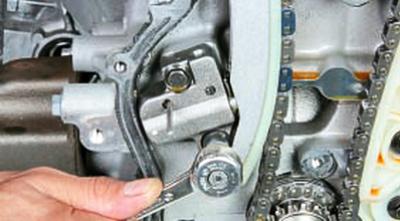
26. Turn out two bolts of fastening..
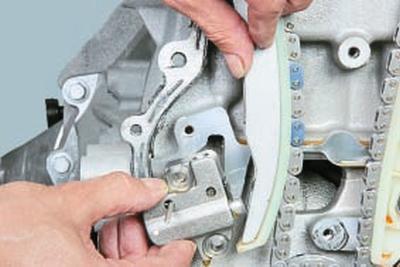
27.... and remove the chain tensioner.

28. Remove the chain tensioner shoe.

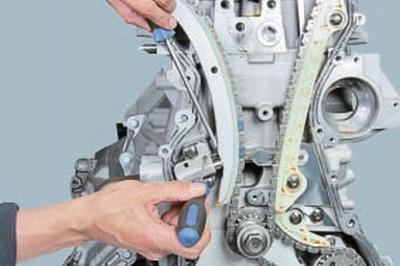
29. Remove one lower and one upper mounting bolt..
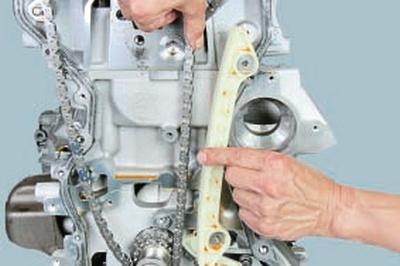
30.... and remove the chain guide.
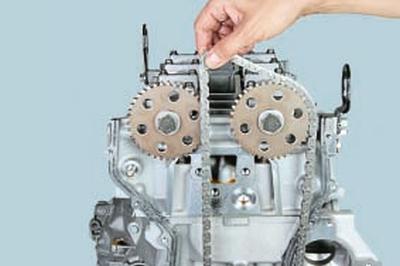
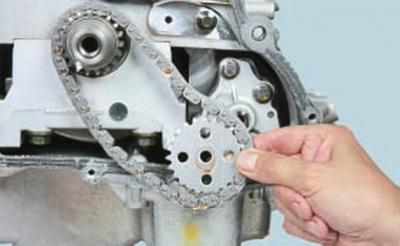
31. Remove the timing chain.
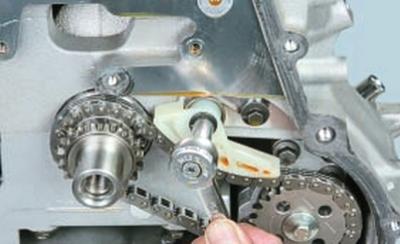
32. If it is necessary to replace the oil pump drive chain, remove the mounting bolt and remove the chain tensioner shoe.
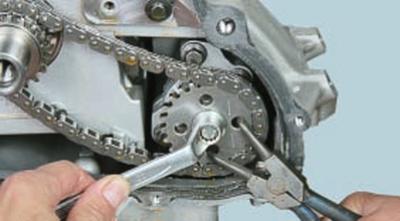
33. Turn out a bolt of fastening of an asterisk of the oil pump …
34.... and remove the sprocket along with the drive chain.
35. Inspect the sprockets of the crankshaft and camshafts, as well as the oil pump. Assess the condition of the tensioner shoe and chain guide. Replace defective parts if necessary.
36. Install the oil pump drive chain in the reverse order of removal.
37. Put a new timing chain on the crankshaft sprocket and camshaft sprockets.
38. Reinstall the tensioner shoe and chain guide.
39. Reinstall the chain tensioner and remove the retainer, bringing the tensioner into position.
40. Clean the seating surfaces of the timing cover and apply FORD WSE-M4G323-A4 silicone sealant or equivalent to the cover flange with a 3 mm roller.
41. Install the timing cover.
NOTE: To ensure the tightness of the connection, the timing cover must be installed no later than 10 minutes after applying the sealant.
42. Tighten the camshaft sprocket bolts.
43. Install all parts in the reverse order of removal. Replace the crankshaft pulley bolt with a new one, tighten it to 100 Nm (10 kgf·m) and then turn 90°. After installing the crankshaft pulley, remove the locking bar from the camshafts.
Visitor comments