To replace the cylinder head gasket on a 1.6L Duratec Ti-VCT engine, follow these steps.
You will need: all the tools needed to remove the cylinder head cover, timing belt, camshafts, collector, as well as TORX T25 and T55 wrenches, a flat-blade screwdriver, pliers, side cutters.
1. Reduce the pressure in the supply system (see Reducing the pressure in the engine supply system).
2. Drain the liquid from the engine cooling system (see Coolant Change).
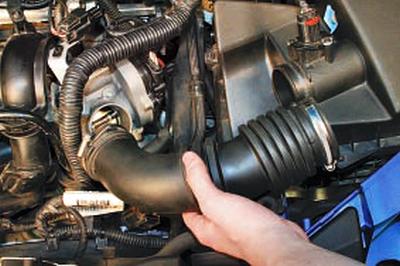
3. Remove the air supply sleeve (refer to Removing and installing the air filter and intake silencer).
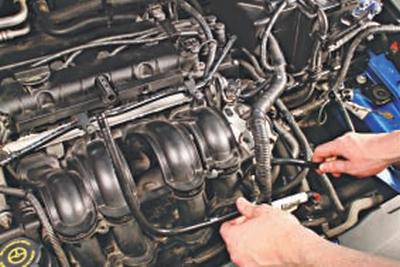
4. Remove the crankcase ventilation system pipe (see Cleaning the Crankcase Ventilation System).
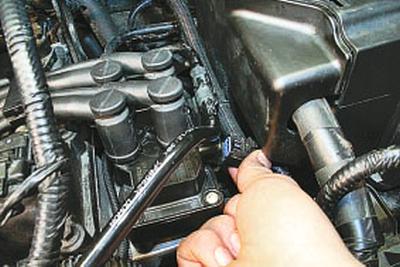
5. Compress clamps and disconnect block of a plait of wires from the coil of ignition.
6. Remove all spark plugs (see Spark Plug Replacement and Maintenance).
7. Remove the cylinder head cover (refer to Cylinder Head Cover Gasket Replacement).
8. Remove the timing belt (refer to Inspection and replacement of the timing belt for the 1.6L duratec ti-vct engine).
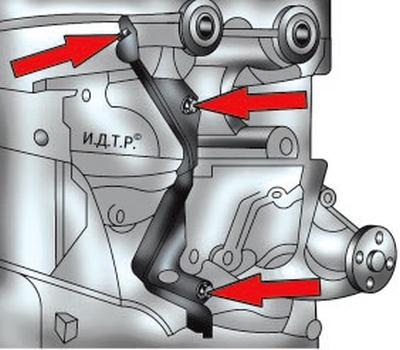
Pic. 5.25. The rear cover of the timing mechanism of the Duratec Ti-VCT engine with a volume of 1.6 liters.
9. Turn out three bolts of fastening of a back cover of a drive of the gas-distributing mechanism (pic. 5.25) and remove the cover.
10. Remove camshafts (see Replacing camshafts).
11. Remove the collector (see Removing and installing the manifold and replacing its gasket).
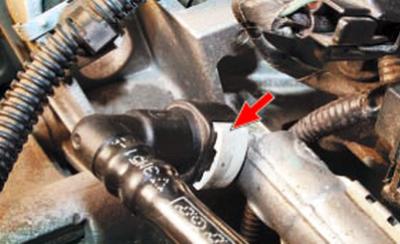
12. Disconnect the fuel supply line from the fuel rail by squeezing the coupling retainers.
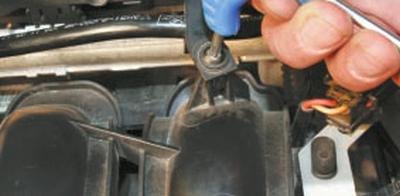
13. Turn out two screws of fastening of holders of the pipeline of giving of fuel and take the pipeline aside.
14. Remove the ramp of the electrical connectors of the injectors (see Removing and installing fuel rail).
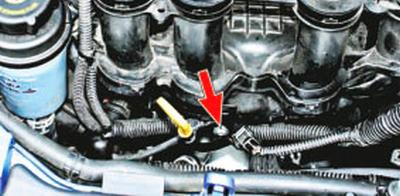
15. Turn out the screw of fastening of an arm of the indicator of level of oil.
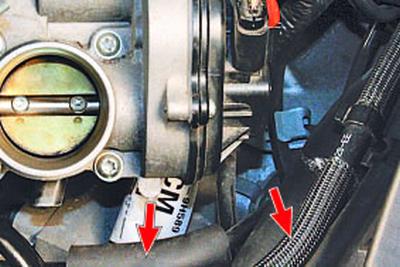
16. Disconnect from an inlet pipe hoses of the vacuum amplifier of brakes and the valve of a purge of an adsorber.
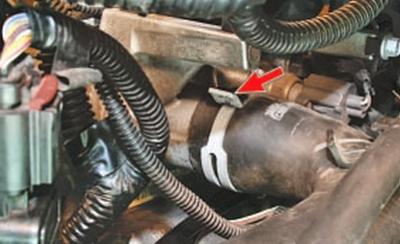
17. Squeezing the clamps with pliers and sliding them along the hoses, disconnect the hose from the outlet pipe of the water jacket to the radiator of the cooling system..
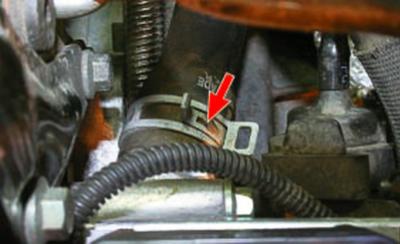
18.... and a hose to the interior heater radiator.
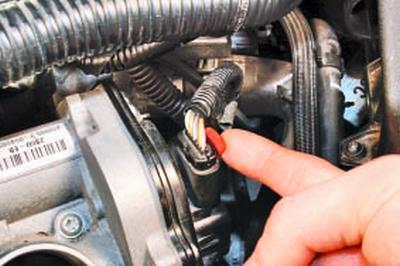
19. Slide up the latch..
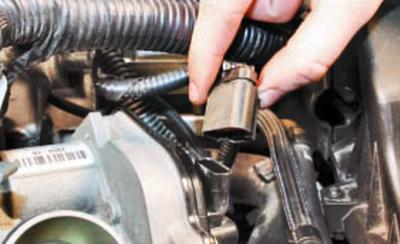
20.... and disconnect the wiring harness block from the throttle assembly cover.
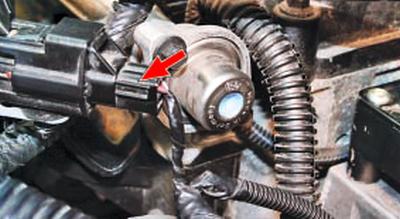
21. Squeezing the retainer, disconnect the wiring harness connector attached to the cylinder head bracket.
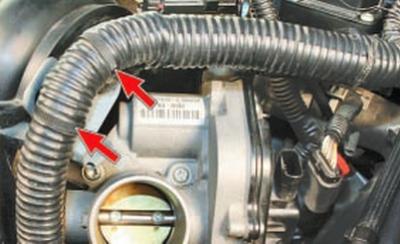
22. Use side cutters to cut the plastic clamps securing the wiring harness to the cylinder head bracket.
NOTE: Clamps are disposable. When assembling, install new clamps.
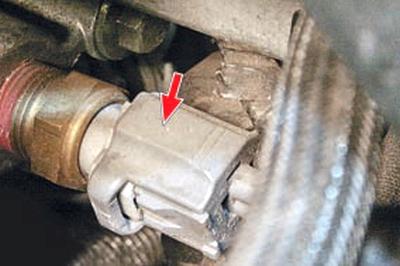
23. While pressing the latch, disconnect the wiring harness block from the coolant temperature sensor.
24. Turn out two bottom bolts of fastening of an inlet pipe.
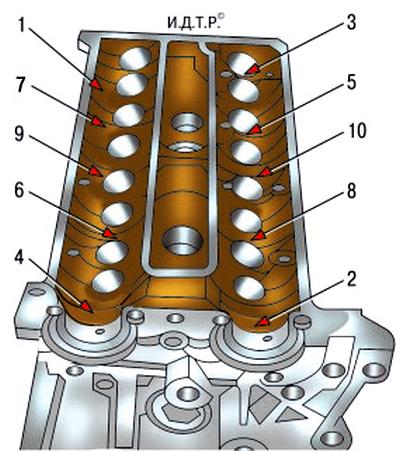
Pic. 5.26. The procedure for loosening the cylinder head bolts of the Duratec Ti-VCT engine with a volume of 1.6 liters.
25. Loosen the ten cylinder head bolts in the order shown in fig. 5.26, finally turn out the head mounting bolts and remove them together with the washers.
WARNING: The cylinder head bolts must only be removed when the engine is cold.
26. Remove the cylinder head assembly with the intake pipe and throttle assembly, as well as the gasket installed under it.
USEFUL ADVICE: It is more convenient to remove the cylinder head with an assistant, as it is quite heavy.
27. Clean the mating surfaces of the head and block.
28. Check up a head of the block on lack of a buckling. To do this, placing the ruler with an edge on the surface of the head, first in the middle along, then across and diagonally, measure the gap between the surface of the head and the ruler with a feeler gauge. Replace the cylinder head if the clearance is greater than 0.1mm.
29. Install the cylinder head in the reverse order of removal, taking into account the following:
– Remove from carving openings of bolts of fastening of a head of the block of cylinders oil or a cooling liquid which got there at removal of a head;
– Be sure to install a new block head gasket, its reuse is not allowed;
- Lubricate the bolts with engine oil;
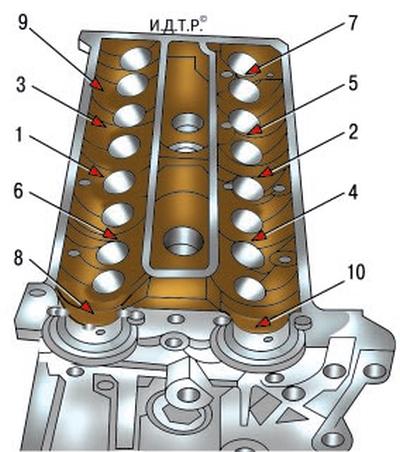
Pic. 5.27. The order of tightening the cylinder head bolts of the Duratec Ti-VCT engine with a volume of 1.6 liters.
– Tighten bolts on the cold engine in the order shown in fig. 5.27, in three steps:
- 1st - torque 15 Nm (1.5 kgf·m);
- 2nd - torque 30 Nm (3.0 kgf·m);
- 3rd - tighten by an angle of 90°.
30. Establish all removed details and knots in an order, the return to removal. After installing the camshafts and the timing belt, check and, if necessary, adjust the clearances in the valve drive (see Valve clearance adjustment).
31. Adjust the tension of the timing belt (see Checking and replacing the timing belt for a 1.6L duratec ti-vct engine).
To replace the cylinder head gasket on 2.0L and 2.3L Duratec-HE engines, follow these steps.
You will need: all the tools needed to remove the cylinder head cover, timing belt, camshafts, collector, as well as TORX T25 and T55 wrenches, a flat-blade screwdriver, pliers, side cutters.
1. Reduce the pressure in the supply system (see Reducing the pressure in the engine supply system).
2. Drain the liquid from the engine cooling system (see Coolant Change).
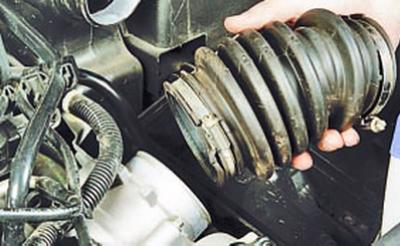
3. Remove the air supply sleeve (refer to Removing and installing the air filter and intake silencer).
4. Compress clamps and disconnect a block of a plait of wires from the coil of ignition.
5. Remove all spark plugs (see Spark Plug Replacement and Maintenance).
6. Remove the cylinder head cover (refer to Cylinder Head Cover Gasket Replacement).
7. Remove the timing chain (refer to Duratec-he 2.0L and 2.3L Timing Chain Replacement).
8. Remove camshafts (see Replacing camshafts.
9. Remove the collector (see Removing and installing the manifold and replacing its gasket).
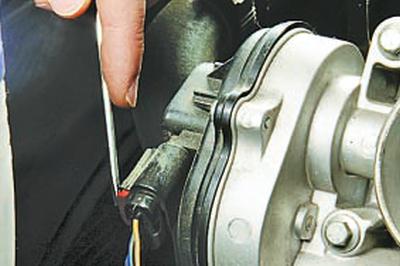
10. Slide the latch..
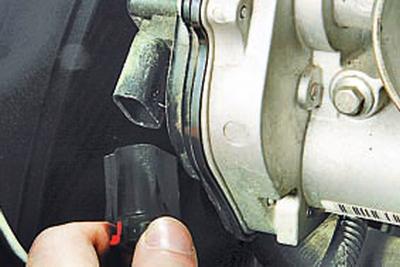
11.... and disconnect the wiring harness block from the throttle assembly cover.
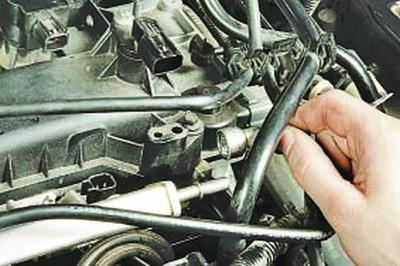
12. Disconnect the fuel line from the fuel rail (see Removing and installing fuel rail).
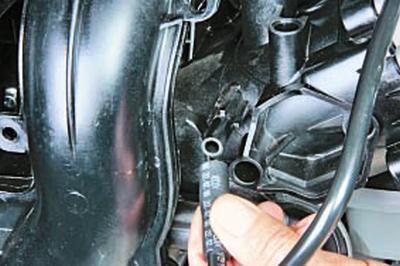
13. Disconnect the adsorber purge hose from the fitting on the inlet pipe.
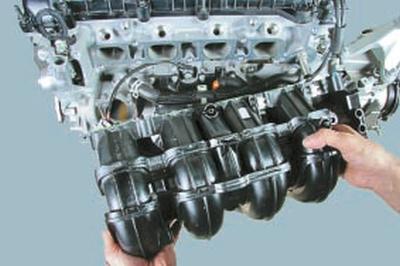
14. Remove the intake pipe assembly with the throttle assembly (refer to Intake Pipe Gasket Replacement).
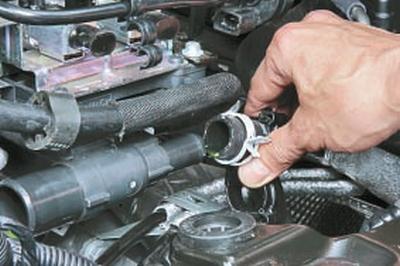
15. Disconnect from the coolant distributor the hose to the interior heater radiator and the inlet hose of the radiator of the engine cooling system.
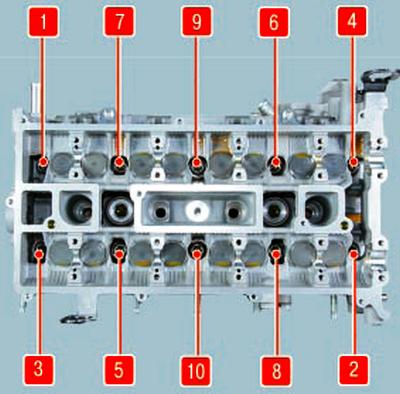
Pic. 5.28. The procedure for loosening the cylinder head bolts of the Duratec-HE engine with a volume of 2.0 liters.
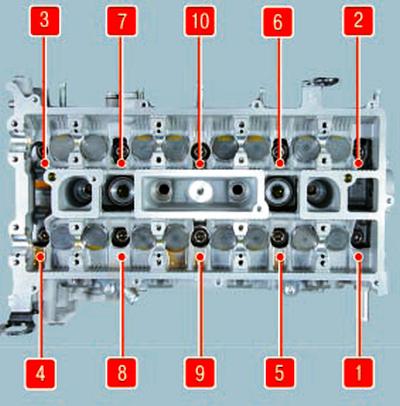
Pic. 5.29. The procedure for loosening the cylinder head bolts of the Duratec-HE engine with a volume of 2.3 liters.
16. Loosen the ten cylinder head bolts in the order shown in fig. 5.28 and 5.29 (depending on engine type), and then completely unscrew the head mounting bolts and remove them together with the washers.
WARNING: The cylinder head bolts must only be removed when the engine is cold.
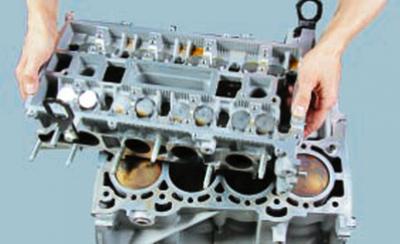
17. Remove the block head and the gasket installed under it.
USEFUL ADVICE: It is more convenient to remove the cylinder head with an assistant, as it is quite heavy.
18. Clean the mating surfaces of the head and block.
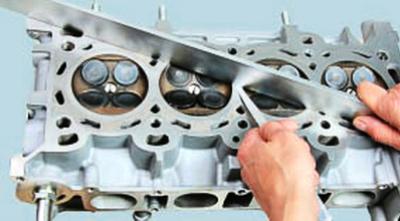
19. Check up a head of the block on lack of a buckling. To do this, placing the ruler with an edge on the surface of the head, first in the middle along, and then across and diagonally, measure the gap between the surface of the head and the ruler with a feeler gauge. Replace the cylinder head if the clearance is greater than 0.1mm.
20. Install the cylinder head in the reverse order of removal, taking into account the following:
– Remove from carving openings of bolts of fastening of a head of the block of cylinders oil or a cooling liquid which got there at removal of a head;
– Be sure to install a new block head gasket, its reuse is not allowed;
- Lubricate the bolts with engine oil;
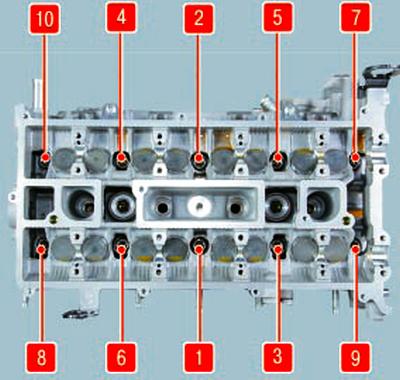
Pic. 5.30. The order of tightening the cylinder head bolts of the Duratec-HE engine with a volume of 2.0 liters.
– Tighten the bolts on a cold 2.0L Duratec-HE engine in the order shown in fig. 5.30, in three steps:
- 1st - torque 15 Nm (1.5 kgf·m);
- 2nd - torque 30 Nm (3 kgf·m);
- 3rd - tighten by an angle of 90°.
NOTE: Tighten the 2.3L Duratec-HE engine bolts in the reverse order of that shown in fig. 5.29, in four stages: 1st - with a torque of 5 Nm (0.5 kgf·m); 2nd - torque 15 Nm (1.5 kgf·m); 3rd - torque 45 Nm (4.5 kgf·m); 4th - tighten by an angle of 90°.
21. Establish all removed details and knots in an order, the return to removal. After installing the camshafts and the timing belt, check and, if necessary, adjust the clearances in the valve drive (see Valve clearance adjustment).
22. Adjust the timing chain tension (refer to Duratec-he 2.0L and 2.3L Timing Chain Replacement).
Visitor comments