


Handbrake
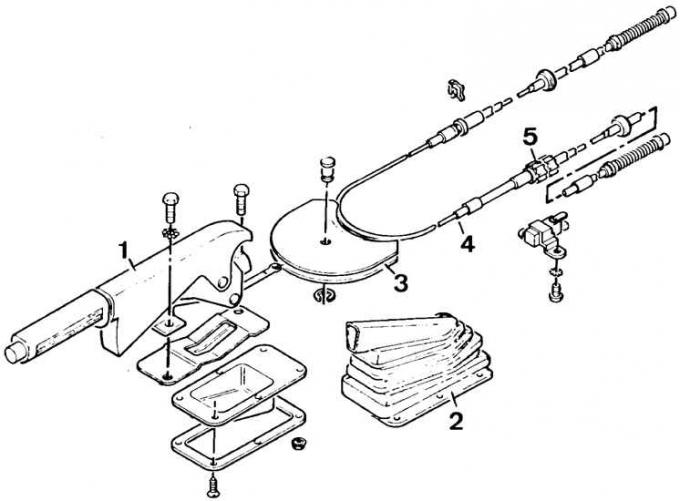
1 – handbrake lever, 2 – protective cover, 3 – crossbar, 4 – cable, 5 – adjusting nut with lock nut
Adjusting the handbrake
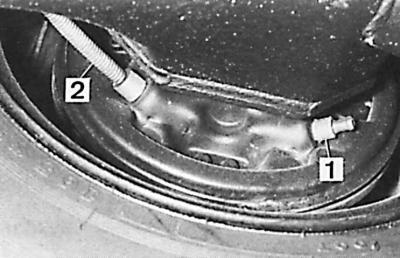
1 – handbrake support sleeve, 2 – handbrake cable
1. Raise and secure the rear of the vehicle.
2. With the handbrake lever released, press the brake pedal several times and check whether the automatic clearance adjustment mechanism has set the brake pad clearance correctly.
3. Check the axial clearance of the control rods in the support bushings located at the ends of the cables on the supporting brake shields (see Fig. Adjusting the handbrake), which should be 0.5–1.0 mm.
4. If necessary, adjust the working length of the handbrake cable using the plastic adjusting nut 5 (see Fig. Handbrake), located near the drive shaft, after unscrewing its lock nut. After adjustment, tighten the lock nut of the adjusting nut until 2-4 characteristic crackles appear.
5. Check the operation of the handbrake.
6. Lower the car.