Contents: ONS and V6 engines ↳ DOHC Engine ↳
ONS and V6 engines
Removal
Remove the upper fan guide shroud.
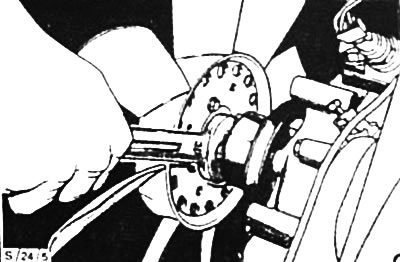
Using a 32 mm or 36 mm bent wrench, loosen the fan mount to the coolant pump hub.
Note: The fan mounting nut has a left-hand thread and must be turned to the right.
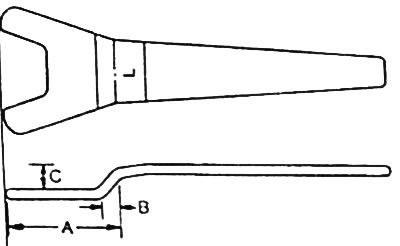
A suitable wrench can be made independently A = 50 mm, B = 10 mm, C = 10 mm.
When loosening the nut, compress the coolant pump drive V-belt to secure the hub and prevent it from turning. If the nut is very tight, hit the wrench with a suitable hammer to loosen the nut.
Remove the fan.
If the fan wheel and viscous coupling need to be separated, unscrew the 4 mounting bolts and pull out the coupling.
Installation
If disconnected, insert the viscous coupling into the fan wheel and tighten the mounting bolts to a torque of 9 Nm (for a V6 engine - 20 Nm).
Caution: To avoid damaging the threads and coupling, under no circumstances should the bolts be tightened more than 10 Nm (for the V6 engine - 23 Nm).
Screw the fan with the coupling to the coolant pump hub. Hold the hub with a V-belt.
Install the upper fan shroud.
DOHC Engine
Removal
Disconnect the negative (-) battery cable.
Caution: When the battery is disconnected, the contents of electronic memory devices, such as engine fault codes or radio codes, are erased. Before disconnecting, also read the instructions in the chapter "Removal and installation the battery".
Place the car on trestles.
Disconnect the fan motor multi-pin connector and remove the wire clamp.
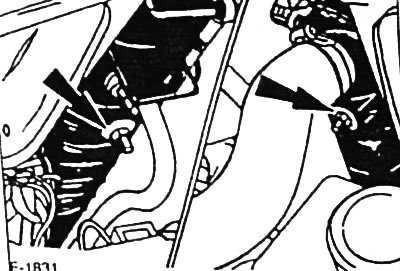
Unscrew the nuts securing the air duct "arrow" on the radiator.
Bend the air duct away from the radiator at the top, lift it, release the lower clamps and remove it together with the fan in a downward motion.
Installation
Insert the air duct from below. At the same time, insert the lower projections of the air duct into the clamps on the radiator.
Tighten the mounting nuts to a torque of 10 Nm.
Connect the multi-pin plug connector of the fan motor.
Connect the battery ground (-) cable.
If available, set the clock and enter the radio theft protection code.