Contents: Removal ↳ Installation ↳
Removal
Disconnect the negative (-) battery cable.
Caution: When the battery is disconnected, the contents of electronic memory devices, such as engine fault codes or radio codes, are erased. Before disconnecting, also read the instructions in the chapter "Removal and installation the battery".
Disconnect the multi-pin plug near the headlight cover. Disconnect the plug connector at the headlight beam angle adjustment actuator motor (if equipped).
Remove the turn signal lamp, see p. 170.
Remove the radiator grille, see p. 130.
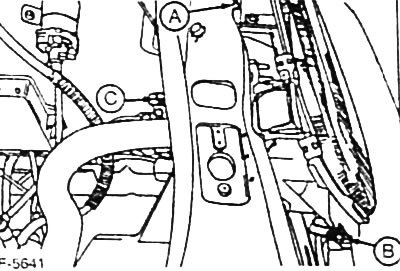
Loosen the bolts securing the upper and rear holders -A, C-.
Just loosen the side mounting bolt, do not unscrew it.
Pull the headlight forward and remove it to the side.
Installation
If a new headlight is installed, the side mounting bolt must be moved to it.
Connect the headlight multi-pin connector.
Insert the headlight. To do this, insert the support pins on the outside of the headlight housing into the partition from the side. Tilt the headlight inward toward the holder and align it. Tighten the side mounting bolt.
Place it against the holders and tighten the upper and rear mounting bolts.
Install the turn signal light, see p. 170.
Install the radiator grille, see p. 130.
Connect the ground (-) cable to the battery.
If available, set the clock and enter the radio theft protection code.
Check the operation of the headlights.
Have your headlights adjusted at a service station.