Attention: From 11/92 to 8/94, cars with ABS used a modified propeller shaft with only one retaining ring (from the outside). If the universal joint shaft is replaced, then the constant velocity universal joint must also be replaced (SHRUS). A new CV joint can be installed on the old shaft along with two circlips.
Disassembly
Remove the rear axle driveshaft.
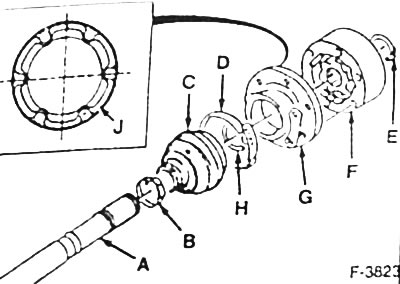
Loosen clamps -B, D- on both sides of the shaft securing the bellows -C-. Move rubber cuffs.
Using round nose pliers, eg HAZET 1844A-10, remove the outer circlips -E- from the outer and inner sliding joints -F-.
Move the CV joints together with the protective cover -G- from the shaft -A-.
Remove inner circlips -H- from shaft.
Remove the corrugated covers from the shaft.
Assembly
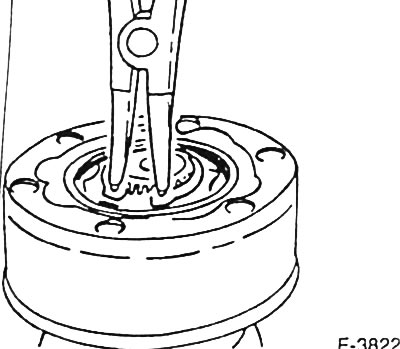
From 9/86: clean the contact surface of the protective cover of the mobile CV joint from dirt and old sealant.
Put a new corrugated cover with new clamps on the shaft.
Install a new inner circlip into the groove on the shaft.
From 9/86: Apply sealant -J- of FORD specification SPM-2G9121-A to protective cover -G- as shown in illustration F-3823.
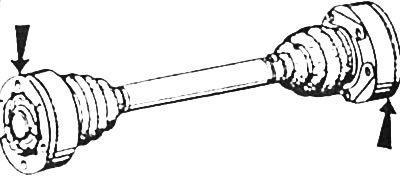
To put on a shaft together with a protective cover mobile SHRUS.
Attention: All-round orientation grooves -arrows- must point outwards.
Install a new outer circlip into the groove on the shaft.
Install the second hinge in the same way.
Evenly fill the outer and inner CV joints with FORD special grease, specification WSD-M1C237-A. The filling volume for one CV joint is 90±10 g.
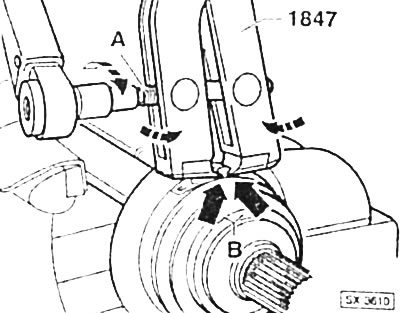
Push corrugated covers onto the CV joint. Tighten the clamps with HAZET 1847 pliers. Attach the pliers as shown in the figure. The blades of the pliers must rest against the corners -arrows of the B- clamp. In this position, tighten the bolt -A- with a torque wrench to 19 Nm and thus tighten the clamp. The tightening of the clamp on the small diameter of the corrugated cover is performed in a similar way.
Visitor comments