Withdrawal
Remove luggage compartment cover.
Limousine
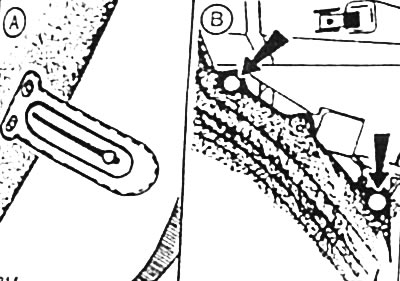
Unclip clips -arrows- from side trim at rear and remove front trim.
Loosen the rear wheel nuts on the vehicle standing on the platform. Mark the position of the front wheel on the hub with paint. Thanks to this, the balanced wheel can be installed again in its original position.
Raise the car on jack stands.
Limousine: remove the wheel.
Using a garage jack, support the diagonal arm through a wooden stand.
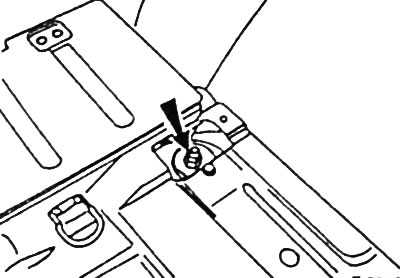
TURNIER: Remove upper nut -arrow- for shock absorber.
Limousine: unscrew the fastening nut and remove the bolt.
Vehicle with ride height control: Detach the ride height control connecting line from the shock absorber. Detach the linkage from the ball joint.
Loosen the shock absorber mounting bolt on the diagonal arm.
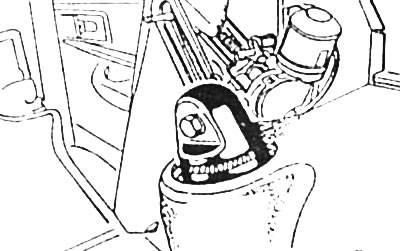
Take out the shock absorber.
Installation
Before installing the shock absorber, check see p. 96.
Stretch the shock absorber and insert from below. Make sure that the shock absorber enters the upper mount.
Attach the shock absorber below to the diagonal lever and tighten the fastening bolt to a torque of 80 Nm.
Screw in the upper fastening nut and tighten to 85 Nm.
Vehicle with ride height control: Attach the ride height control connecting pipe to the shock absorber. Press the rods at the ball joint with a pipe wrench.
If removed, screw on the wheel, after ensuring the coincidence of the marks applied before removing.
Lower the vehicle, tighten the wheel nuts crosswise to 100 Nm.
Limousine: Attach and secure the side trim.
Install the luggage compartment cover.
Visitor comments