Warning: If suspension or steering fasteners are lost or unscrewed, they must be replaced with new ones, do not reuse them. Fasteners are replaced with new ones of the same quality design and marking.
Withdrawal
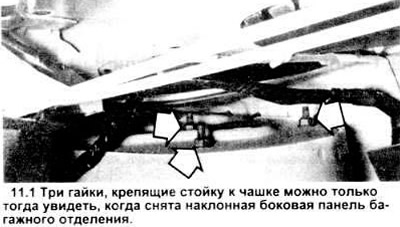
1. Open a trunk and remove the lateral inclined panel from the corresponding party. Loosen but do not remove the three nuts securing the strut to the body cup (see picture).
2. Loosen the wheel nuts, raise the rear of the car, securely place on stands. Block the front wheels, remove the rear.
3. Separate the stabilizer bar and its connecting element. then unscrew the stabilizer bush bracket from the floor (section 10).
4. Having unscrewed the bolt, remove the lower support bracket of the pressure control valve in the brake system from the lever (see chapter 9).
5. Unscrew the brake hose bolts from the bracket on the rack (see picture).

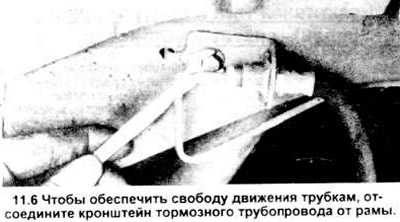
6. To provide additional clearance in the brake lines. unscrew the bolt securing the pipelines to the frame (see picture).
7. Loosen but do not remove the lock bolt between the shaft and the column.
8. Unscrew the nut securing the jet thrust to the knuckle, remove the washer and rubber bushings (section 14), then move the strut/knuckle assembly back just enough to free the tie rod from the knuckle.
9. Unscrew a coupling bolt of a fist and a rack.
10. Using a screwdriver, spread the brace slightly to loosen the connection between the post and knuckle (see figure 8.9).
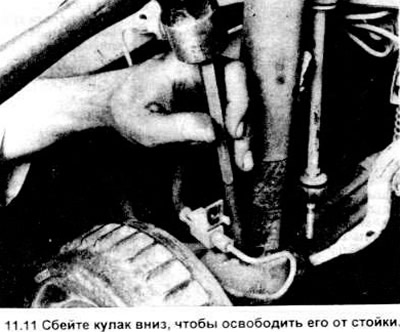
11. Using a hammer and punch, carefully knock down (take off) shaft from rack (see picture). If it jams, lubricate with oil with good penetrating power the junction of the fist and the rack. Do not hit or bend the brake pipe.
12. Turn off three top fixing nuts from inside a luggage compartment, disconnect a rack from a fist, remove rack knot from the car.
Installation
13. Guide the shock absorber and coil spring assembly into the wheel opening by inserting the three support pins into the shock column holes. Install the bottom (bottom) stand on the knuckle so that it does not fall then hand-tighten the three nuts.
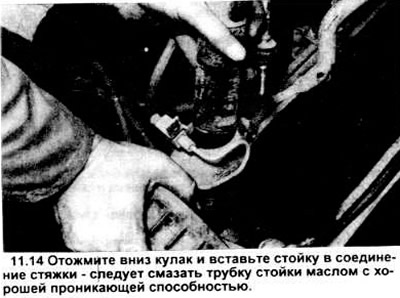
14. Pull down, aligning the ear on the back of the upright with the brace groove on the knuckle, and insert the upright into the knuckle (see picture). Install the pinch bolt, but do not tighten it.
15. Pull the rack back and insert the tie rod into the fist. Install the rubber bushings, washer and nut, tightening to the correct torque.
16. Tighten the pinch bolt between the knuckle and the strut to the correct torque.
17. Attach the brake line bracket to the frame by tightening the bolt securely.
18. Connect the other brake hose bracket to the support bracket on the strut, tighten the bolt securely.
19. Insert the stabilizer link into the shaft, place the stabilizer bracket on the floor panel, screw in and securely tighten the bolt.
20. Install the stabilizer bar link bushings, washer and nut Tighten the nut properly.
21. Put the wheel on, tighten the nuts, lower the car. Tighten the nuts to the required torque.
22. Tighten the top three fixing nuts to the required torque and install the side tilt panel in the luggage compartment.
Visitor comments