Warning: Disassembling the strut assembly is quite dangerous - be very careful and follow all instructions carefully to avoid serious injury. Use only a high-quality spring puller and follow the instructions provided with the tool. Once the coil spring is removed from the strut assembly, set it aside in a safe, isolated place (preferably a metal box).
2. Remove the strut assembly with the spring as described in section 6. Secure the stand in a vice so that the vice jaws secure the stabilizer connecting element bracket.
3. In accordance with the tool manufacturer's instructions, install the spring compressor on the spring and compress it so as to relieve the spring pressure on its seat (see figure). Check by gently shaking the spring.

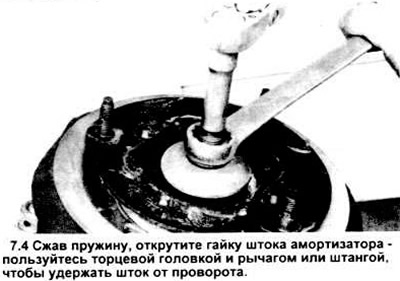
4. Loosen the shock absorber rod nut, while holding the rod with a socket wrench by its hexagonal surface (see figure) to prevent it from turning. Unscrew the nut and remove the upper concave washer.
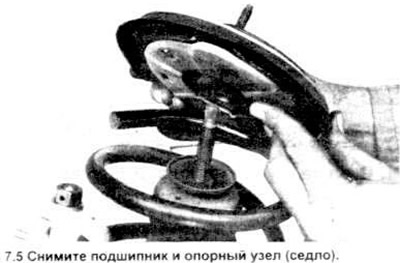
5. Remove the bearing, support unit (seat) and upper support from the rod (see figure). Check whether the bearing in the spring seat operates smoothly enough - replace if necessary.
6. Carefully remove the block with the compressed spring and put it aside in a safe place - preferably in a steel box.
7. Remove the dust boot, washer and rubber buffer from the shock absorber rod.
8. Assemble the beginning of the rack - buffer dust cover, washer and spring, then the spring seat and finish with the bearing cover on top. Remember that the large concave washer is installed under the support
9. Tighten the damper shaft nut to the required tightening torque.
10. Install the strut and spring assembly on the vehicle as described in section 6.