Contents: Removal ↳ Installation ↳
Warning: If suspension or steering fasteners are lost or loosened, they must be replaced with new ones; do not reuse them. Fasteners must be replaced with new ones of the same design, quality and marking.
Note: A special puller and adapters are required to install the axle drive into the hub. Before starting work, read all the information regarding the removal and installation of axle drives in chapter 8.
Removal
1. Loosen the wheel nuts, lift the car, securely place it on stands. Remove the wheel.
2. Remove the brake caliper and lift it with a wooden block as described in chapter 9. Disconnect the brake disc from the hub.
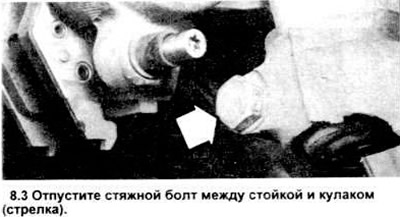
3. Loosen, but do not remove, the pinch bolt between the strut and the steering knuckle (see illustration).
4. Disconnect the steering rod from the knuckle as described in section 29.
5. Unscrew the tie bolt and the ball joint nut from the steering knuckle (see figure 5.4). Using a large lever, pull the ball joint stud out of the steering knuckle (see figure 5.5).
6. Loosen, but do not unscrew, the upper nuts securing the strut to the body cup.
7. Push the axle drive out of the hub as described in chapter 8. Support the axle drive with wire.
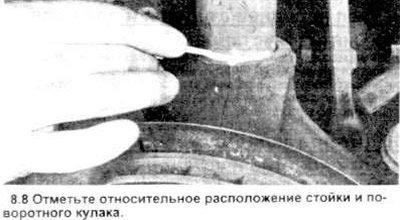
8. Mark the position of the strut relative to the steering knuckle (see figure). This will simplify the assembly later.
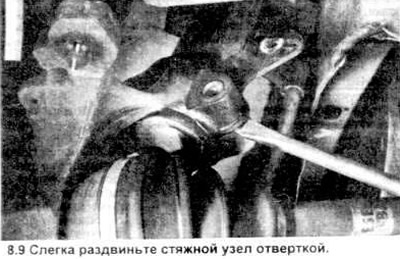
9. Unscrew the tightening bolts between the strut and the knuckle. Lubricate the strut-knuckle assembly with oil with high penetrating ability. Slightly spread the tie with a screwdriver or lever (see figure).
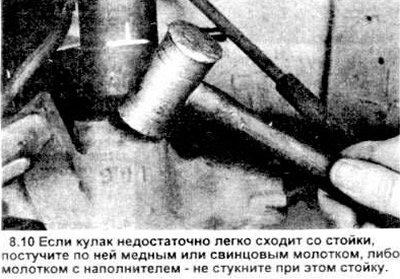
10. Remove the knuckle from the strut using a vibrating motion. If it is "stuck", carefully knock it off the hub with a copper or lead hammer. Hold the knuckle with your other hand so that it does not fall when it comes off the strut (see the picture).
Installation
11. Place the knuckle on the end of the stand, aligning the stand ear with the knuckle brace. Use the markings you made earlier to achieve this.
12. Install a new pinch bolt between the strut and the steering knuckle, do not tighten it.
13. Install the axle drive into the hub (see chapter 8).
14. Lower the lever and install the ball joint stud into the knuckle. Remember that the notch on the ball joint stud must align with the hole in the knuckle before installing the tie rod. Install a new tie rod at the front, tighten the new nut to the required tightening torque.
15. Tighten the pinch bolt between the strut and the knuckle to the required tightening torque.
16. Tighten the upper nuts securing the strut to the body cup to the required tightening torque.
17. Connect the steering rod to the knuckle arm as described in section 30.
18. Place the brake disc on the hub and install the caliper as recommended chapters 9.
19. Install the wheel and wheel nuts.
20. Lower the vehicle, tighten the wheel nuts to the required tightening torque.
[The original article is posted at: FordBook]