Contents: Removal ↳ Installation ↳
Removal is carried out basically in the same way as for the SCORPIO model manufactured before 8/94, see p. 135.
Below we describe only the differences that you should pay attention to in the new model.
When the door is opened from the outside, its lock is unlocked by means of a drive rod connected to the door opening handle. The door opening handle is connected to the lock from the inside by a rod. Each lock has an electric motor for the central locking system, as well as a control switch for the security alarm system.
Removal
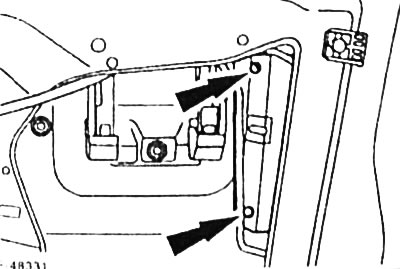
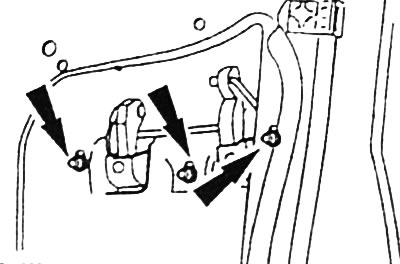
Remove the screws securing the lock cylinder cover.
Open the plastic clips on the locking mechanism levers and detach the drive rods.
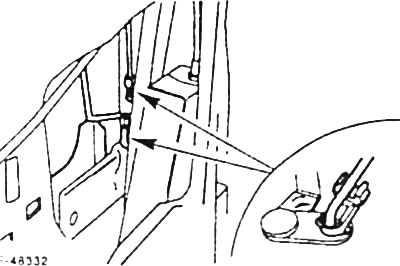
To facilitate access to the lock, unscrew the rear window glass guide fastening.
Cut the clamp of the electrical wires going to the lock.
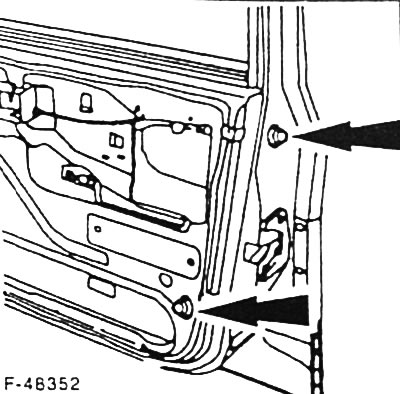
Remove the 3 lock mounting screws and disconnect its multi-pin plug connector.
Remove the lock assembly.
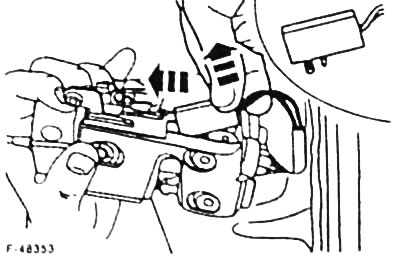
Remove the central locking system microswitch from the lock. To do this, press the microswitch up and fold it back.
If necessary, unscrew the 2 screws securing the central locking system actuator motor to the lock.
Removing the outer door handle: unscrew the 3 fastening screws and remove the handle from the outside, turn the handle 90° and disconnect the drive rod.
Installation
Before installing the door lock, clean the drive rods and apply universal grease to the places where they move in the bushings.
Hang the drive rod on the outer handle, turn the handle 90°, attach and screw on.
Attach the release mechanism rod to the lock.
Install the assembled lock into the mounting position through the large opening, screw in and tighten the 3 mounting bolts.
Insert into the lock and secure with plastic clamps of the drive rod.
Press the door release mechanism locking lever to the locked position and push the release mechanism lever all the way back. Insert and tighten the release mechanism fastening screw.
Check whether the unlocking mechanism functions correctly when the lock is locked and adjust it if necessary.
Connect the door lock multi-pin connector.
Hang the door locking mechanism electric motor rod and screw the electric motor to the door leaf. Connect the multi-pin plug connector of the electric motor.
Screw on the lock cylinder cover.
Secure the electrical wires of the lock to the door ribbing with a new clamp.
Check the functioning of the lock and eliminate any detected faults.
Stick the protective film without creases. Seal the torn areas with wide adhesive tape.
Note: If the protective film is not applied correctly, a draft will form in the car interior when the vehicle is moving.
Install door trim.
[For details, please visit the website Fordbook.ru]