Before dismantling the master cylinder, make sure that there is no low pressure in the brake booster. To do this, disconnect either the low-pressure line from the booster, or "pump" the brake pedal with the engine stopped until the force on the pedal becomes "noticeable".
ORDER OF EXECUTION
Remove the low pressure line from the brake booster and...
...disconnect the main connector from the expansion tank cover.
Unscrew the cap from the tank and place it upside down on a clean surface.
Suck out the brake fluid from the expansion tank using a pipette or syringe.
Models with manual transmission
Disconnect the connecting hose from the clutch sensor cylinder and cover the hole to prevent dirt from entering.
All models
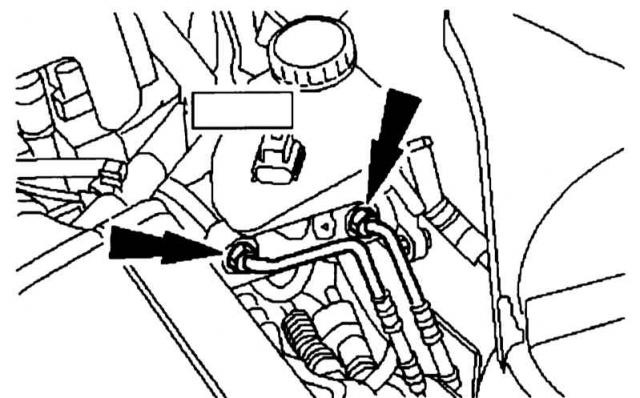
Remove both pipes (indicated by arrows) from the master cylinder and cap their ends.
Dismantling both pipes from the master brake cylinder and closing the ends with plugs.
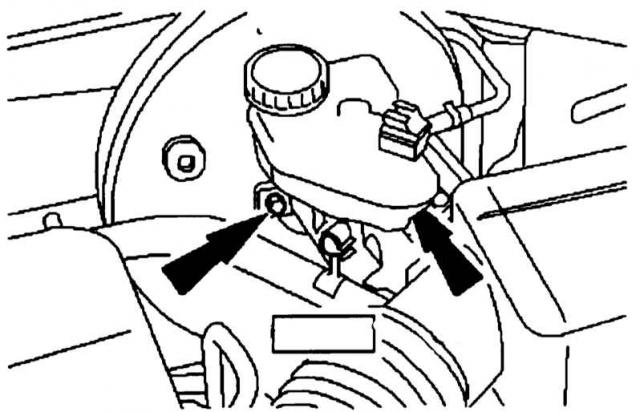
Now remove the brake master cylinder together with the brake fluid expansion tank (locations indicated by arrows) from the brake booster.
Removing the master brake cylinder with the expansion tank.
Install a new brake master cylinder with new vacuum gaskets. Lightly lubricate the gasket with Vaseline and clean the surfaces adjacent to the booster. Otherwise, foreign air may penetrate into the booster from these places, and as a result, its boosting effect will be reduced or absent altogether. In cars with EVA, check the correctness of the brake master cylinder design - standard cylinders are not suitable here.
Carry out further installation in reverse order and then bleed the brake system as described above.