The replacement of the pads is usually carried out only in pairs on both sides of the bridge. Otherwise, the brake discs will have different friction coefficients, which will subsequently, under full braking, "confidently throw" your car out of the rut. Due to the effect of heat, new brake pads change their material structure during the first 500 km: give these segments time to "recover" and do not apply full braking at first, if possible. Otherwise, the pads can quickly harden ("glass") and subsequently never restore their normal friction coefficient. In addition, meticulously pay attention to the fact that the spare brake parts have the manufacturer"s permission and the appropriate AVE for your Mondeo. If you are tormented by doubts, then it is better to show a "fig" in the direction of dubious counters with goods and "fill up" with genuine spare parts at your Ford dealer.
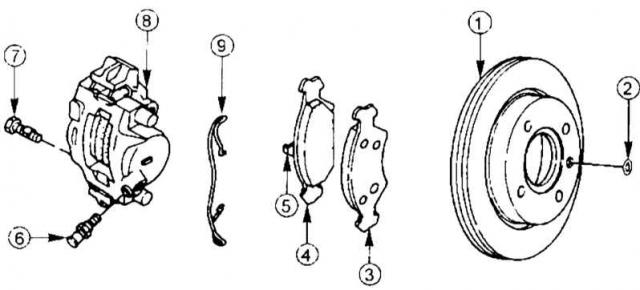
Front disc brake mechanism in detail


Front axle
|
ORDER OF EXECUTION |
- Raise the front of the car onto jack stands and remove the wheels.
- Remove the brake hose from the holder and...
- ...remove the outer mounting spring.
- Before removing the brake caliper, push it slightly outward, the brake piston gets a small gap.
- Remove the caliper from the two mounting screws 2, having first removed the caps 1 from the screws using a screwdriver.
Disc brake caliper mounting screws. |
- To disconnect the brake hose, hang the caliper with welding wire in the wheel well.
- Pull the outer brake shoe out through the retaining tab of the pressure spring and...
- ...remove it from the caliper.
- Then remove the inner brake shoe.
- Before inserting new brake elements into the collet, press back the brake pistons using the special tool "Ford 206-005 (12-014)" or a suitable screwdriver. Note: this will increase the fluid level in the master cylinder expansion tank. Immediately flush away any leaking fluid with water.
- Hold the brake discs in place and lightly sand them before installing the caliper.
- Insert the inner pad into the caliper first, then the outer pad. Pre-lubricate the contact surfaces with a thin layer of heat-resistant copper paste.
- Pull the pressure spring by the retaining tab and...
- ...then move the caliper onto the disc and secure it.
- Carry out the installation in reverse order.
- pump the brake pedal until the brake pressure is created. Only then place the pads on the brake discs.
- Now check the brake fluid level in the expansion tank. Excess fluid can be sucked out with a pipette or syringe to the "MAX" mark.
- Braking with new pads is done carefully. For example, on country roads, where you have to brake several times from about 100 km/h to 50 km/h. Allow the pads to cool down from time to time.
|
|
Rear axle
|
ORDER OF EXECUTION |
- Raise the rear of the vehicle onto jack stands, securely support it and remove the wheels.
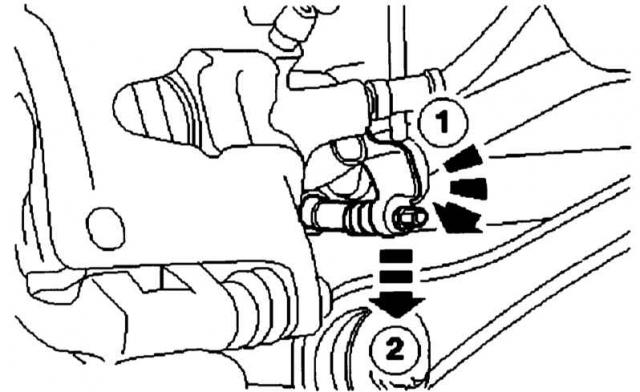
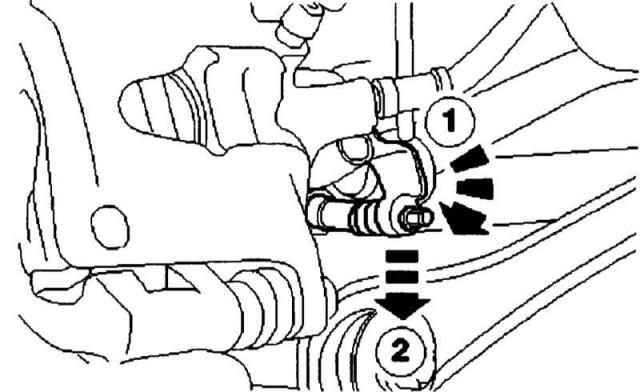
- Hang the parking brake cable. To do this, press lever 1 against the brake caliper from the inside and hang cable 2.
Hanging cable 2 parking brake; 1 lever on a cable. |
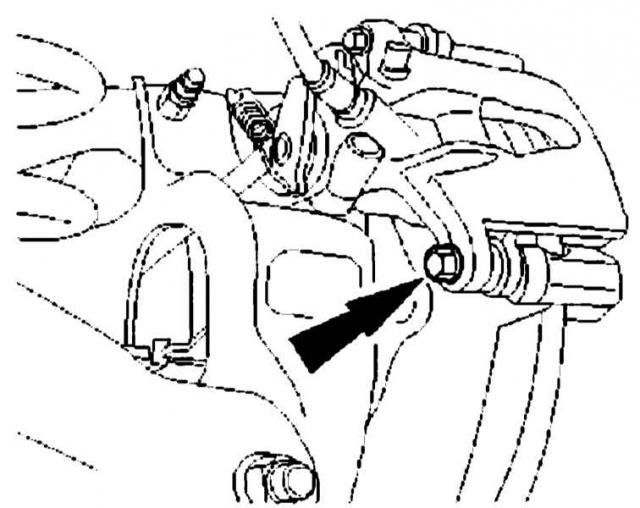
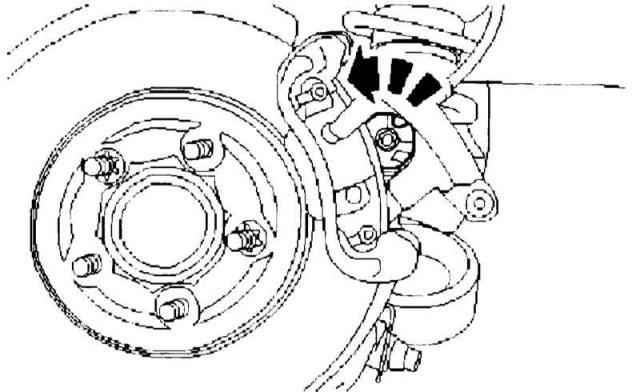
- Unscrew the lower mounting screw on the brake caliper (indicated by the arrow).
First, unscrew the lower mounting screw (indicated by the arrow) on the brake caliper. |
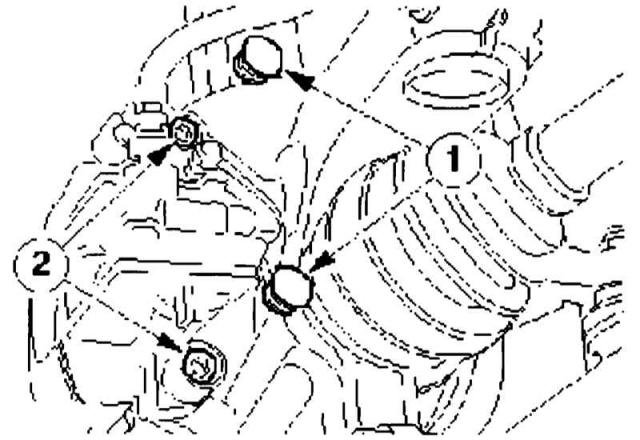
- To install the piston in the brake caliper, hold the caliper firmly. Press the piston in the direction of the caliper and turn the Allen key (indicated by the arrow), in the station wagon model in the direction of the rear door, in the sedan and coupe in the direction of the engine hood. The brake fluid that has "penetrated" the caliper returns back to the expansion tank. If necessary, suck out excess fluid from the tank.
Insert the piston into the brake caliper using an Allen key. |
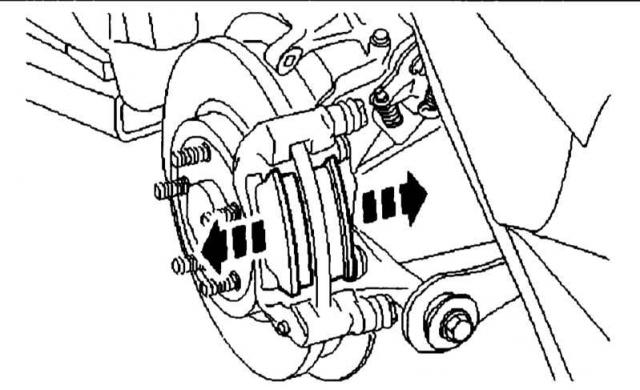
- Turn the caliper upward and remove the old pads (indicated by arrows) from the corresponding wells.
Remove the pads (indicated by arrows) from the brake lining wells. |
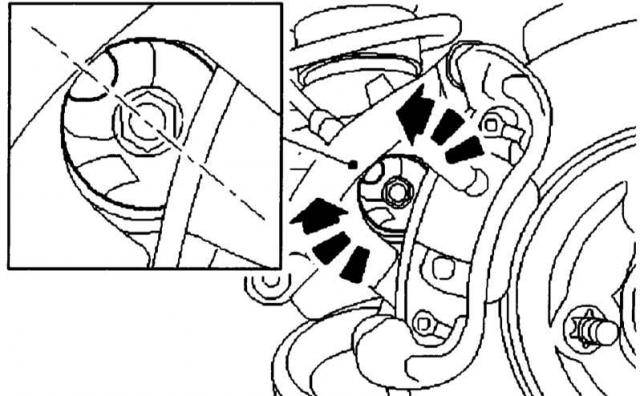
- Before installing new segments, lubricate the contact surfaces with heat-resistant copper paste, align the grooves in the brake caliper and...
- ...screw the bottom screw into the caliper.
Aligning the groove in the brake caliper. |
- Hang the handbrake cable on the caliper and then connect it to the lever. To do this, press the lever 1 from the inside and hang the cable 2 on the lever.
Hang the handbrake cable on the caliper: first press lever 1 from the inside and only then hang cable 2. |
- Install the wheels, pump the brake pedal with force and then pull the handbrake several times. Check the brake fluid level in the expansion tank and top up to the "MAX" mark if necessary.
- Complete the work in reverse order and check the braking of the new pads as described above.
|
|
The original can be found on this resource [FordBook.ru]