Withdrawal
All cars
WARNING: Do not smoke or walk with a lit cigarette or any type of open flame while working on or near fuel related items. In such situations, there are always highly flammable mixtures that can ignite. Failure to follow these instructions may result in injury.
WARNING: This procedure is related to fuel handling. Always be aware of the possibility of fuel splashing and observe fuel handling precautions. Failure to follow these instructions may result in injury.
After stopping the engine, wait at least one minute before starting any repairs to the fuel injection system. Failure to follow these instructions may result in injury.
CAUTION: Diesel fuel injection equipment is manufactured to very precise tolerances and very close clearances. Therefore, it is especially important to observe absolute cleanliness when working with these elements. Open holes or lines should always be plugged with appropriate plugs.
CAUTION: Always perform the cleaning procedure before making any repairs to the fuel injection system components. Failure to follow this instruction may result in dirt entering the fuel injection system.
1. Disconnect a wire of weight from the accumulator. See Section 414-01 for more information.
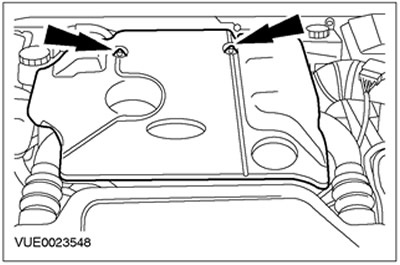
2. Remove the engine top cover.
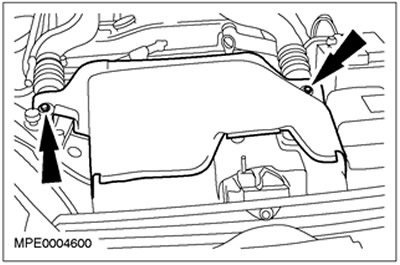
3. Remove the air baffle.
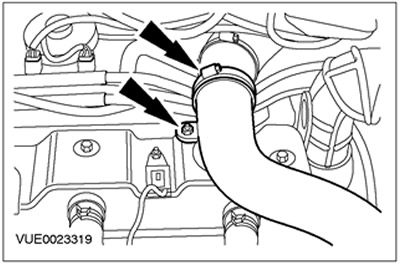
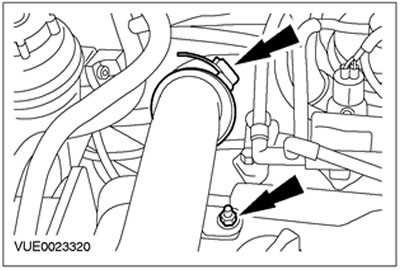
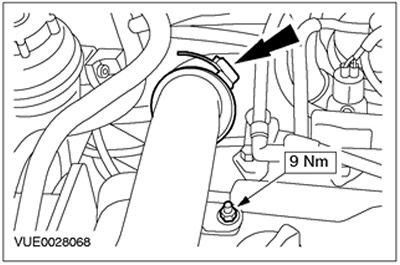
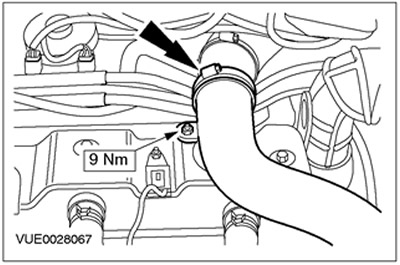
4. Disconnect the charge air cooler intake pipe.
Vehicles with a 100 HP diesel engine
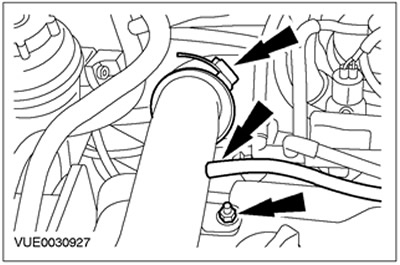
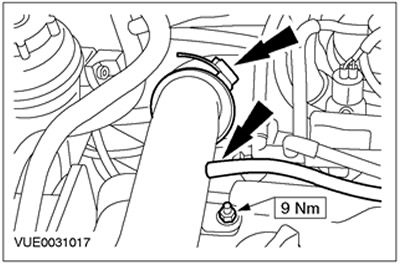
5. Disconnect the charge air cooler outlet pipe. Disconnect the vacuum line from the charge air cooler outlet pipe.
Vehicles with a 115 hp diesel engine
6. Disconnect the charge air cooler outlet pipe.
All cars
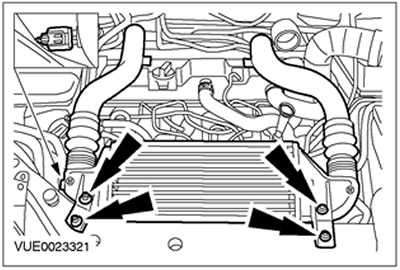
7. Disconnect the plug connector of the air intake temperature sensor (IAT) and remove the charge air cooler and piping.
8.
CAUTION: Protect generator from contamination. Failure to follow this instruction may result in premature generator failure.
Cover the generator with lint-free material to prevent contamination.
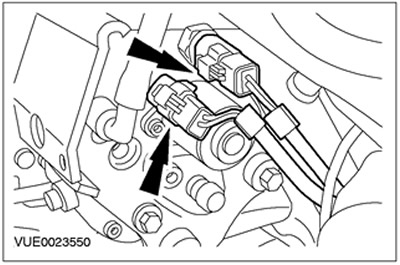
9. Disconnect the plug connectors of the fuel metering valve and the fuel temperature sensor (for clarity, the high pressure fuel supply line is shown removed).
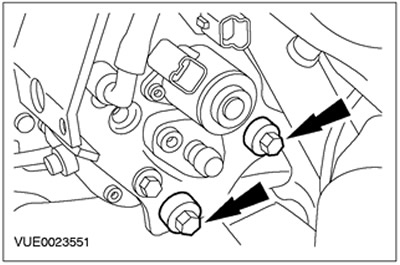
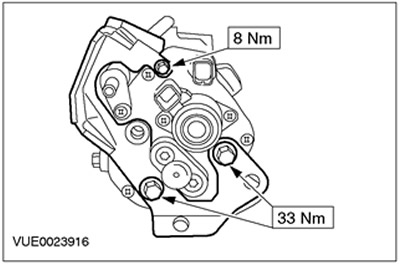
10. Turn out bolts of a basic arm of the fuel pump (for clarity, the high pressure fuel supply line is shown removed).
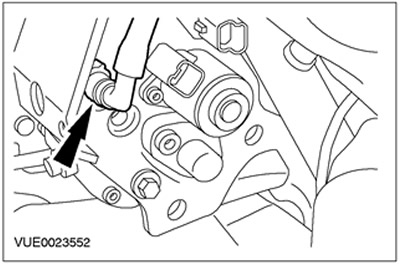
11. Disconnect the fuel return line from the fuel pump to the fuel filter from the fuel return diffuser (for clarity, the high pressure fuel supply line is shown removed). See Section 310-00 for more information.
- Install the plugs on the fuel return line of the fuel pump and the diffuser of the fuel return line.
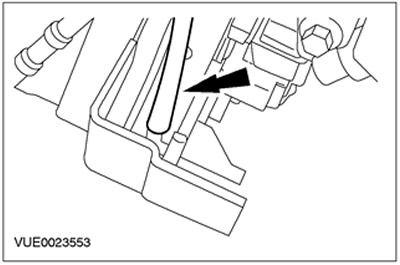
12. Disconnect the fuel injector return line from the fuel return line diffuser.
- Install plugs on the fuel return line of the fuel injector and the diffuser of the fuel return line.
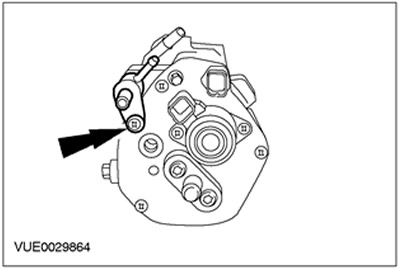
13. Remove the screen from the fuel pump (for clarity, the fuel pump is shown removed).

14. Clean the fuel pump, the fuel pump return lines and the surrounding area. For more information, refer to the chapter Cleaning the fuel injection system components found in this section.
15. Using a pneumatic vacuum gun, remove foreign matter from the fuel pump, fuel return diffuser, and fuel pump return lines.
16. Remove the fuel return pipe diffuser (for clarity, the fuel pump is shown removed). Install a plug in the open port of the fuel pump.
Installation
All cars
WARNING: Do not smoke or walk with a lit cigarette or any type of open flame while working on or near fuel related items. In such situations, there are always highly flammable mixtures that can ignite. Failure to follow these instructions may result in injury.
WARNING: This procedure is related to fuel handling. Always be aware of the possibility of fuel splashing and observe fuel handling precautions. Failure to follow these instructions may result in injury.
CAUTION: Diesel fuel injection equipment is manufactured to very precise tolerances and very close clearances. Therefore, it is especially important to observe absolute cleanliness when working with these elements. Open holes or lines should always be plugged with appropriate plugs.
CAUTION: Always perform the cleaning procedure before making any repairs to the fuel injection system components. Failure to follow this instruction may result in dirt entering the fuel injection system.
1.
CAUTION: Protect generator from contamination. Failure to follow this instruction may result in premature generator failure.
Cover the generator with lint-free material to prevent contamination.
2. Install the fuel return diffuser (for clarity, the fuel pump is shown removed). Discard plugs as they are no longer needed.
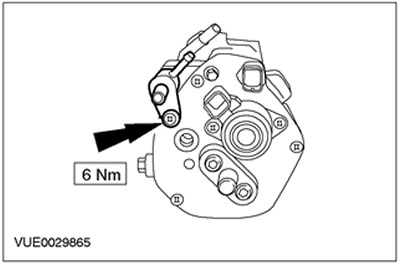
3. Install the screen on the fuel pump (for clarity, the fuel pump is shown removed).
4. Remove the plugs and connect the fuel injector return line to the fuel return line diffuser. Discard plugs as they are no longer needed.

5. Connect the plug connectors of the fuel metering valve and the fuel temperature sensor (for clarity, the high pressure fuel supply line is shown removed).

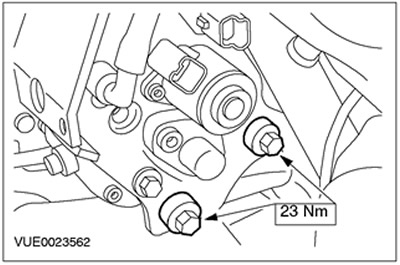
6. Tighten the fuel pump support bracket bolts (for clarity, the high pressure fuel supply line is shown removed).
7. Connect the fuel return line from the fuel pump to the fuel filter.
8. Remove lint-free material from the generator.
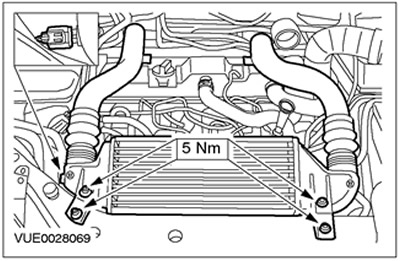
9. Install the charge air cooler and piping and dock the IAT sensor connector.
Vehicles with a 115 hp diesel engine
10.
CAUTION: Make sure the inside of the end of the charge air cooler exhaust pipe is clean and free of oil, as this reduces the friction when connecting the piping to the charge air cooler. Failure to follow this instruction may result in engine damage.
Connect the charge air cooler outlet pipe.
Vehicles with a 100 HP diesel engine
11.
CAUTION: Make sure the inside of the end of the charge air cooler exhaust pipe is clean and free of oil, as this reduces the friction when connecting the piping to the charge air cooler. Failure to follow this instruction may result in engine damage.
Connect the exhaust pipe to the charge air cooler.
- Connect the vacuum line to the charge air cooler outlet pipe.
All cars
12.
CAUTION: Make sure the inside of the charge air cooler intake pipe is clean and free from oil, as this impairs the adhesion between the piping and the charge air cooler. Failure to follow this instruction may result in engine damage.
Connect the charge air cooler intake pipe.
13. Install the air deflector.

14. Install the engine top cover.

15. Connect a wire of weight to the accumulator. See Section 414-01 for more information.
Visitor comments