Withdrawal
All cars
1. Disconnect a wire of weight from the accumulator. See Section 414-01 for more information.
2. Remove the air filter. See Section 303-12 for more information.
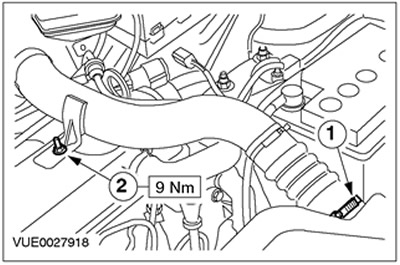
3. Disconnect the positive crankcase ventilation hose (PCV) from the valve cover.

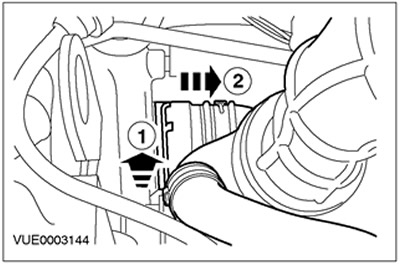
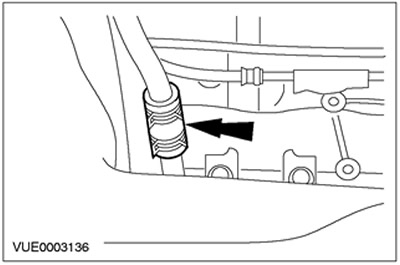
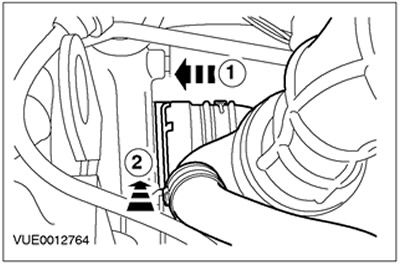
4. Remove the air filter outlet pipe.
- 1. Slide the clamp to release the tubing.
- 2. Remove the pipeline.
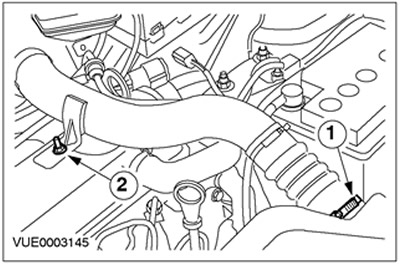
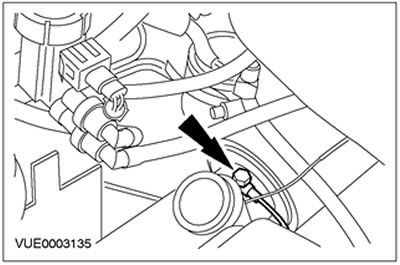
5. Disconnect the charge air cooler inlet pipe.
- 1. Release the clamp.
- 2. Loosen the nut.
6. Remove the inlet pipe of the charge air cooler.

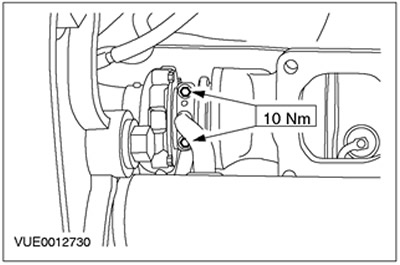
7. Disconnect the EGR pipe (EGR). Turn out two bolts.

Vehicles with EGR cooler
8.
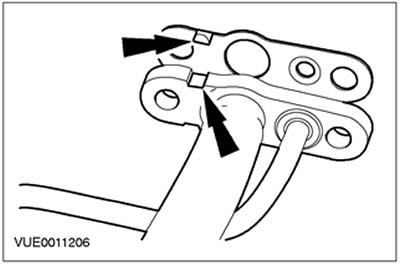
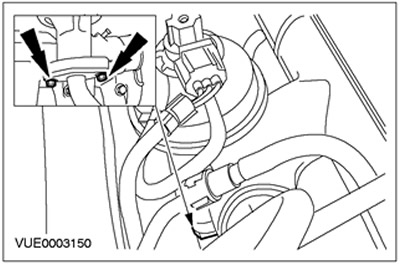
NOTE: Mark the orientation of the EGR cooler clip to ensure it is installed in exactly the same position. Seen from above, the clip loop must be covered by the EGR cooler. This should provide access to the catalytic converter nuts.
Remove the EGR cooler clip and discard it as no longer needed.
Vehicles without EGR cooler
9.
NOTE: Mark the orientation of the EGR cooler clip to ensure it is installed in exactly the same position. The clamp loop must be covered by the EGR pipe when viewed from the top of the engine. This should provide access to the catalytic converter nuts.
Remove the EGR pipe clamp and discard it as no longer needed.

All cars
10. Remove the EGR pipeline.
Vehicles manufactured up to 06.1999
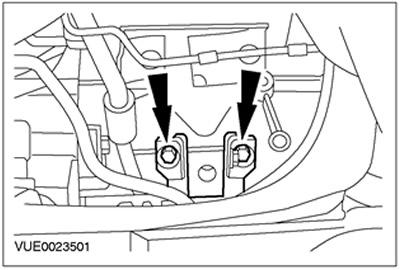
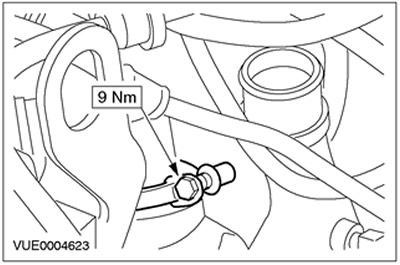
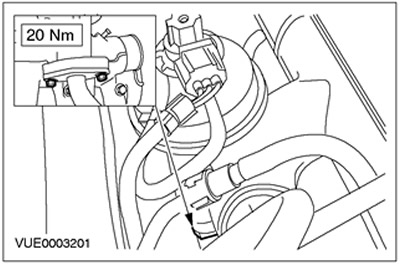
11. Disconnect the oil supply line from the turbocharger. Discard the sealing washers as they are no longer needed.

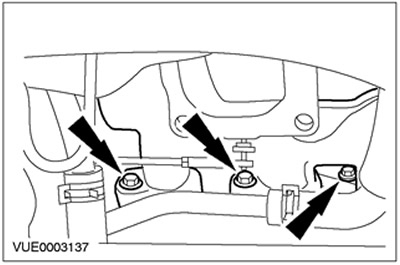
Attach the lower suspension arm (right side shown).
12. Remove the catalytic converter. See Section 309-00 for more information.
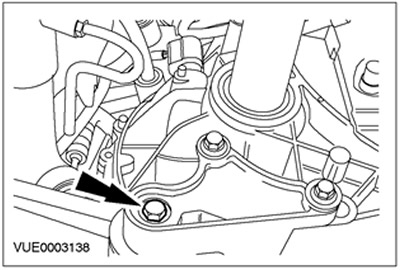
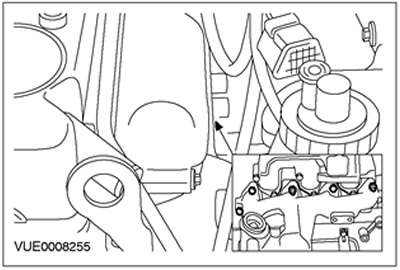
13. Remove the engine roll stop bolt. Move the engine as far forward as possible.
Vehicles with EGR cooler
14. Disconnect the EGR cooler and secure it aside.
Vehicles manufactured up to 06.1999
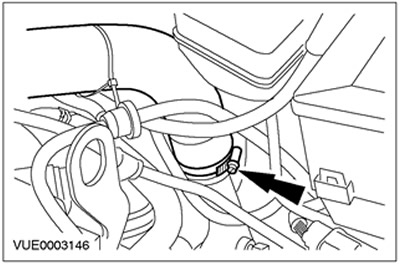
15. Disconnect the oil return line. Discard the O-ring as it is no longer needed.

Vehicles manufactured since 06.1999
16. Disconnect the supply and return oil lines. Discard the gasket as it is no longer needed.
All cars
17. Lower the car.
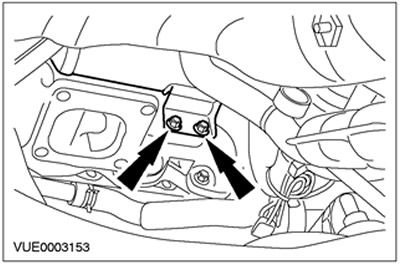
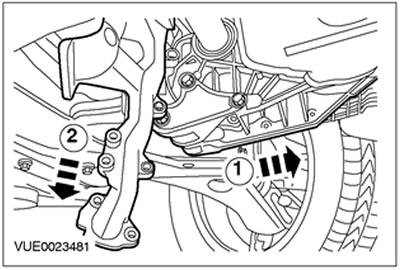
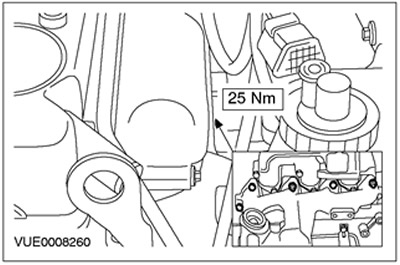
18. Turn out the top bolts of fastening of a final collector.
19. Raise and support the vehicle. See Section 100-02 for more information.
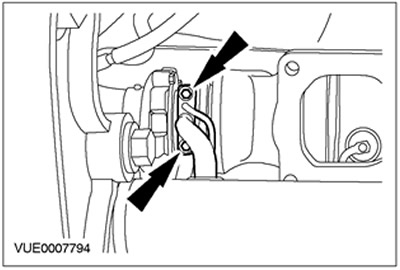
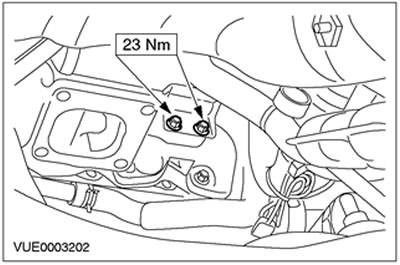
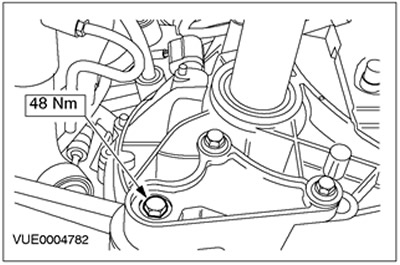
20. Remove the catalytic converter support bracket from the cylinder block.
21. Disconnect the turbocharger assembly with the exhaust manifold. Discard the gasket as it is no longer needed.
22. Remove the turbocharger complete with exhaust manifold.
- 1. Move the engine as far forward as possible.
- 2. Remove the turbocharger.
Installation
All cars
1.
NOTE: Install a new exhaust manifold gasket.
NOTE: Install a new oil return line O-ring.
NOTE: Install new oil supply line sealing washers.
Install the lower exhaust manifold bolts.
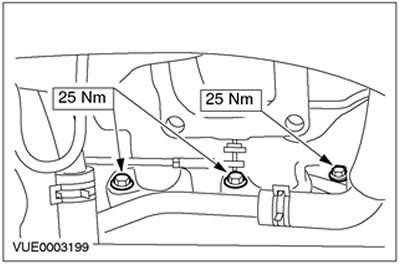
2. Install the catalytic converter support bracket.

3. Lower the car.
4. Establish the top nuts of fastening and bolts of a final collector.
Vehicles manufactured up to 06.1999
5.
NOTE: Install new sealing washers.
Connect the oil supply line.
All cars
6. Raise and support the vehicle. See Section 100-02 for more information.
7. Connect the return oil line to the cylinder block.
Vehicles manufactured since 06.1999
8.
NOTE: Make sure the supply and return oil lines are installed correctly.
Install new oil supply and return lines.
9. Install the supply and return oil lines.
Vehicles manufactured up to 06.1999
10.
NOTE: Install a new O-ring.
Install the oil return line.
Vehicles with EGR cooler
11.
NOTE: Do not tighten bolts at this stage.
Install the EGR cooler mounting bolts (tighten by hand and then loosen 1.5 turns).

All cars
12. Lower the car.
13.
NOTE: Do not tighten bolts at this stage.
Install the EGR pipe (hand-tighten the bolts securing the EGR pipe to the EGR valve).
Vehicles without EGR cooler
14.
CAUTION: To ensure even preload of the EGR pipe gasket when installing the pipe clamp, the movement of the pipe must not be restricted by the pipe bolts.
NOTE: Be sure to install the clip in the same position it was in before removal.
Install a new EGR pipe clamp.

Vehicles with EGR cooler
15.
CAUTION: To ensure even preload of the EGR cooler gasket when the cooler clamp is installed, the movement of the cooler must not be restricted by the cooler bolts.
NOTE: Make sure the EGR cooler clamp is set to the same position. from which it was taken.
Install a new EGR cooler clip.
16. Raise and support the vehicle. See Section 100-02 for more information.
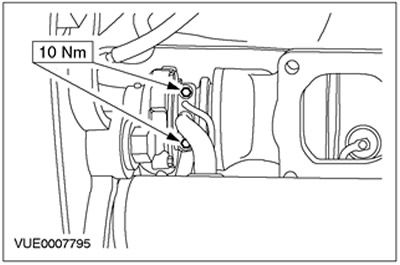
17. Tighten the bolts securing the EGR cooler to the cylinder block.
All cars
18. Install the engine roll stop bolt.
19. Install the catalytic converter. See Section 309-00 for more information.
20. Tighten the bolts securing the EGR pipe to the EGR valve.
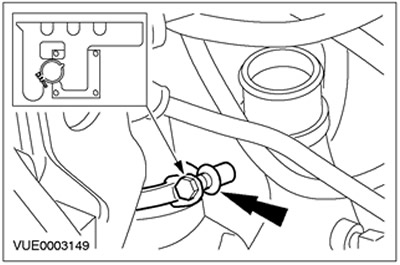
21. Connect the inlet pipe of the charge air cooler.
22.
CAUTION: Make sure the inside of the charge air cooler intake pipe is clean and free of oil, as this reduces the friction when connecting the piping to the charge air cooler. Failure to follow this instruction may result in engine damage.
Install the charge air cooler intake pipe.
- 1. Tighten the clamp.
- 2. Tighten the nut.
23. Install the air filter outlet pipe.
- 1. Install piping.
- 2. Slide the clamp to position the piping in the desired position.
24. Connect the PCV hose to the valve cover.

25. Install the air filter. See Section 303-12 for more information.
26. Connect a wire of weight to the accumulator. See Section 414-01 for more information.
Visitor comments