Contents: Removal ↳ Installation ↳
Special tool
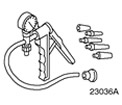 | Hand Vacuum/Pressure Pump 23-036A (416-D001) |
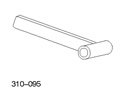 | High Pressure Fuel Pump Pulley Puller 310-095 (23-067) |
Removal
All cars
1.
WARNING: Do not smoke or carry a lighted cigarette or open flame of any type when working with or near fuel-related items. Highly flammable mixtures are always present in such situations and may ignite. Failure to follow these instructions may result in injury.
CAUTION: Diesel fuel injection equipment is manufactured to very precise tolerances and with very small clearances. Therefore, it is especially important to maintain absolute cleanliness when working with these components. Always plug any open ports or lines.
Remove the timing belt. For additional information, refer to Section 303-01A / 303-01B / 303-01C / 303-01D / 303-01E.
2.
CAUTION: Protect the generator from contamination. Failure to follow this instruction may result in premature failure of the generator.
To prevent contamination of the generator, cover it with a lint-free material.
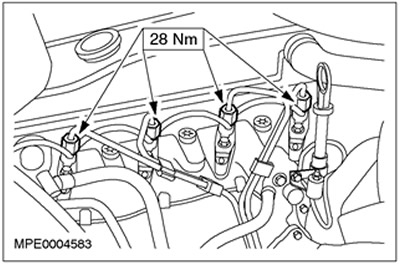
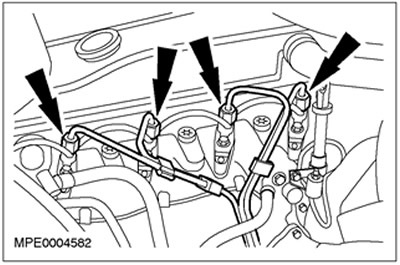
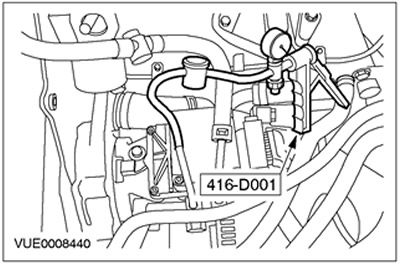
3. Disconnect the high pressure fuel lines.
4. Remove the high pressure fuel lines and discard them as no longer needed.
5. Raise and support the vehicle.
6. Remove the generator connector cover.
7. Disconnect the generator plug connectors.

Cars with air conditioning system.
8. Disconnect the air conditioning compressor and secure it to the side.
All cars
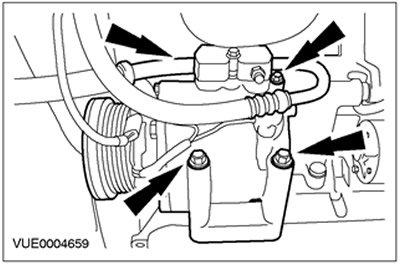
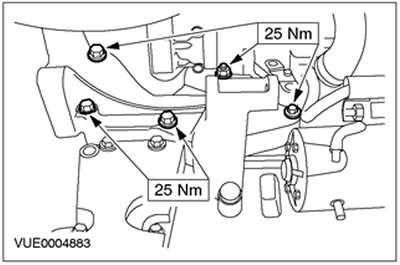
9. Remove the generator.
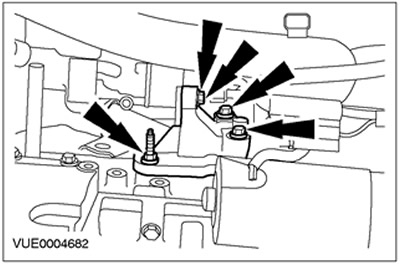
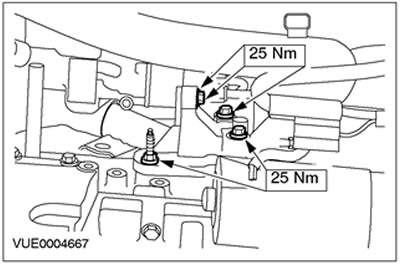
10. Remove the generator support bracket.
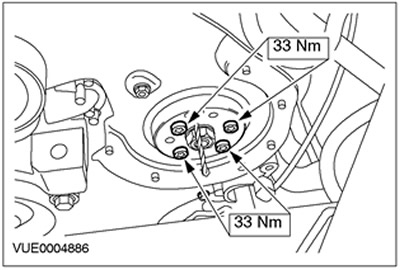
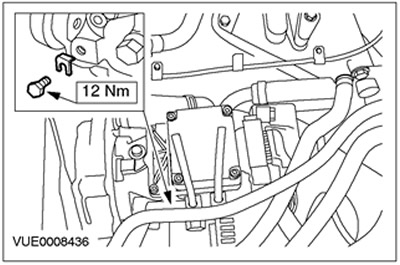
11. Remove the high pressure fuel pump bracket. Remove four bolts and one nut.
12. Lower the vehicle.
13.
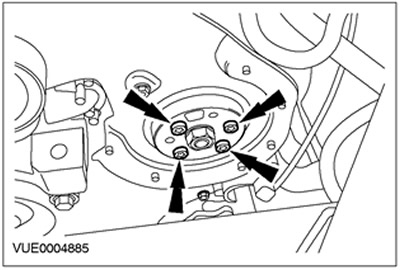
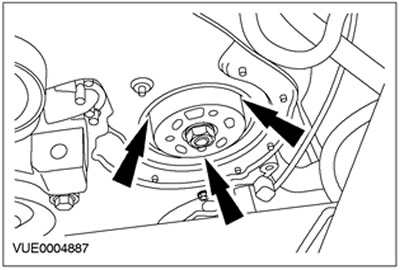
NOTE: The high pressure fuel pump pulley is sealed against the fuel pump sprocket.
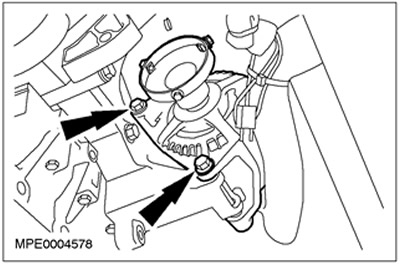
Remove the high pressure fuel pump pulley mounting bolts.
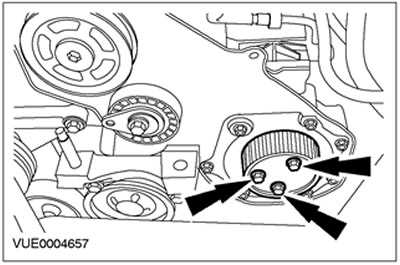
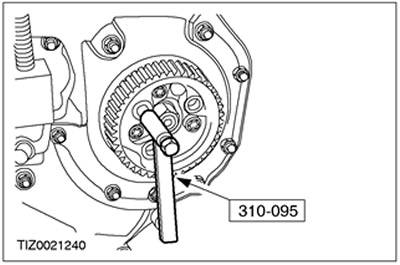
14. Remove the high pressure fuel pump pulley.
- Insert the special tool into the bolt hole in the high pressure fuel pump pulley.
- Press the special tool toward the high-pressure fuel pump and at the same time screw in the stud of the special tool until the high-pressure fuel pump pulley is released.
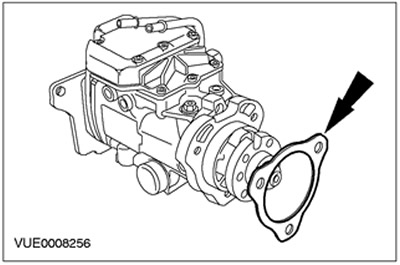
15. Remove and discard the high pressure fuel pump seal as unnecessary.
16.
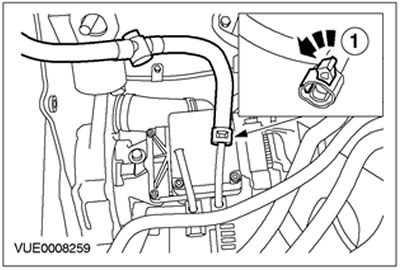
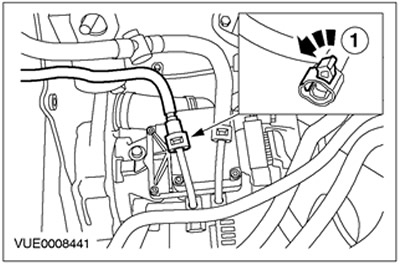
NOTE: Fuel supply line connectors are colored white or identified by a white border. Fuel return line connectors are colored red or identified by a red border.
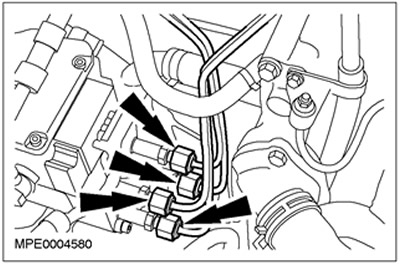
Disconnect the fuel supply and return lines.
- 1. Pull the clip to release the latch.
- 2. Lift the connector to release the line.
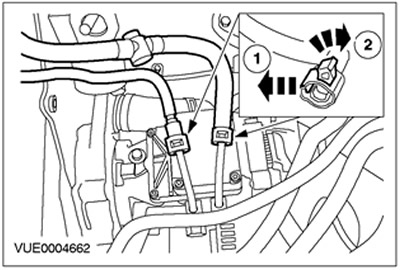
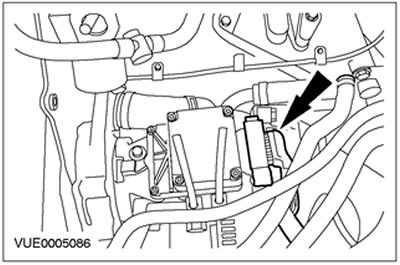
17. Disconnect the plug connector of the high-pressure fuel pump control unit.
- 1. Pull the clip to release the latch.
- 2. Remove the plug connector.
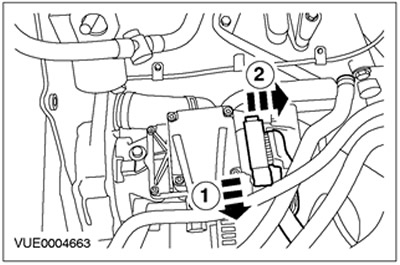
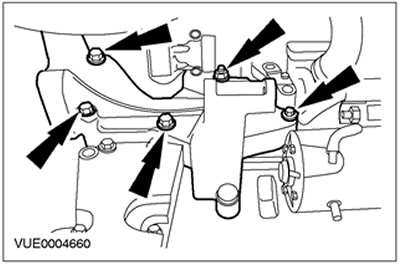
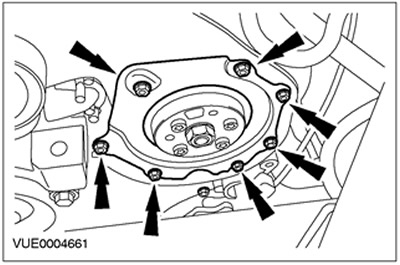
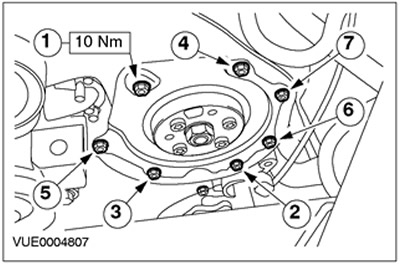
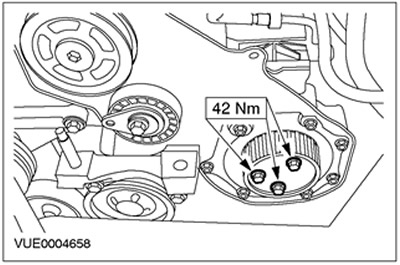
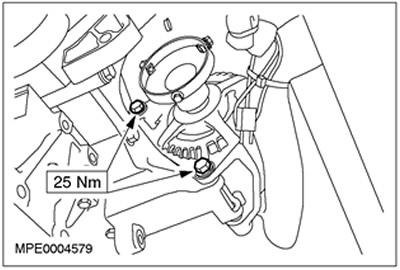
18. Remove the high pressure fuel pump sprocket bolts.
19.
NOTE: Bolts are accessible through holes. High pressure fuel pump bolts cannot be completely removed.
Remove the high pressure fuel pump.
20. Remove and discard the high pressure fuel pump gasket as unnecessary.
Installation
All cars
1.
WARNING: Do not smoke or carry a lighted cigarette or open flame of any type when working with or near fuel-related items. Highly flammable mixtures are always present in such situations and may ignite. Failure to follow these instructions may result in injury.
CAUTION: Diesel fuel injection equipment is manufactured to very precise tolerances and with very small clearances. Therefore, it is especially important to maintain absolute cleanliness when working with these components. Always plug any open ports or lines.
NOTE: Install new high pressure fuel lines.
NOTE: Install a new high pressure fuel pump seal.
NOTE: Install a new high pressure fuel pump gasket.
NOTE: A new high pressure fuel pump may be supplied in a locked or unlocked condition. This can be determined by inspecting the locking bolt on the high pressure fuel pump drive shaft. A locked high pressure fuel pump has a hex head bolt and is supplied with a spacer. An unlocked high pressure fuel pump has an internal hex head bolt and does not have any spacer. A locked fuel pump drive shaft should not be turned.
NOTE: Use a 6mm drill to adjust the position of the high pressure fuel pump relative to the crankshaft.
Install the high pressure fuel pump.
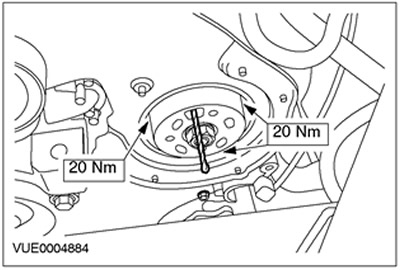
2. Install the high pressure fuel pump sprocket bolts.
3. Remove the drill.
4.
NOTE: If the high pressure fuel pump is supplied in an unlocked condition, a spacer gasket is not required.
Install the provided spacer between the high pressure fuel pump drive shaft locking hex bolt and the high pressure fuel pump (if equipped).
5. Install a new high pressure fuel pump seal.
6. Connect the control unit plug to the high-pressure fuel pump.
7. Install the fuel supply line.
- 1. Turn the clamp to lock the latch.
8.
NOTE: Seal the high pressure fuel pump pulley to the pump sprocket with Loctite RTV 5910.
NOTE: Apply Loctite 518 to the outside edges of the high pressure fuel pump pulley bolt holes.
Install the high pressure fuel pump pulley.
9. Install the high pressure fuel pump bracket.
10. Raise and support the vehicle.
11. Install the generator support bracket.
12. Install the generator.
Cars with air conditioning system
13. Install the air conditioning compressor.

All cars
14. Install the generator plug connectors.

15. Install the generator plug cover.
16. Lower the vehicle.
17.
CAUTION: Protect the generator from contamination. Failure to follow this instruction may result in premature failure of the generator.
To prevent contamination of the generator, cover it with a lint-free material.
18. Install high pressure fuel lines.
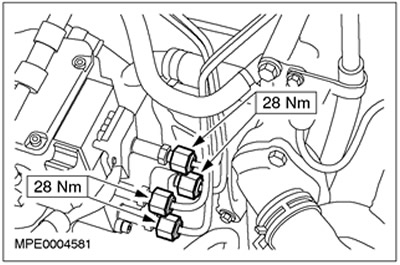
19. Install new high pressure fuel lines and hand tighten them.

20.
CAUTION: If the high pressure fuel pump is supplied in a locked condition, it should not be turned until the spacer has been installed.
Install the timing belt. For additional information, refer to Section 303-01A / 303-01B / 303-01C / 303-01D / 303-01E.
21. Configure the Powertrain Control Module (PCM). Refer to FDS 2000 for more information.
22. Using the special tool, fill the high pressure fuel pump with fuel until clean fuel is visible entering the vacuum pump reservoir.
23. Remove the special tool.
24. Install the fuel return line.
- 1. Turn the clamp to lock the latch.
25. Remove the lint-free material from the generator.
26. Turn the ignition switch to position III (engine cranking). Crank the engine until clean fuel starts to flow out of the fuel line nipple.
27. Tighten the high pressure fuel lines.