NOTE: Right hand drive and left hand drive templates are not interchangeable. The right headlight and left headlight templates are not interchangeable.
1. Print out the correct templates given at the end of this work instruction.
2. Measure the X dimension on the printed template.
3. Calculate the Y enlargement/reduction factor for the copier using the formula: Y=ZhXh100.
- X = size on printed template in millimeters
- Y = enlargement/reduction ratio in percent.
- Z = original size in millimeters = 25
4. Photocopy of printed templates with estimated enlargement/reduction ratio.
- Compare the x-size on the photocopy with the original size.
5. Cut out the prepared templates for the headlights.
6. Cut out the shaded areas.
Left hand drive vehicles
7.
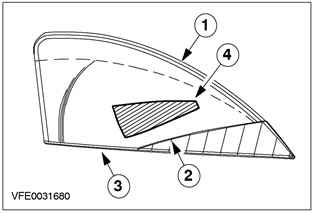
NOTE: Right headlight only.
Install the template on the headlight lens and align its position.
- 1. Upper headlight lens alignment line
- 2. Lateral alignment line of the headlight lens
- 3. Bottom alignment line of the headlight lens
- 4. Pattern
8.
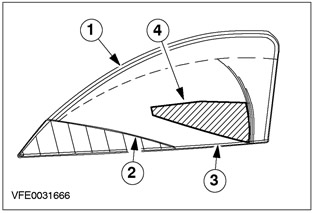
NOTE: Left headlight only.
Install the template on the headlight lens and align its position.
- 1. Upper headlight lens alignment line
- 2. Lateral alignment line of the headlight lens
- 3. Bottom alignment line of the headlight lens
- 4. Pattern
Right hand drive vehicles
9.
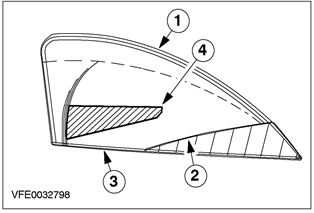
NOTE: Right headlight only.
Install the template on the headlight lens and align its position.
- 1. Upper headlight lens alignment line
- 2. Lateral alignment line of the headlight lens
- 3. Bottom alignment line of the headlight lens
- 4. Pattern
10.
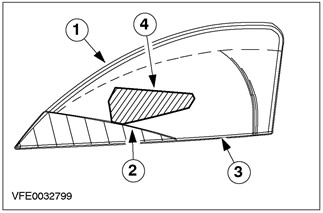
NOTE: Left headlight only.
Install the template on the headlight lens and align its position.
- 1. Upper headlight lens alignment line
- 2. Lateral alignment line of the headlight lens
- 3. Bottom alignment line of the headlight lens
- 4. Pattern
All cars
11.
CAUTION: Make sure the headlight lens is not scratched.
Copy the outline of the template onto the headlight lens using the appropriate marker.
12. Remove the template.
13.
NOTE: When closing sections of the headlight, it is not allowed to go beyond the contours of the marked area in the direction of increasing the area of closing.
Cover the marked area with black opaque tape.
14. Repeat the steps in p.p. 11 - 13 for another headlight.
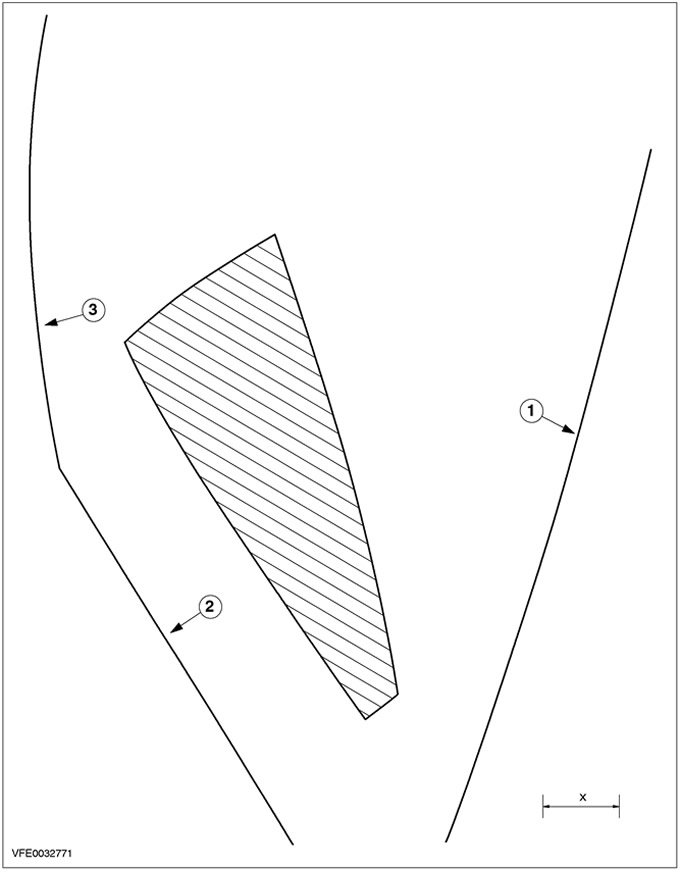
15. Template for left-hand drive cars, right headlight.
- 1. Upper headlight lens alignment line
- 2. Lateral alignment line of the headlight lens
- 3. Bottom alignment line of the headlight lens
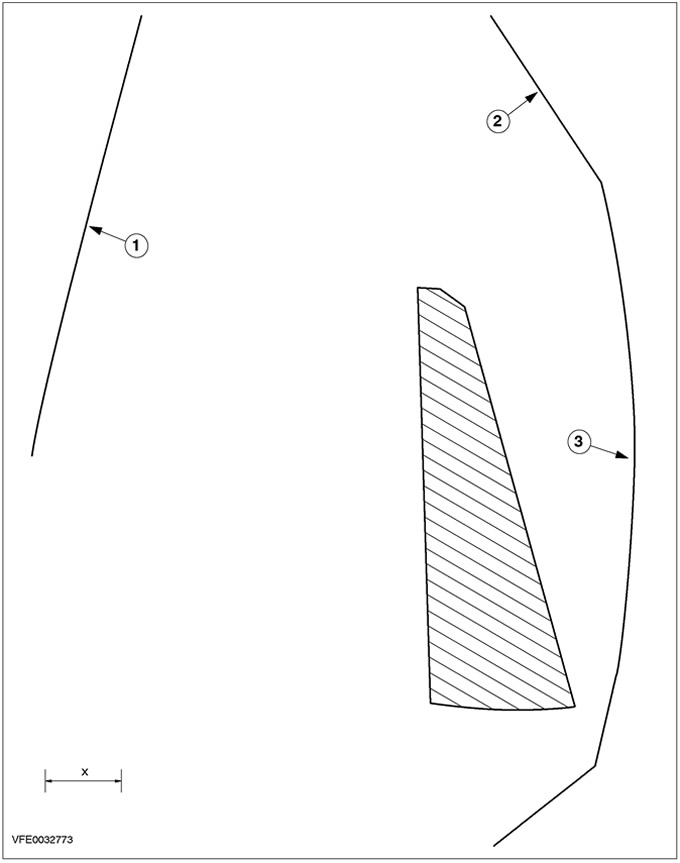
16. Template for left-hand drive cars, left headlight.
- 1. Upper headlight lens alignment line
- 2. Lateral alignment line of the headlight lens
- 3. Bottom alignment line of the headlight lens

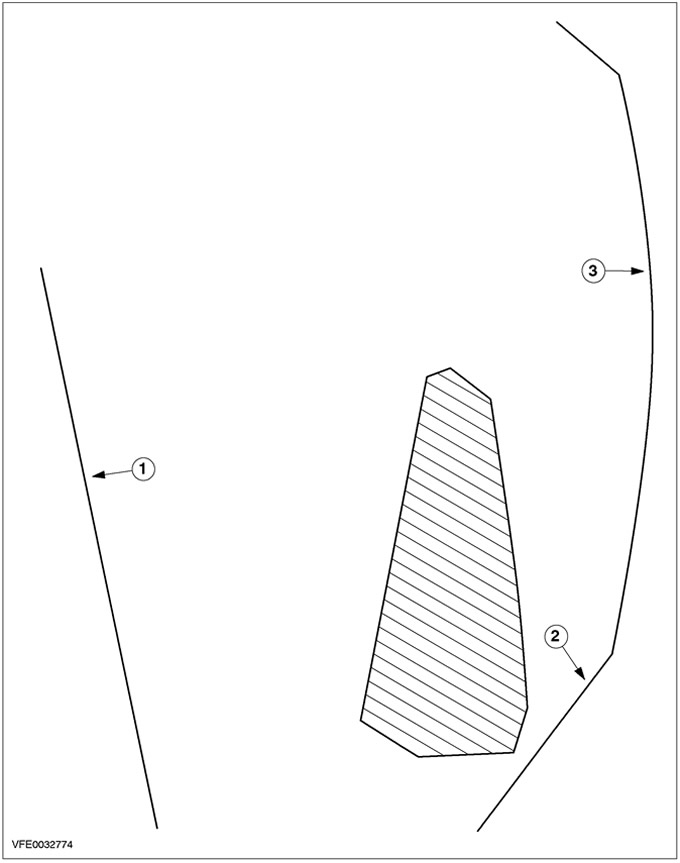
17. Template for right-hand drive cars, right headlight.
- 1. Upper headlight lens alignment line
- 2. Lateral alignment line of the headlight lens
- 3. Bottom alignment line of the headlight lens
18. Template for right-hand drive cars, left headlight.
- 1. Upper headlight lens alignment line
- 2. Lateral alignment line of the headlight lens
- 3. Bottom alignment line of the headlight lens
Visitor comments