Contents: Disassembly ↳ Assembly ↳
Disassembly
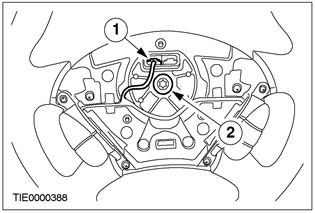
1. Remove the steering wheel.
- 1. Disconnect the speed control system plug connector (if equipped).
- 2. Unscrew the bolt.
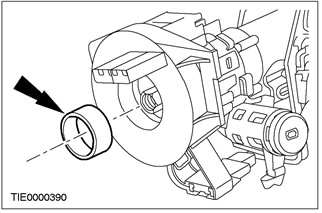
2. Remove the spacer sleeve.
3.
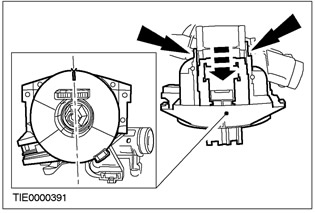
NOTE: Make sure that the clock spring cannot rotate. Secure it in the central position with suitable tape.
Remove the clock spring.
- Using a thin-tipped screwdriver, release the two retaining clips.
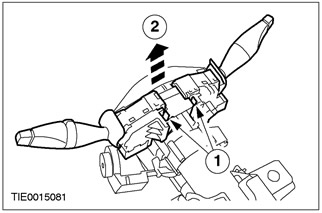
4. Remove the two multifunction switches.
- 1. Press the locking elements.
- 2. Lift the switches up.
5. Remove the Passive Anti-Theft System (PATS) transceiver.
- Remove the screw.
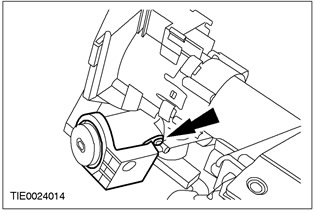
6. Remove the ignition switch. Release the clamps.
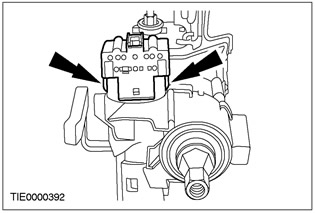
7.
CAUTION: Never turn the ignition switch camshaft from position 1 when the ignition switch cylinder is removed. Moving the ignition switch mechanism will activate the safety functions and will not be restored.
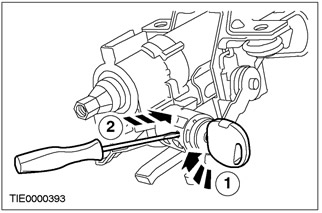
Remove the ignition switch cylinder.
- 1. Insert the ignition key and turn it to position 1.
- 2. Using a thin-tipped screwdriver, press down on the stopper.
Assembly
1.
CAUTION: Never turn the ignition switch camshaft from position 1 when the ignition switch cylinder is removed. Moving the ignition switch mechanism will activate the safety functions and will not be restored.
Using a suitable screwdriver, turn the ignition switch cylinder from the off position to position 1.
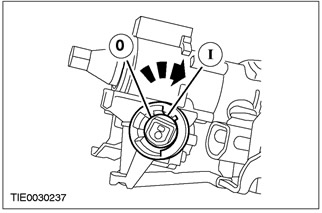
2.
CAUTION: Never turn the ignition switch camshaft from position 1 when the ignition switch cylinder is removed. Moving the ignition switch mechanism will activate the safety functions and will not be restored.
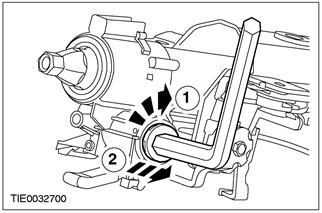
Using the appropriate socket wrench, remove the outer lock cylinder.
- 1. Insert the socket wrench and turn the outer lock cylinder to position 1.
- 2. Remove the outer lock cylinder and discard it as no longer needed.
3. Install the ignition switch cylinder.
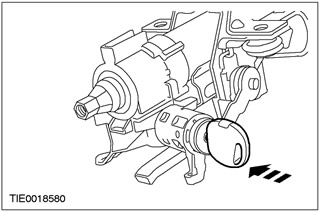
4. Install the ignition switch.
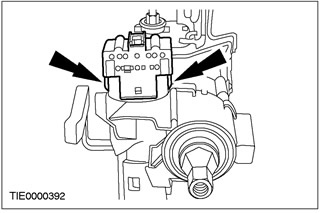
5. Install the Passive Anti-Theft System (PATS) transceiver.
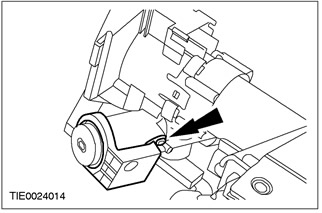
6.
WARNING: Before installation, ensure that the clock spring is centered. Failure to do so may result in injury.
Center the clock spring.
- 1. Turn the clock spring in the COUNTERCLOCKWISE direction until you feel resistance (approximately 2.5 turns from the center position).
- 2. Turn the clock spring CLOCKWISE 2.5 turns until the hand marked on the center of the clock spring aligns with the letter "V" at the 12 o'clock position on the outer cover of the clock spring. The clock spring is now centered.
7.
CAUTION: Make sure the spacer washer is installed correctly. Do not assemble if the spacer washer is missing.
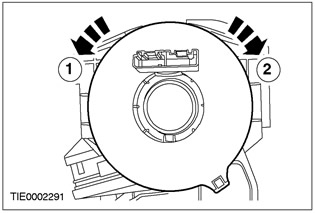
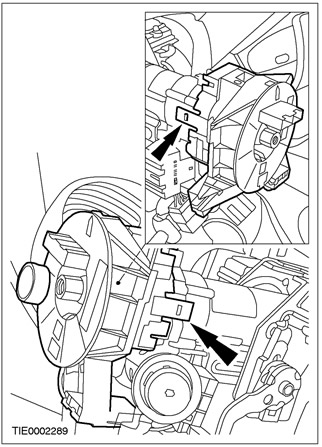
Install the clock spring.
- Make sure both locking tabs are secured in the required position on the steering column.
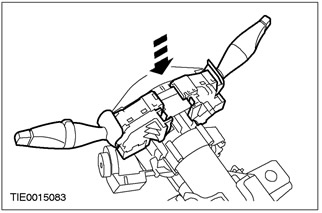
8. Set the two multi-function switches.
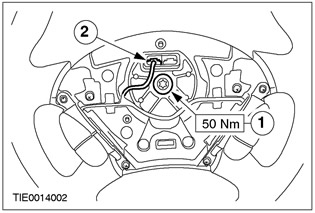
9. Install the steering wheel.
- 1. Install the bolt.
- 2. Connect the speed control system plug connector (if equipped).
[For more information, please visit the website: Fordbook.ru]