Withdrawal
1.
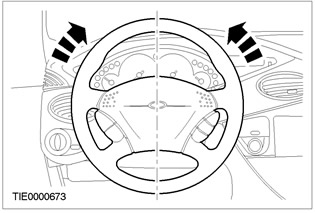
NOTE: Make sure the front wheels are pointing straight ahead.
Center the steering and lock it in this position.
2. Remove the driver airbag module. Refer to Section 501-20A / 501-20B for more information.
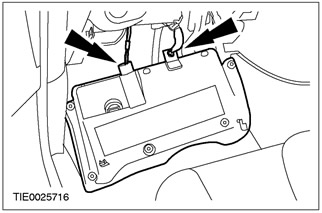
3. Disconnect the lower section of the instrument panel.
- 1. Remove the screws.
- 2. Disconnect the clip.

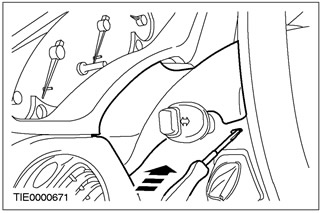
4. Disconnect the data link connector (DLC) and plug connectors for footwell lighting (in the presence of).
- Remove the lower section of the instrument panel.

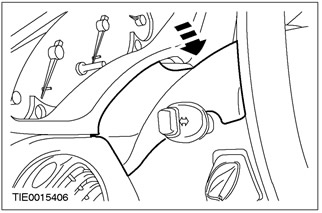
5. Remove the top casing of a steering column.
- Using a fine tip screwdriver, release the two clips (one on each side).
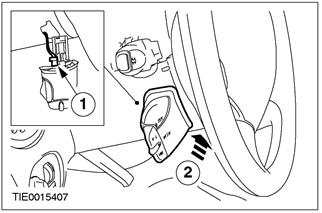
6. Remove the audio control switch (in the presence of).
- 1. Using a fine tip screwdriver, release the locking element.
- 2. Disconnect the audio control switch connector.
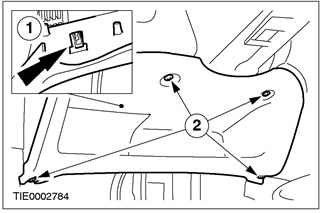
7. Remove the lower casing of a steering column.
- 1. Release the steering lock lever (in the presence of).
- 2. Remove the screws.

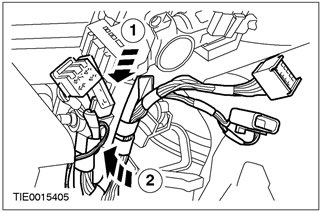
8. Disconnect the connectors of the passive anti-theft alarm transceiver (PATS), windshield wiper/washer switch and clock spring/steering wheel rotation sensor/speed control system.

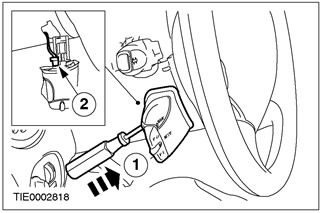
9. Disconnect the plug connectors of the ignition switch and the turn signal/headlight switch.

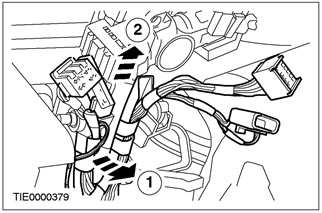
10. Disconnect the wiring harness from the steering column.
- 1. Release lock pin.
- 2. Disconnect the wiring harness from the steering column.
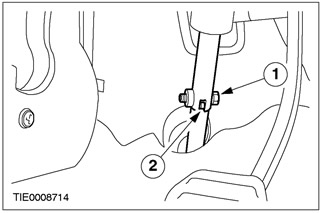
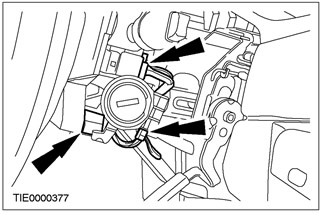
11. Disconnect the steering column shaft from the steering mechanism.
- 1. Turn out a bolt.
- 2. Disconnect the steering gear shaft from the steering column.
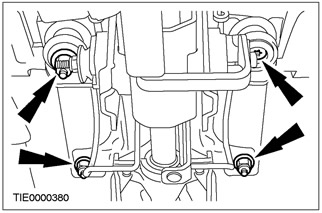
12. Remove the steering column.
- Remove the three self-locking nuts.
- Remove the Torx bolt.
Installation
All cars
1.
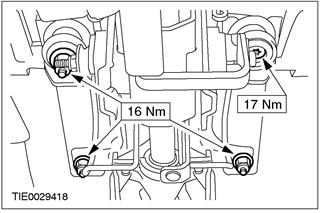
WARNING: When installing the steering column, be sure to install new self-locking nuts. Failure to follow this instruction may result in injury.
WARNING: Make sure the front wheels are pointing straight ahead.
Install the steering column.
2.
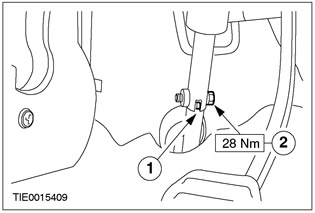
WARNING: Install a new steering column coupler bolt. Failure to follow these instructions may result in injury.
Connect the steering column shaft to the steering mechanism.
- 1. Connect the steering column shaft to the steering gear.
- 2. Install the bolt.
3. Connect the wiring harness to the steering column.
- 1. Connect the wiring harness to the steering column.
- 2. Install the dowel pin.
4. Connect the plug connectors of the ignition switch and the turn signal/headlight switch.

5. Disconnect the connectors of the passive anti-theft alarm transceiver (PATS), windshield wiper/washer switch and clock spring/steering wheel rotation sensor/speed control system.
6. Establish the lower casing of a steering column.
- 1. Lower the steering column lock lever.
- 2. Screw in the screws.

7. Set the audio control switch (in the presence of).
- 1. Connect the audio control switch connector.
- 2. Set the audio control switch.
8. Establish the top casing of a steering column.
9. Connect the data link plug (DLC) and plug connectors for footwell lighting (in the presence of).
10. Connect the bottom section of the instrument panel.
- 1. Fasten the clip.
- 2. Install screws.
11. Install the driver's airbag module. See Section 501-20A / 501-20B for more information.
Vehicles with yaw control
12.
WARNING: Reconfiguration of electronic heading stability is required. Failure to follow this instruction may result in injury.
Using WDS, configure the electronic heading stability function.
Visitor comments