Contents: General information ↳ Genuine Ford spare part ↳ Protection against corrosion of new… ↳ Welded elements ↳ Apply welding primer ↳ Partial replacement ↳ Procedure ↳ Application of cavity protection… ↳ Classification of different… ↳ Classification of various corrosion… ↳
General information
Care must be taken to maintain the corrosion protection material applied during the manufacture of the vehicles and/or to restore the protective layer during and after body repairs. Only a long-term guarantee against rust-through is provided (refer to the Warranty Booklet/Service Booklet).
For body repairs, use only genuine Ford body parts and repair materials (sealant, paint, etc.) approved by Ford.
All Ford body elements have a cathodic coating. Individual body elements are galvanized on one or both sides (in different areas depending on the car model).
Together with the elastic paint coating, this guarantees optimum, high resistance to corrosion caused by impacts from small objects such as gravel.
NOTE: If possible, do not damage or destroy individual protective layers (zinc, cathodic coating) of Ford body components by grinding or other mechanical operations.
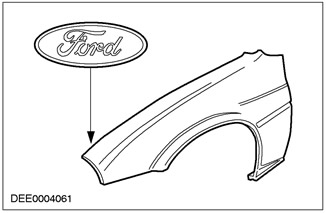
For identification purposes, each original body assembly is stamped with the Ford emblem. This symbol is a registered trademark of the manufacturer; furthermore, this is necessary for any subsequent warranty claims.
Genuine Ford spare part
If the bodywork requires repair, you must follow the repair instructions given in the specific model-specific chapters of this manual and the instructions given in the paint and corrosion protection manual.
If hairline cracks appear in the connecting areas of the body after straightening work (e.g. on door hinges), it is necessary to restore the corrosion protection provided during the manufacture of the car. If necessary, the paintwork should be completely restored. The same applies to straightening body elements that have a characteristic relief (e.g. the floor). If necessary, replace or improve the paintwork, sealing rollers and protective coating of the bottom.
After repairs, any interior surfaces that will no longer be visible or accessible should be primed, and this should be done before applying cavity filler. The coating should be applied evenly to interior surfaces; to do this, you should carefully spray the entire cavity (twice, with intermediate drying).
If body panels are subjected to strong heating during repair, this inevitably leads to damage or even destruction of the structure of the corrosion protection material. If heating is used, the effectiveness of the cavity protection material is reduced. Therefore, reworking of damaged areas is mandatory.
Welded areas should be cleaned before applying corrosion protection.
The corrosion protection measures that must be taken when replacing body parts are described on the following pages.
Protection against corrosion of new elements
All new items should be inspected for damage caused during transportation or storage, such as scratches or dents. The following operations may be required, depending on the extent of the damage:
1. Undamaged new element
- Do not strip the cathode primer. Clean thoroughly with silicone remover and wipe dry.
2. Slightly damaged new element
- Scratches.
- Polish the surrounding surfaces lightly.
- Clean thoroughly using silicone remover and wipe dry.
- Apply anti-corrosion primer to exposed areas.
3. Damaged new element (bulges, dents)
- Remove dents and polish to a metallic shine.
- Apply polyester filler (only to clean metal surface).
- Apply finishing putty.
- Lightly polish the entire element.
- Clean thoroughly using silicone remover and wipe dry.
- Apply anti-corrosion primer to exposed areas.
Depending on the vehicle, the bonnet, door, tailgate and boot lid flanges should be sealed using flange sealant. Detailed information is provided in the body repair manuals for the specific models.
After repair, the exterior paintwork should be restored, working in accordance with the description given in the Corrosion Protection and Painting Guide.
Welded elements
Using a rotating wire brush, remove the primer from the inside and outside of the area to be welded, being careful not to damage the zinc coating.
NOTE: Areas to be stripped should be kept as small as possible and the corrosion protection material applied during vehicle manufacture (cathodic primer) should be preserved to the maximum extent possible.
NOTE: Welding primer should be stirred well before application.
Clean the repair area thoroughly (silicone remover). Apply welding primer evenly to all flanges to be welded (old and new elements).
NOTE: The welding primer must be dried before welding.
Apply welding primer
The weld reinforcement should be removed after welding is completed, taking care not to weaken the material.
Any roughness in the connections is removed by using lead loading.
If necessary, spot weld the missing T-pins to secure the trim tape clips in place. The vehicle should be completely free of abrasive dust and metal shavings to prevent corrosion.
Clean and prime all interior areas and areas to be sealed.
Seal all welded areas and joints, apply underbody protection coating.
NOTE: Allow the primer to dry before applying sealant or underbody coating. Do not use solvents when applying sealant (the sealant will not dry).
The sound-absorbing mats and cavity foam installed during vehicle manufacture should be put back in place.
After painting, apply cavity protection material to all cavities in all parts that have been replaced (especially in the weld area).
Partial replacement
The procedure to be followed when replacing partial elements is the same as that described in the Welded Elements section.
The main difference between partial replacement of elements and complete replacement of elements is that in the former case there are more problems with preparation for the execution of end or lap joints.
- When cutting body parts, care must be taken to adequately remove paint and zinc coating from interior areas. This is especially true for hard-to-reach interior areas.
- To ensure the quality of the weld, it is important that the metal inside is clean. Zinc and paint residues in the weld area burn and during the combustion process this causes the formation of porosity.
- If the zinc layer and paint coating are not removed, the zinc and paint will burn during the welding process. The soot produced prevents satisfactory protection of the cavity.
Procedure
- The paint layer should be removed to a width of 30 mm along the weld line using a rotating wire brush.
- This operation should be performed on both new and old body parts.
- Depending on the body element, it is also necessary to remove 10 mm of the zinc layer width along the weld line.
NOTE: If the cavity is small, a flat scraper or wire brush may be used instead of a rotary brush. Do not use an angle grinder, which will weaken the structure.
Application of cavity protection material to the door threshold after partial repair
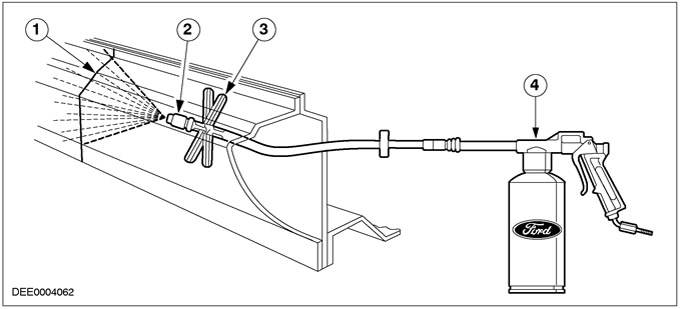
| Pos. | Spare Part No | Name |
| 1 | - | Welding bead |
| 2 | - | Spray head |
| 3 | - | Spacer element |
| 4 | - | Spray |
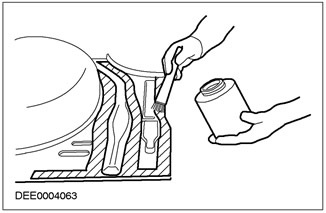
To protect areas that are not accessible by applying cavity putty, you can drill a hole in the appropriate location. The diameter of the hole depends on the size of the plugs you have. When drilling, make sure that no chips are left in the cavity (if chips are left, this will lead to rust). The edge of the hole should be treated with cavity putty. Then install the plug and seal using the anti-corrosion coating of the car underbody.
Classification of different corrosion protection measures for dent removal
| Method of protection against corrosion | External surfaces | Accessible internal surfaces | Inaccessible internal surfaces |
| Coloring | X | X | |
| Protection of cavities | X |
Classification of various corrosion protection measures for new installations
| Method of protection against corrosion | Welded flanges before welding in the required position (contact surfaces) | All exposed cleared areas | Accessible weldable flange area | Inaccessible area of the welded flange |
| Welding primer | X | |||
| Coloring | X | X | ||
| Curved edge protection | X | |||
| Protection of cavities | X |
[The original can be found on the specified resource FordBook.ru]